Introduction & Examples
In Infigo Designer, it is possible to link fields together so that they respond to each other and dynamically suppress themselves.
For example, if you have 4 address lines available but not all address lines are mandatory, you may want to keep all of the lines together so if a user does not enter one, the fields will suppress to keep them all in one block.
Another example of when this would be useful is if you had a contact block which contained telephone, mobile and an email field, but the mobile field was optional, and all three fields had an image icon as their label. If the user did not enter a mobile, you would expect the mobile icon to suppress, which Group Suppression can handle.
How-to
Group Suppression is easy to configure, however, as is the case with all Infigo Designer features, it is limited to only being able to affect Infigo Designer fields. This means that if you are using an icon label, and the icon is part of the artwork itself, you will need to remove the icon from the artwork and have it be part of an image field instead.
For the purposes of this article, I will be working with a simple Infigo branded business card.
***
All of the text and images in this document, excluding the logo in the bottom-left corner, are Infigo Designer fields, and so we can suppress these however we wish.
To configure the suppression, you first need to combine the fields into a dynamic suppression group. To do this, select the "Select field entries" tool (see here) then click and drag to highlight all of the fields you wish to configure suppression for.
***
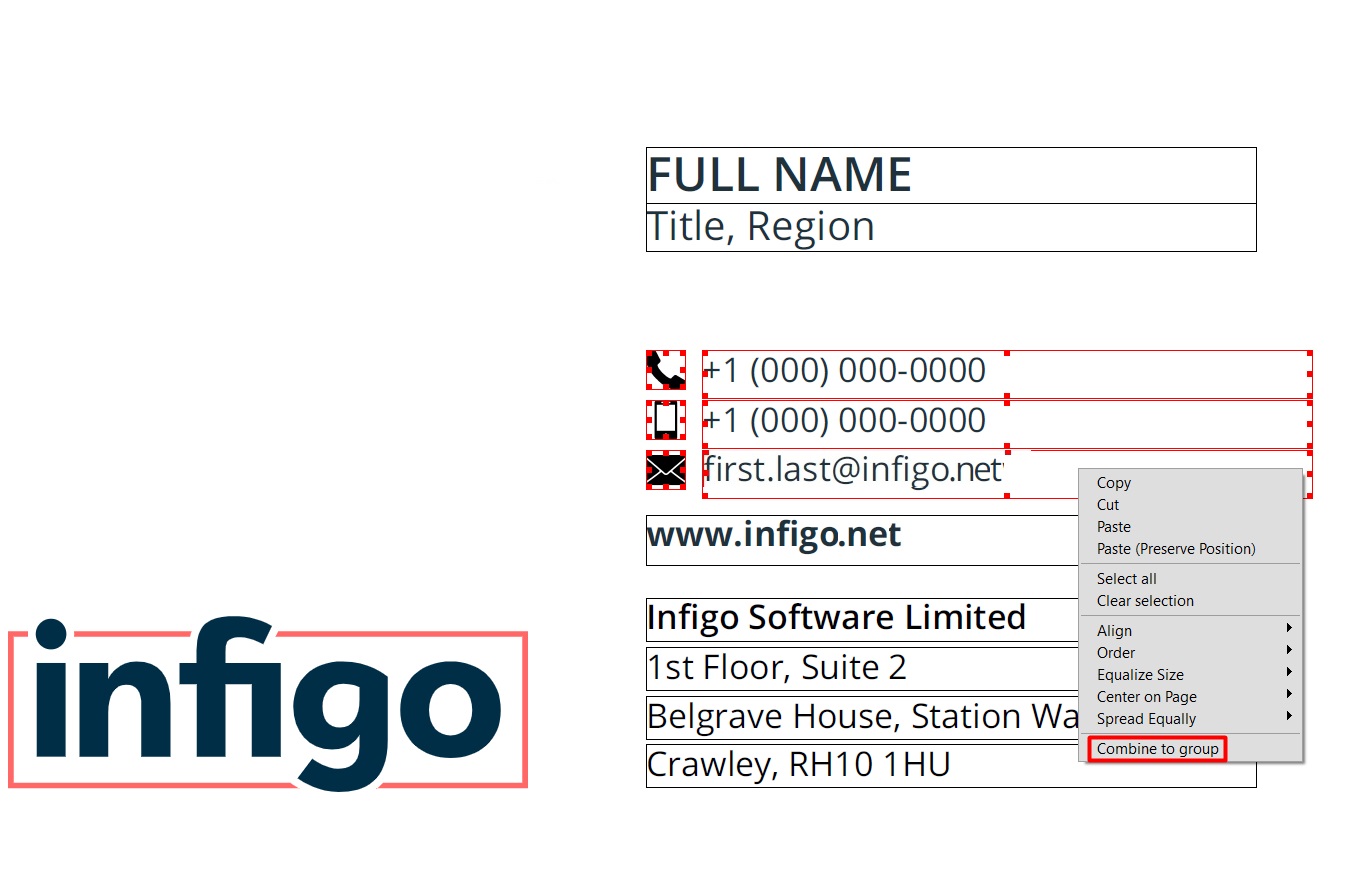
Once you have highlighted the fields, right-click on any of them and select the "Combine to group" option:
In the pop-up menu which appears, you will need to give the group a name that would allow you to easily identify the group. For this example, I am calling the group "Contact Group".
You will also need to ensure that you select "Dynamic Suppress Group" from the "Function" dropdown.
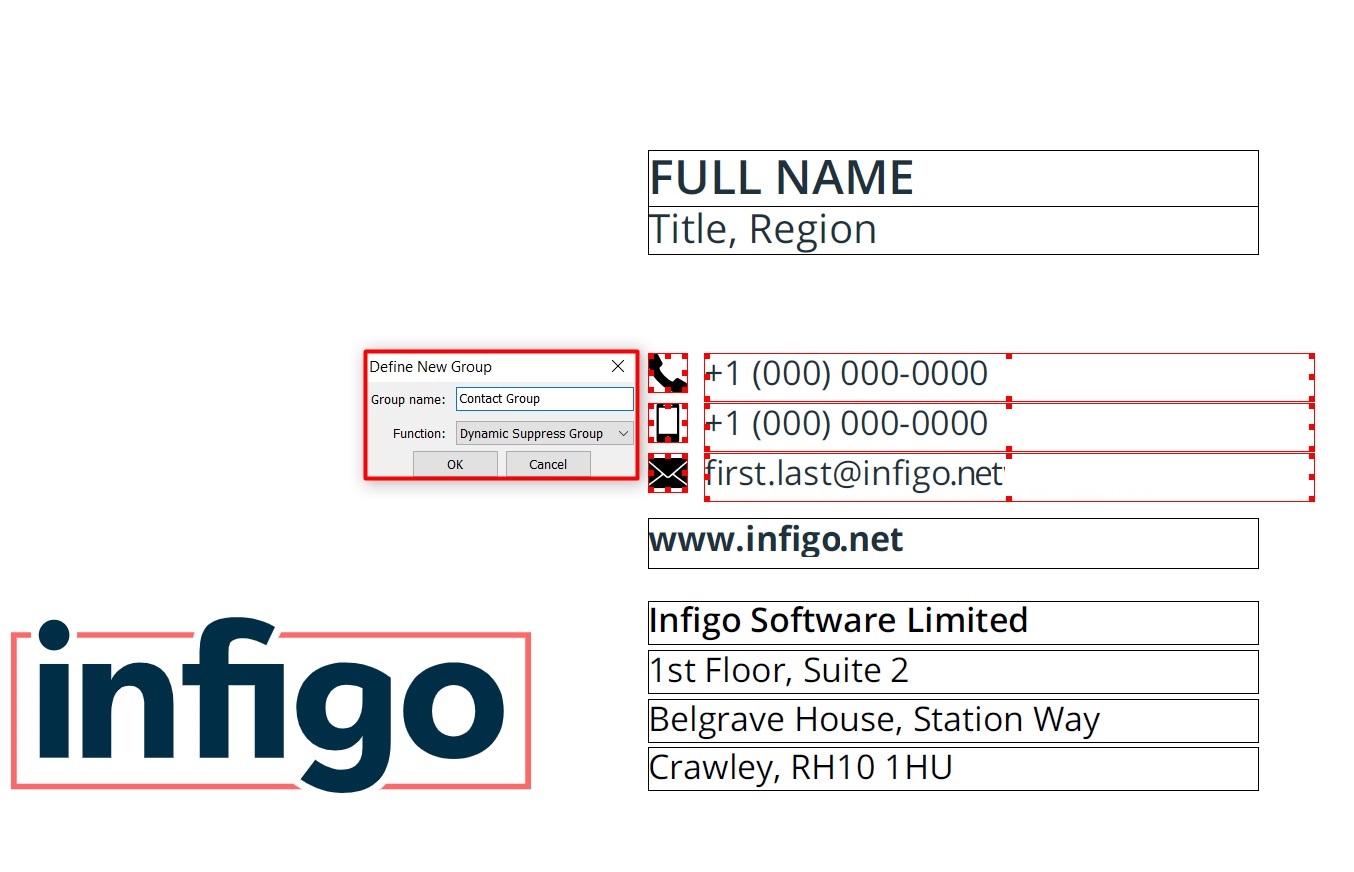
Once configured, click "OK" and the group configuration menu will appear:

(click here for full image)
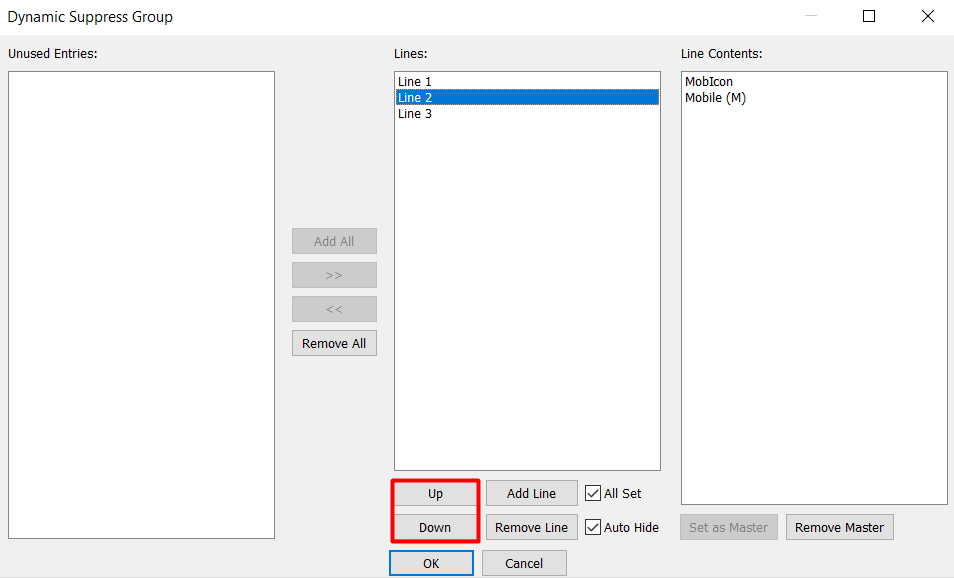
In the screenshot above, we see three lists: Unused Entries, Lines, and Line Contents.
Unused Entries
This will populate with all of the fields you highlighted that could not be automatically assigned to a line, as well as the fields which have been manually removed from a line using the tools. These will not be affected by the suppression, but it is best practice to ensure that this column is entry. If a field is not due to be affected by suppression, then it is best that you not include it in the group.
To add an item to the Unused Entries list, you must first select a line from the "Lines" list, and then a field from the "Line Contents" list.
Once you have selected these, your item, click on the "<<" button highlighted below:

This will move the field from the "Line Contents" list to the "Unused Entries" list. To move it back into the line, you simply need to select the line you want to add it to, using the method outline above, then select the entry you would like to move into the line, and click the ">>" button:

There are also the "Add All" and "Remove All" buttons, which will add all unused entries to the selected line and remove all entries from the selected line, respectively.
Lines
These will be the lines used when suppression is applied. The y-coordinates of each line are stored within the system and, if a line is empty, the line below it will move to take its place.
For example, if Line 2 was at y-coordinate 50, Line 3 was at y-coordinate 25, and Line 2 was left empty, then Line 3 would be moved to y-coordinate 50.
As this is driven by coordinates, the order of the lines controls the direction in which the fields are suppressed. By default, the first line will be the highest one on the page, the second will be the second highest and so on. Since suppression always moves towards Line 1, the block of fields will suppress up.
However, if you were to configure your line order so that Line 1 was the lowest field, Line 2 was the second lowest and so on, suppression would still move towards Line 1, and so the fields would instead suppress downwards.
By selecting a line, you are able to use the "Up" and "Down" buttons to change the order in which the lines are loaded.
Please note, however, that the names of the selected lines will update, so you will only be able to identify what each line is by the line's contents - another reason it is good to ensure that you name your fields appropriately.
If the system has not detected enough lines from your field selection, you can add and remove lines using the "Add Line" and "Remove Line" buttons respectively. Please note that if you remove a line which contains fields, then these fields will move to the "Unused Entries" list.
Line Contents
This will list the fields contained within a line, once the line is selected, and will allow you to both set and remove a Master field. If a field is set to be the master, then whether or not this field is empty will determine whether or not the line should be suppressed.
Effectively, if the Master field has at least one character in it, then the line will show. However, if the Master field is empty, then the entire line will be suppressed, regardless of the contents of the other fields in the line. The master field can be identified by the field name having the suffix "(M)".
If a line contains one text field alongside one or more image fields, then the system will assume that the text field is the master as this is often the case, and it will automatically assign it to be the master. If it contains two or more text fields, however, then no field will be automatically assigned as the master.
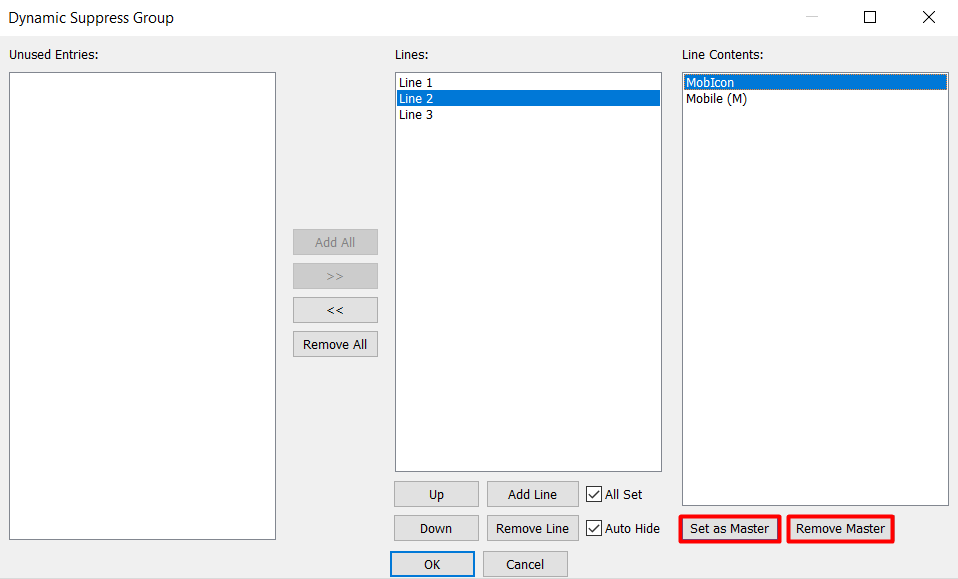
To manually set the master, simply click on the field you would like to make a master, and click "Set as Master". There can only be one master, so if there is already one assigned, it will be removed as a master (though the field will still be there), and the new field will become the master.
Alternatively, if you do not want to have a master field, and would instead have all fields be required to be empty for the line to suppress, then you can select the master field and click "Remove Master".
Lastly, there are the "All Set" and "Auto Hide" check boxes.
All Set
If this is enabled, then the system will see all text variables within a given field as a set, and if any part of that set is missing, then it will count the line as invalid. This means that if you have two or more variables within a text field, and this setting is enabled, then if one of those variables is empty, the entire line will be suppressed.
Auto Hide
If this setting is enabled, then the system will suppress any fields which contain empty variables, so that if even part of a field has not been filled out, the entire field will be considered empty. Note that this is different to All Set as it will simply suppress the fields, not the line.