We have added a new MIS plugin for Google Merchant. Now you can configure a synchronization process or upload manually the generated XML from your products and attribute combinations, including the images and descriptions into your Google Merchant account quickly and easily.
**There are steps that require assistance from the Support Team, please be sure to include the following information in your ticket when setting up Google Merchant:
- Request to have access to MIS Plugins and MIS Settings
- Request to have access to Widgets
- The Platform URL from Step 3
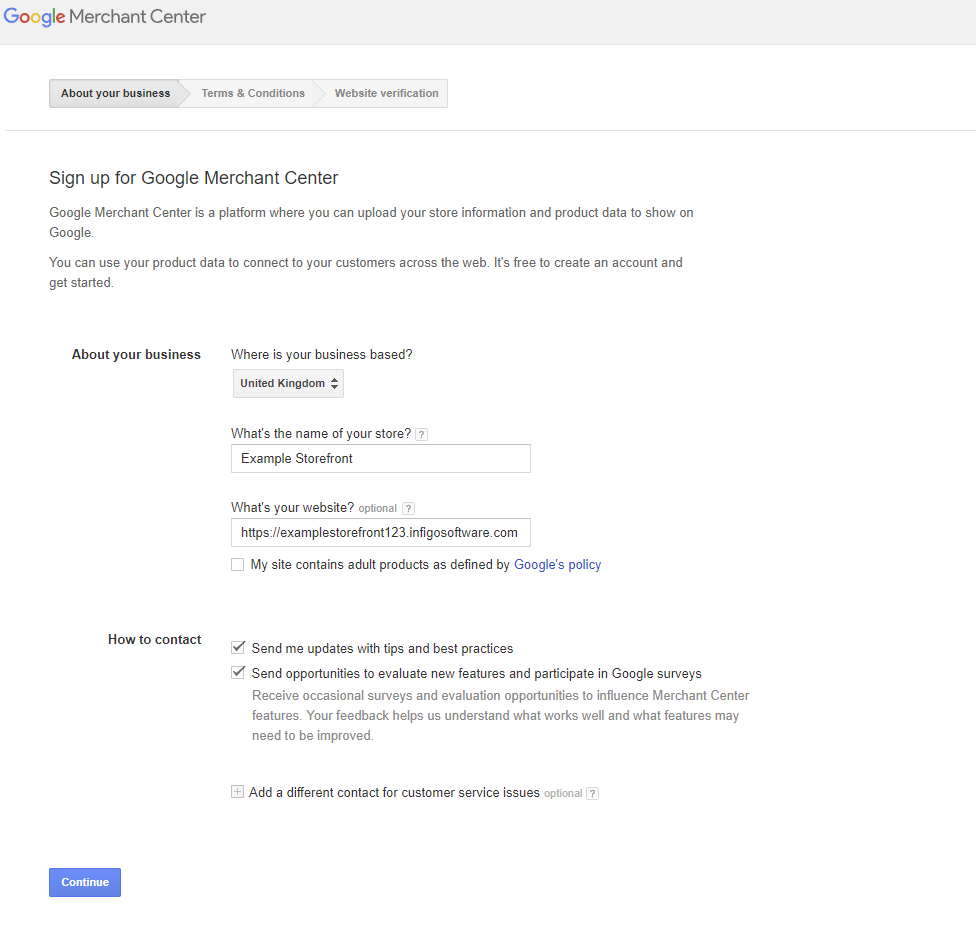
1. Signup for Google Merchant.
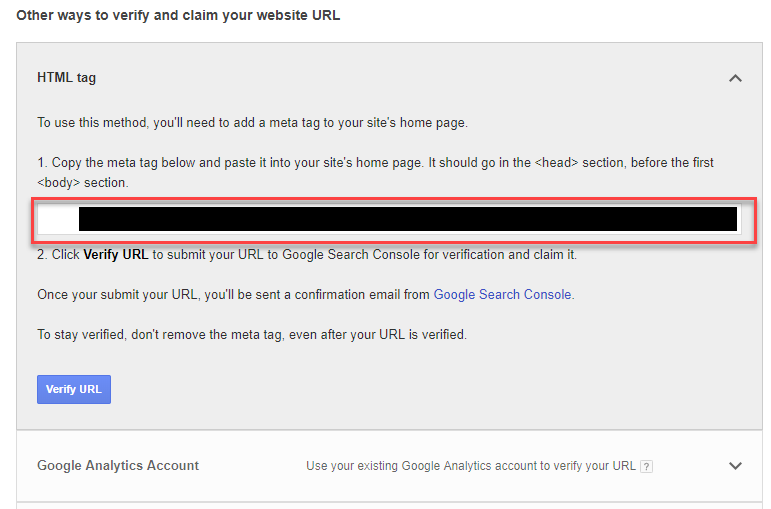
2. You need to validate your URL. We will do this with an HTML Tag. In Catfish, navigate to Content Management > Widgets > Google Analytics > Add to zone.

A. Copy the HTML Tag from the Google Merchant setup:
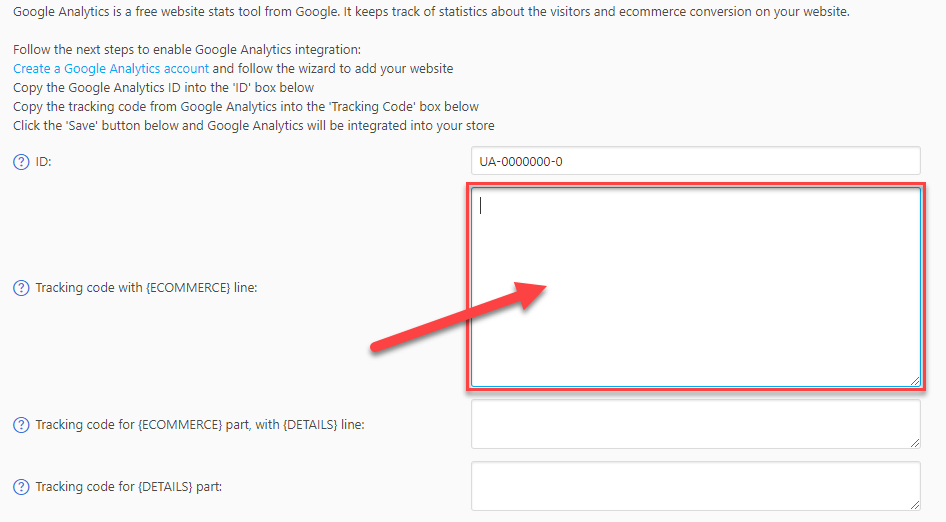
B. On the Google Analytics Widget, Paste the HTML tag into the
Press Save.
In Tracking code with {ECOMMERCE} line, here is an example:
<meta name="google-site-verification" content="T7GJisRvNBj6i5FCaX101OpkysDfMwfz2IE!_JXg"/>
For Tracking code {ECOMMERCE} part, with {DETAILS} line and Tracking code for {DETAILS} part sections, these need to always be left blank.
C. Now you can press Verify URL in Google Merchant:
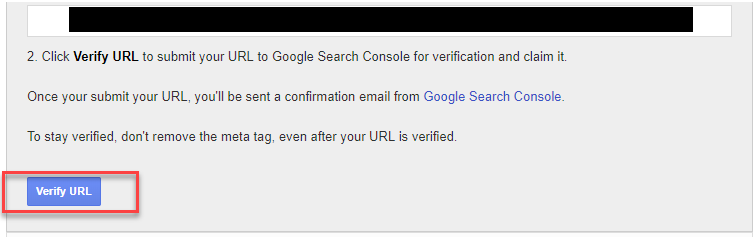
Press Finish after you see the URL is verified.
3. Infigo needs to install Google Merchant into your MIS Plugins. Please provide the Platform URL where you need this installed. After Infigo has installed the plugin, navigate to Catfish > Other > MIS Settings and enable Google Merchant. Please proceed to Step 4 after these steps have been taken.
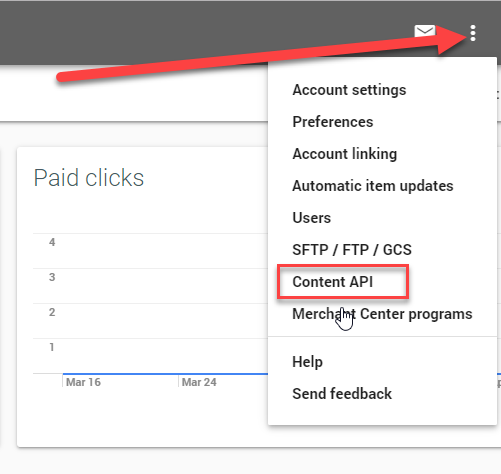
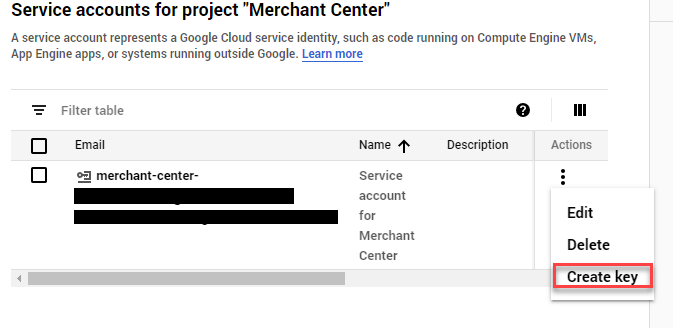
4. You will need an Authentication Key from Google Merchant. Navigate to Content API:
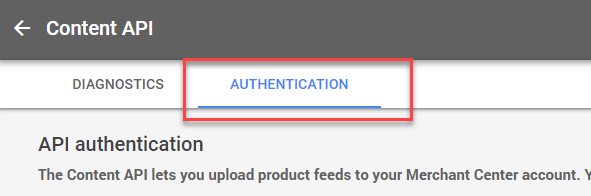
A. Go to Authentication
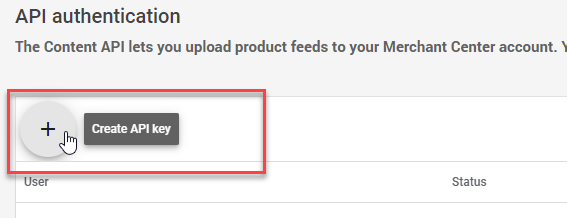
B. Create a New API Key
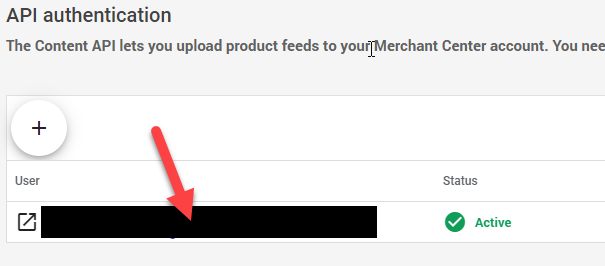
C. A new content-api-key.json file will be created. Be sure to save this. Now you need to create a new Authentication User. Click on the new user just created:
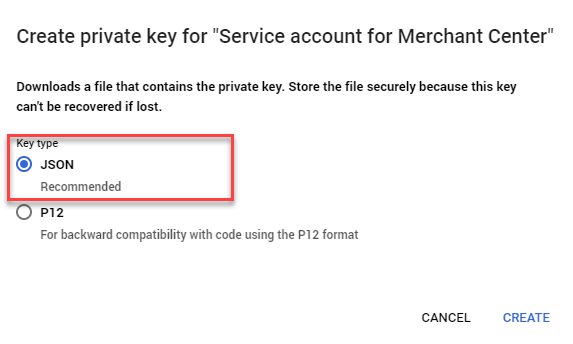
D. Now you need to create a new authentication key:
E. Select Key Type as JSON. Select Create and a JSON file will be downloaded.
F. Navigate to Catfish > Other > MIS > MIS Plugins. Press Configure against Google Merchant. You will need to insert the Merchant Store ID. The ID can be found on the Google Merchant homepage for your site:
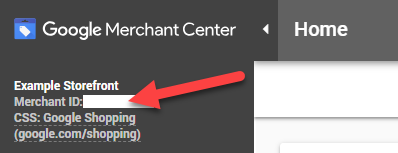
Paste the ID into Catfish:
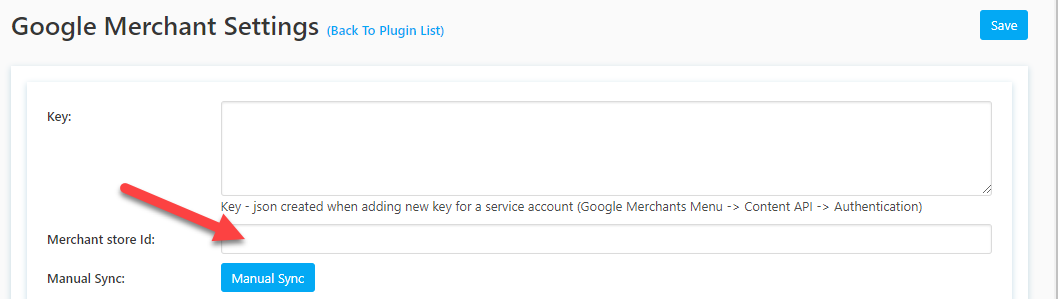
Next paste in the Merchant Center JSON file (From Step 4E) you downloaded into Key:
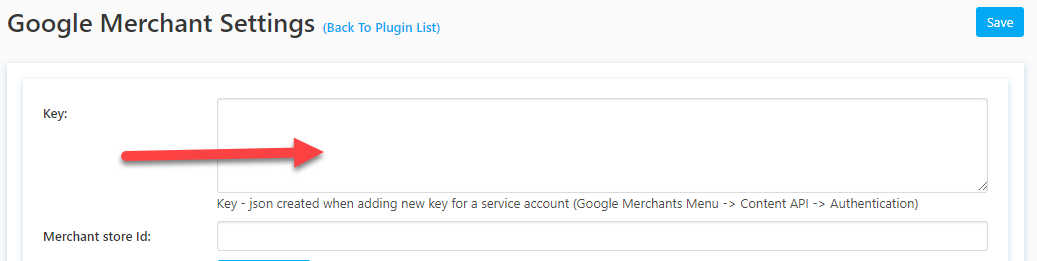
Press Save.
By default, your settings will be set to automatically sync your google merchant account with your storefront. It will be set to 24hrs for the auto sync interval, you can change this.
5. Add a target country, under Targets. The press Save to have the download xml appear. 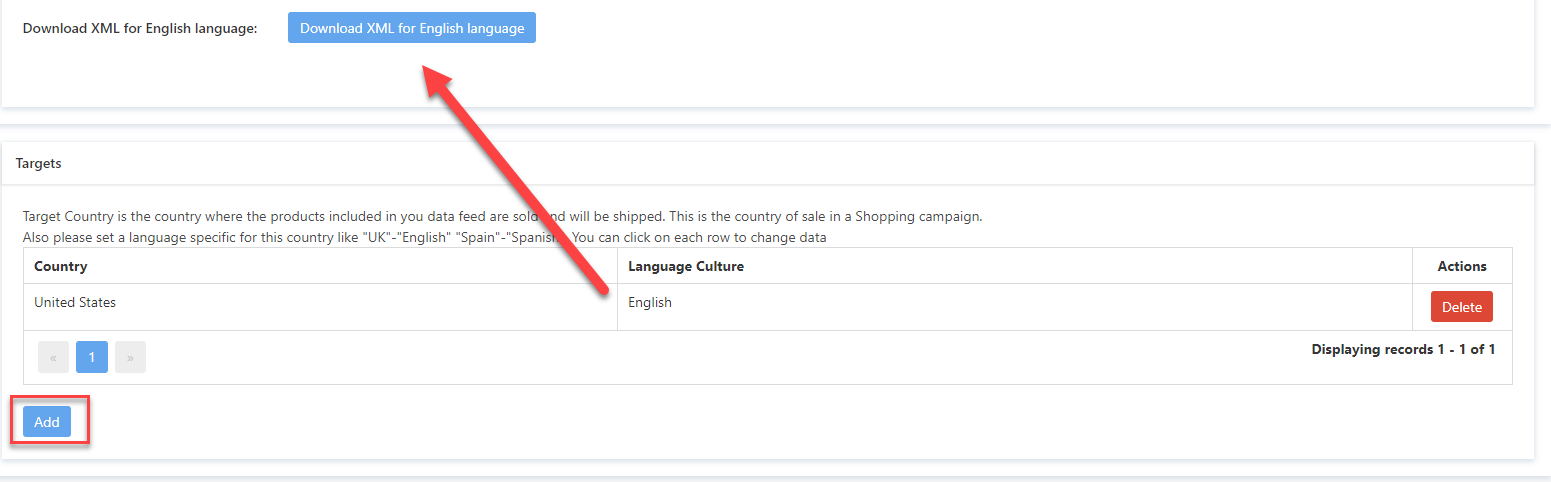 This will allow you to download the XML for English Language (Or which ever language you choose).
After all of these steps are completed, your Google Merchant account will now start communicating with Catfish. Please allow up to 2 hours for products to start syncing. You will see your products on Google Merchant under Products > List.
Google Merchant Settings
| Key | This is where you place the Merchant Center JSON file from Step 4E |
| Merchant Store ID | Found in your Google Merchant Account, Step 4F |
| Manual Sync | Clicking this will allow you to manually sync your products. Please allow up to hours after clicking this for the changes to appear on your Google Merchant Account. |
| Auto Sync Enabled | This will allow for Google and Catfish to automatically sync your products as a background task There are some rules in order for a product to sync: - Product must have a price greater than 0
- Product must have an image
|
| Auto Sync Interval | This is the time the sync will take place in intervals of minutes. By default it is 1440. |
| Create a product for each combination | This setting will create 1 product in google merchant per each product attribute combinations. In case products don’t have any attribute combinations, we will create a simple product without any preselected attributes and will use the product image and not the attribute combination image. Example: Two attribute combinations Attribute combinations: |
| Download XML button | We will download all xml data for specific language to sync manually in google merchant |
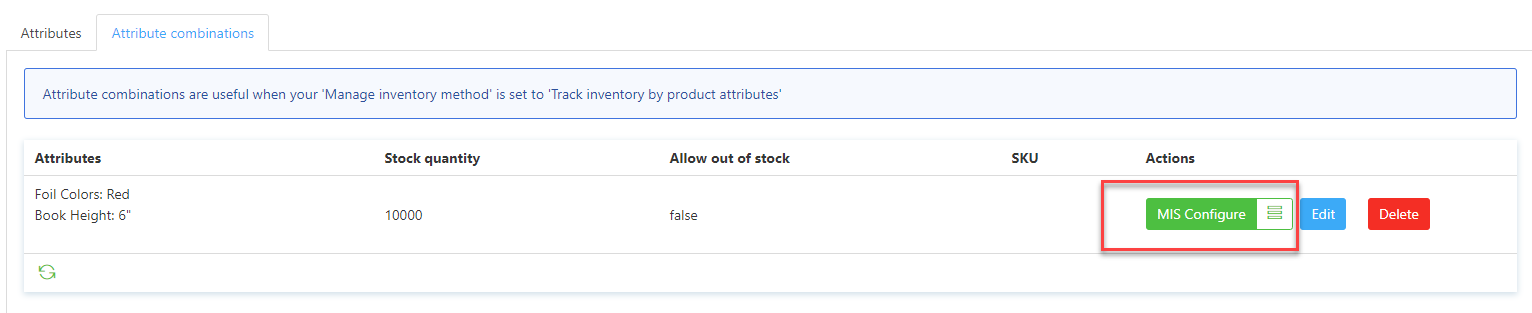
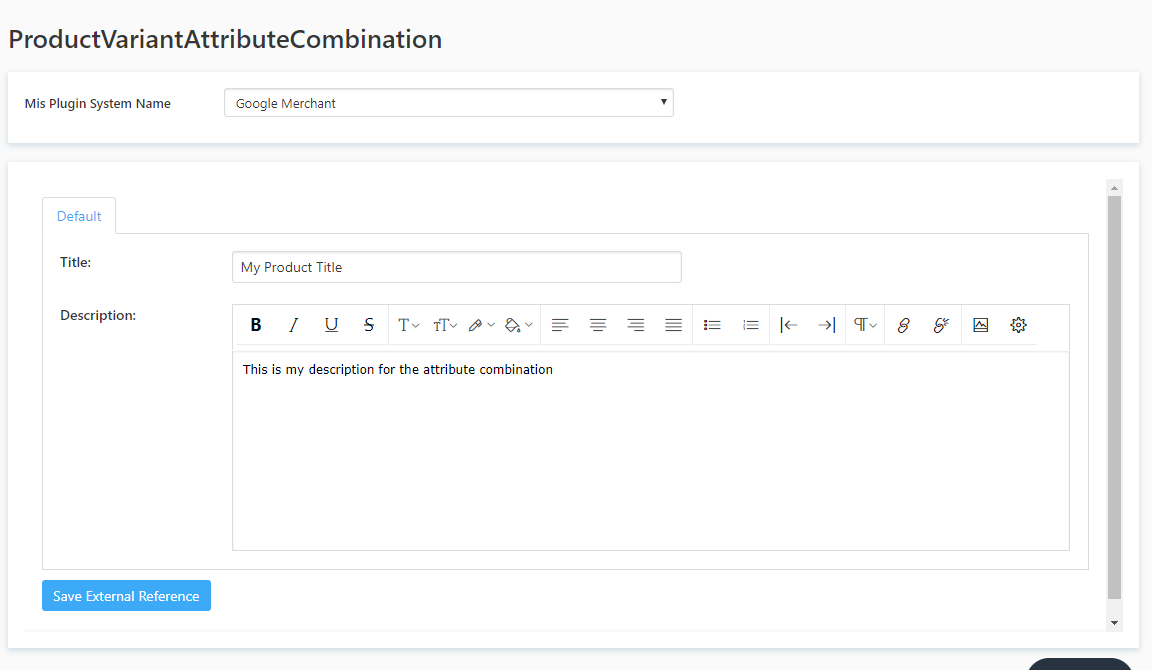
Adding a Product Title and Description for an Attribute Combination
Navigate to the Attribute Combinations, and press MIS Configure
Then you type in your Title and Description:
You can also setup shipping methods in Google Merchant
https://support.google.com/merchants/answer/6069284?hl=en
Manually Syncing Products using XML
Please visit this article here after you have setup Google Merchant.