The concept of hot folders and Print Locations is to allow routing of specific jobs (output files).
A print location, by definition, should be thought of as a separate location where production happens. Hot folders are then created and assigned to a print location so that you can manage what folders jobs will be pushed into for that specific print location.
You can create a number of print locations for a storefront, and within the print location you can create many hot folders.
All Infigo Storefronts are linked to one Platform wide Print Location to begin with.
A Print Location stores all Hotfolders and allows the printer to define specific download locations for each job, based on mapping criteria.
The Hotfolders are then replicated on an Administrators local machine and integrated into the print workflow (imposition / prepress etc)
Each mapping criteria is created to automatically assign the job to a Hotfolder when it is ordered.
An introduction to Hotfolders and Print Locations
Infigo Sync allows you to download your Infigo outputs automatically (for more information on this, see the Infigo Sync article here). These files will be downloaded straight to your local machine, but before Infigo Sync can be configured to download from the storefront, you will need to configure where the outputs are going to be sent to and stored until they are downloaded.
In Infigo, we handle this via print locations and hotfolders (note: these are not meant to be identical to your print locations and hotfolders, rather they are meant to be digital representations of them).
A print location can reside on either a storefront or on the platform, and is where hotfolders are contained. Depending on the location of the print location, it will have access to either a single storefront's outputs, or every storefront's output. It is important to create your print location on the right account (platform or storefront) as Infigo Sync can only download from one print location at a time, and so if you would like to use multiple print locations, you would need multiple instances of Infigo Sync installed.
Note: Infigo Sync can only be installed once per machine as it installs a Windows Service.
A hotfolder, when referring to Infigo, is where the output files will end up (job outputs, job tickets, XML outputs etc.). Infigo Sync will create a local copy of these folders on the machine it is installed, the names of which can be configured.
One thing to be careful of when creating your hotfolders, is that Infigo Sync will only download hotfolders which exist on the same account as their print location. This means that if you have created your print location on the platform, Infigo Sync will only download hotfolders, which were also created on the platform.
Print Locations
Where to create them
The easiest way to decide where you should create your print location is to consider which storefront(s) you want this to accept outputs from. If you would like your Infigo Sync instance to download from just one storefront, then it makes sense to create the print location on that storefront.
However, if you would like your Infigo Sync instance to download the outputs from all of your storefronts, then you would need to create your print location on the platform.
Print Location management and creation
To create a print location, log into any of your storefronts as a Platform Administrator, and then navigate to the account you wish to create this on. For the purposes of this example, I will be creating my print location on the platform account.
Once you are on the account you would like to create your print location and hotfolders on, navigate to Configuration > Hotfolders and Print Locations (Or simply search for 'Hotfolders and Print Locations' in the search bar)
There will already be a print location present called 'Digital'. This is the default print location which is present on the platform and you are more than welcome to use it, however please note that a print location, and the hotfolders within it, can only be edited when you are on the same account.
In this case, the Digital print location exists on the platform, as seen in the 'Storefront' column in the screenshot below. This means that if I want to make any changes to it, I will also need to be on the platform.

If you would like to rename this print location, or change its description, you can do so by clicking 'Edit' under the 'Commands' column.
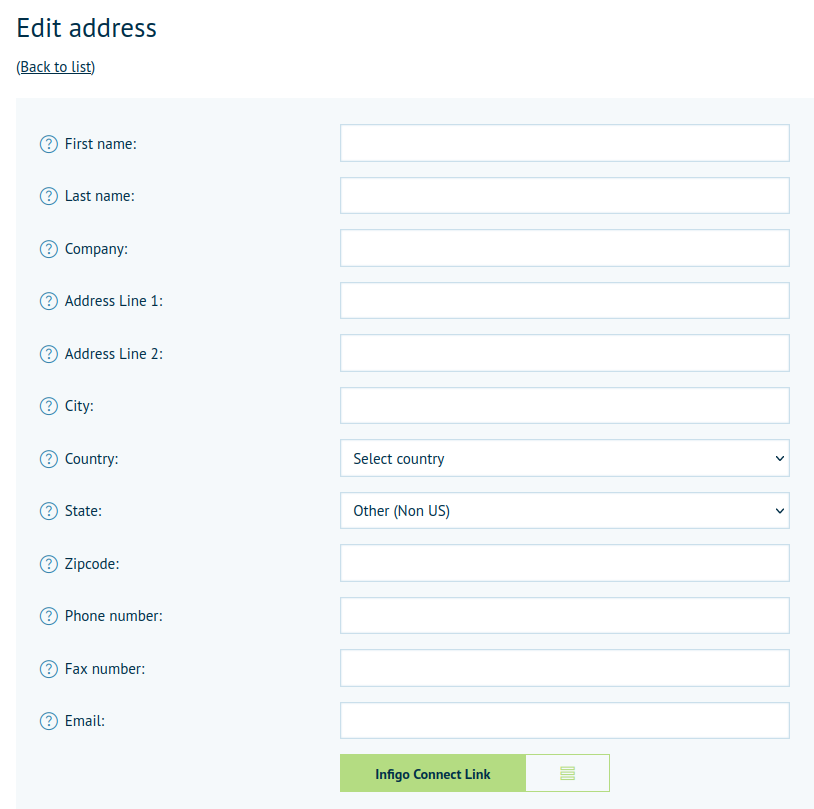
You can assign an address to the print location by clicking 'Edit' under the 'Address' column, and filling in the address information as seen below. However, this address is only really used in bespoke scenarios and can more often than not be overlooked.
If you would like to remove the print location, you can do so by clicking 'Delete' under the 'Commands' column.
Please note that this can only be done if there are not hotfolders contained within the print location.
In order to create a print location, you simple need to click Add new Print Location, fill in the Name and Description, then click Insert as seen below.

As you can see in the screenshot below, it is quick and easy to create new print locations:

Hotfolders
Where to create them
When creating a hotfolder, you should always create them on the same account as the print location. If you created the print location on the platform, then you should create the hotfolders on the platform also. This is because Infigo Sync will only download hotfolders which exist on the same level as its target print location.
How to create one
Creating a hotfolder is a very similar process to creating a print location. To see the hotfolders contained within a print location, click the + adjacent to the print location's name. This will turn the + into a - and show a list of all of the hotfolders contained within the print location.
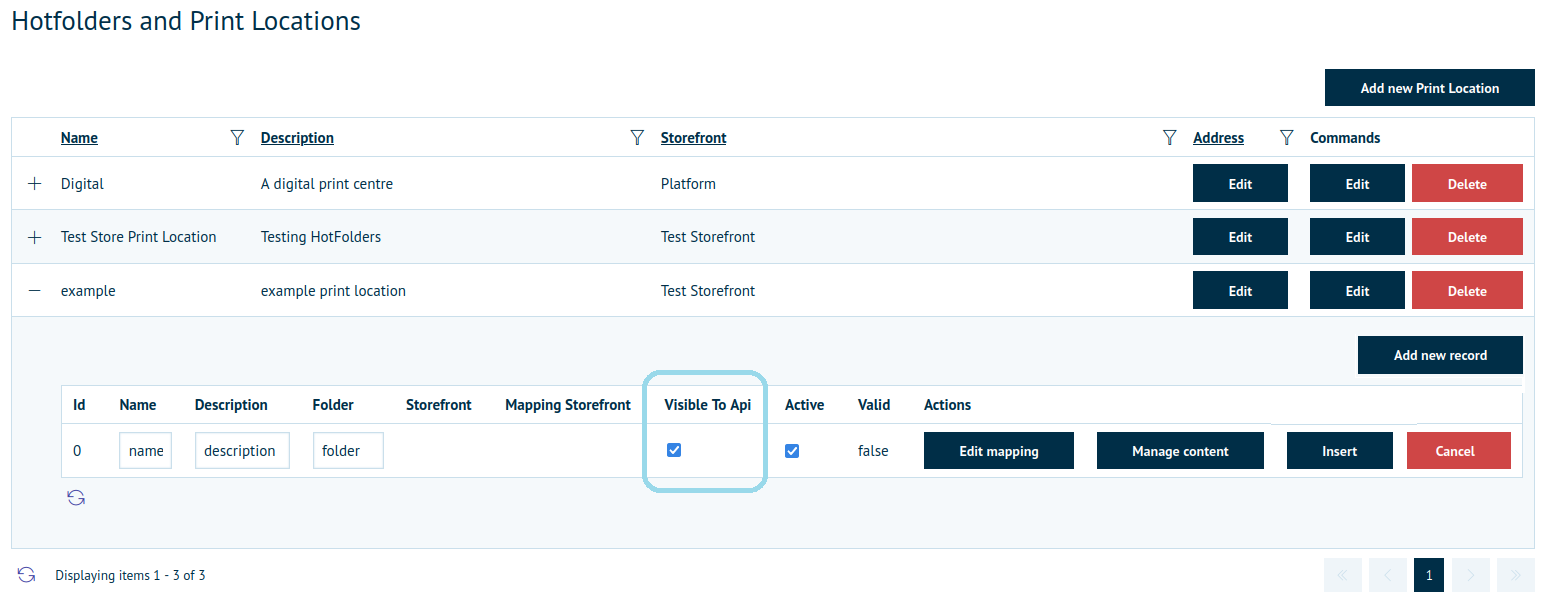
In order to add a hotfolder, simply click 'Add a new record' and fill in the information as seen and explained below:
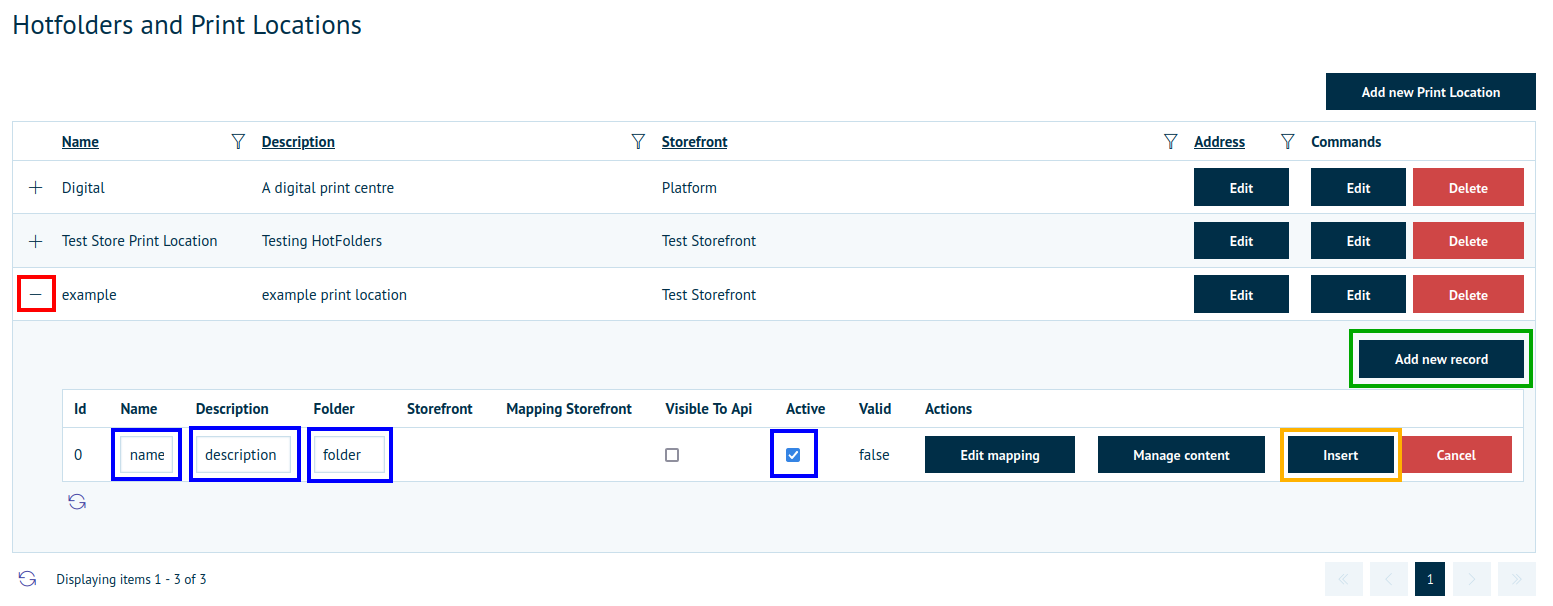
Annotation for the above:
Red - The + button which turns into a - that lets you expand/collapse the hotfolder list.
Blue - The configurations available for the hotfolders. All of these fields are mandatory, and below is a brief explanation of each:
Name - This is the system name for the hotfolder and can be used to identify it in the administration menu.
Description - This is a simple description of the hotfolder to allow you to identify its purpose.
Folder - this is the name of the folder that will be downloaded through Infigo Sync. This can be the same as the system Name, or different to it entirely, as this is designed to allow you to integrate Infigo Sync into your existing workflow.
Active - This is essentially an on/off switch for hotfolders as turning this off will make a hotfolder inactive and cause all parts of the system to ignore it entirely.
Insert - Once you are done with your configuration, click this button and the hotfolder will be created.
Mapping
Mapping is how you can control which order line output files go to which hotfolders. Our hotfolder mapping is less of a filtration system, and more of a guidance system, in that there is no way to configure the system to prevent files from going into certain hotfolders, and instead you will provide them with arguments for incoming folders.
Hotfolder Mapping
To edit the mapping for your hotfolder, you simply need to click "Edit mapping" under the "Actions" column as highlighted in the screenshot below:

This will bring up the hotfolder's mapping page where you can configure the mapping for each potential job property. A job property is simply some information that can be used to separate one job from another at a mapping level.
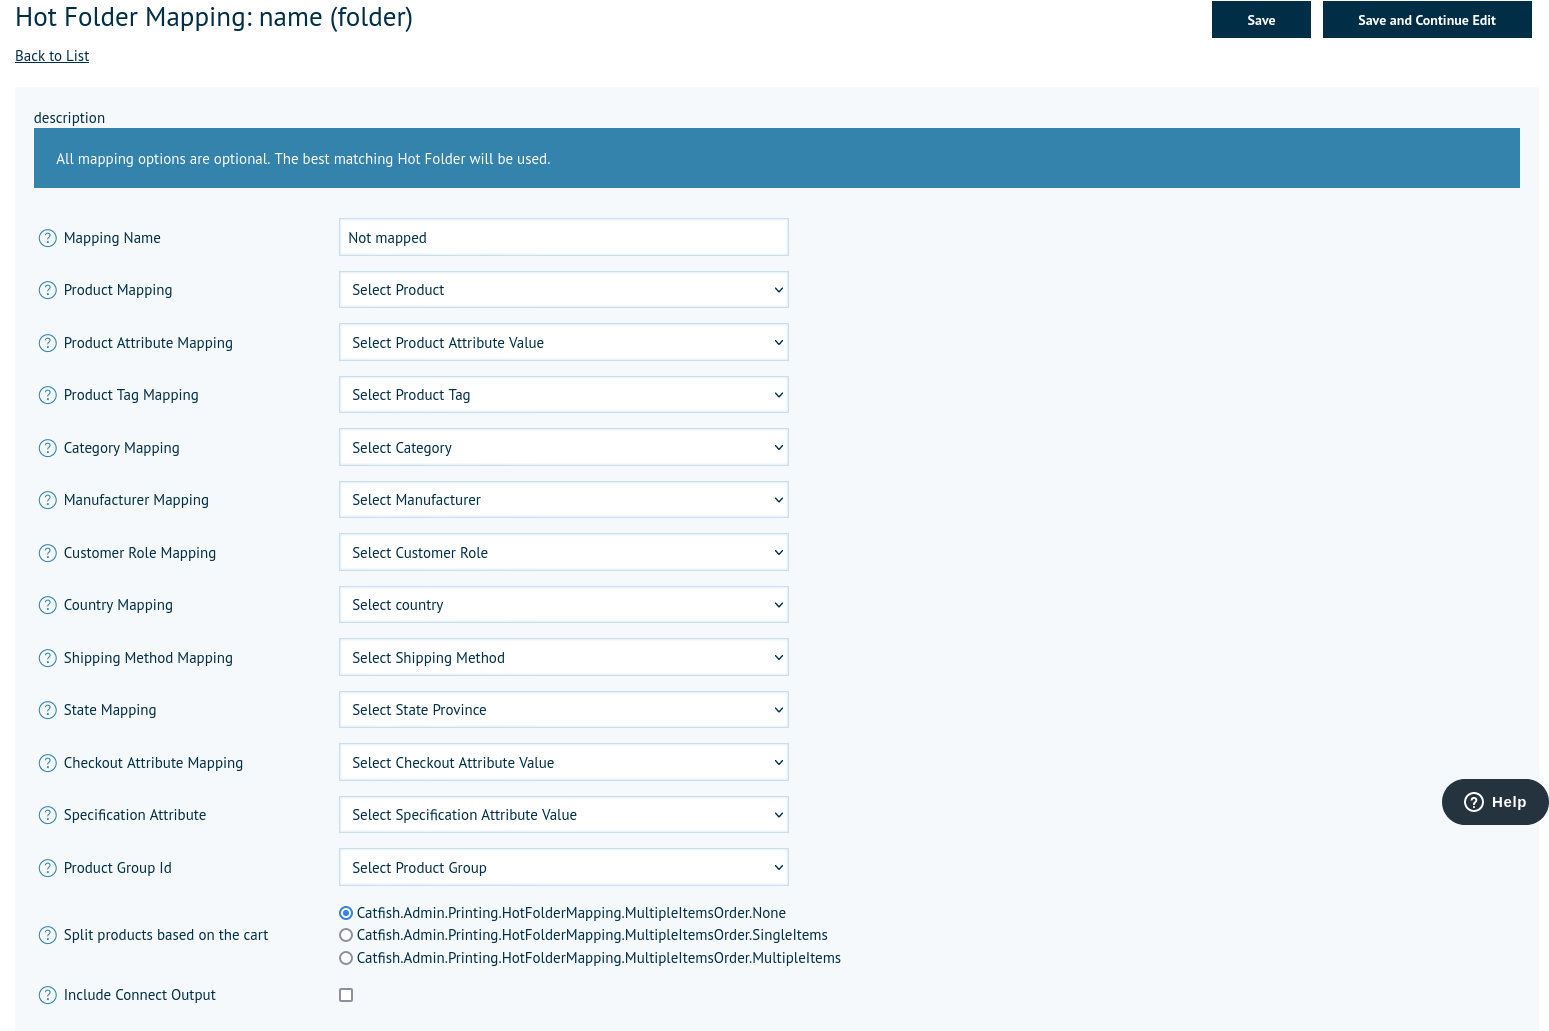
For example, you can use the "Product Tag" dropdown to map products which have specific product tags to the hotfolder you are currently configuring. This will cause any outputs that end up in this print location and have the mapped product tag assigned to them an argument to go to this hotfolder.
You could be more specific and not only map the product tag, but the category, so that an output file for a product which has the mapped product tag assigned to it and is part of the mapped category will have two arguments for going to this hotfolder instead of one.
When a file is deciding where to go, it will go to the hotfolder it has the most arguments for. If your hotfolder is mapped to three properties, but the job only meets two of the mapping requirements, then the job will go to the next available hotfolder that it has valid mapping for.
Before you 'Go Live' with your hotfolder, you'll need to make it visible to the API:
Mapping Scenarios
To help provide a better understanding of how mapping works, I have created a diagram (shown below) which represents six hotfolders across two print locations, and three colour-coded orders and their journey to their destination hotfolders.
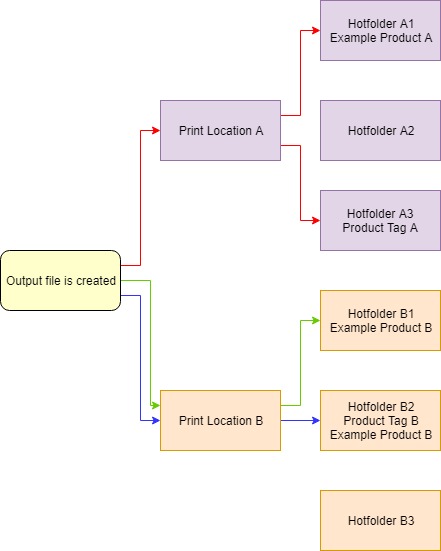
Scenario A
In this scenario we are trying to get the output into Hotfolder B1 (see above). Example product B is mapped to go to Print Location B and so regardless of any other data, the outputs for this product will always go to a hotfolder contained within Print Location B. Once here, it will look at the available hotfolders and count the arguments for each.
Since, for this order, Product Tag B has not been mapped to Example Product B, it will have one argument for Hotfolder B1, and one argument for Hotfolder B2. This would usually trigger random allocation between the valid hotfolders, however, since Hotfolder B2 is also mapped to Product Tag B, the output for scenario A will go to Hotfolder B1.
Scenario B
In this scenario we are trying to get the output into Hotfolder B2. As in Scenario A, Example Product B has been mapped to Print Location B, however the difference between the order in Scenario A and the order in this scenario is that, for this order, Example Product B does have Product Tag B assigned to it, the order will have one argument for Hotfolder B1, but two arguments for Hotfolder B2.
As there are more arguments for Hotfolder B2 than there are for Hotfolder B1, the output will go to Hotfolder B2.
Scenario C
In this scenario, Hotfolder A1 has been mapped to Example Product A and Hotfolder A3 has been mapped to Product Tag A. The order placed for Scenario C is of a product which has four order lines, Example Product A has Product Tag A assigned to it. This gives exactly one argument for both Hotfolder A1 and Hotfolder A3. When this is the case, the output files will be distributed randomly between the valid hotfolders.
Copy Settings
As well as configuring where the files go when they are automatically copied, you can control which product types automatically copy their outputs, and whether or not they do so whenever an output is created.
Control which products are copied
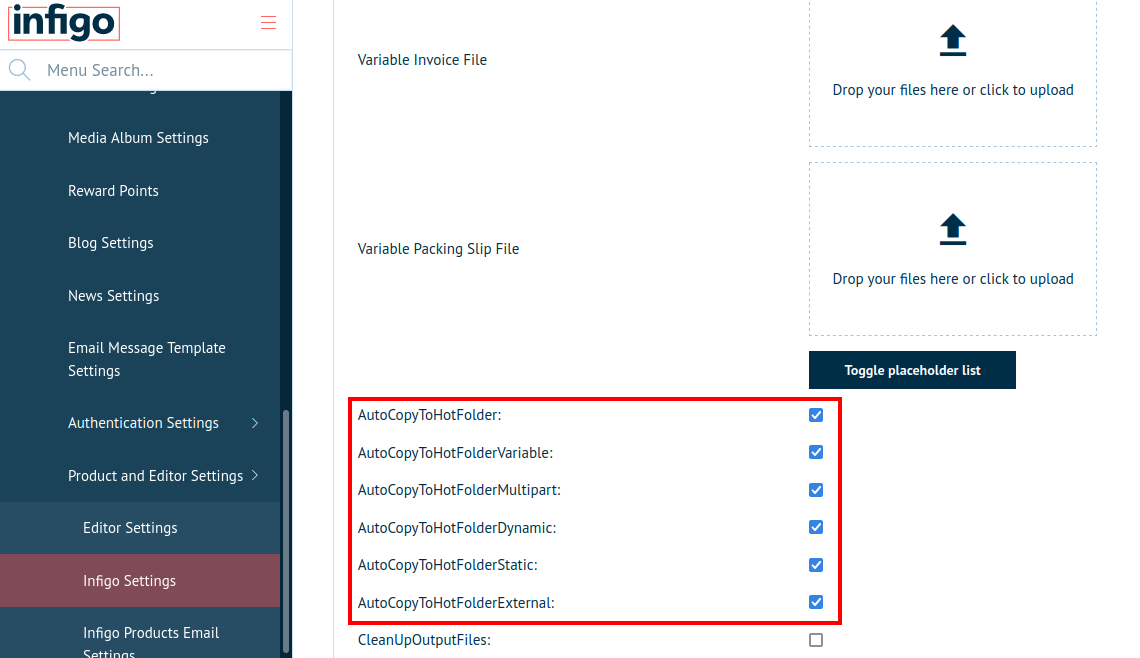
In Configuration > Settings > Product and Editor Settings > Infigo Settings there is a group of settings (highlighted below) which allows you to control which types of products which have their outputs automatically copied to a hotfolder. To control which ones are copied, simply either check or un-check the box next to them, and all checked product types will have their outputs copied.
Control when outputs are copied
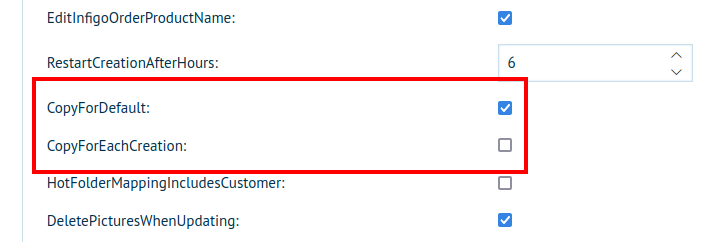
In Configuration > Settings > Product and Editor Settings > Infigo Settings, you can also find the settings "CopyForDefault" and "CopyForEachCreation" which enable the auto-copying of output files to a hotfolder when the order is first considered "Ready" (output is created, order is approved and marked as paid), and the copying for each time the output is re-created through Shared Print Operations respectively
Copying Packaging slips, Invoices and Job Tickets to Hotfolders:
You can also copy additional items to Hotfolders by navigating to Configuration > Hotfolders and Print Locations > Hotfolder Settings and selecting "Copy additional items to Hotfolder." You will now have new drop downs that will send copies of packing slips, invoices, and job tickets to the selected hotfolder.
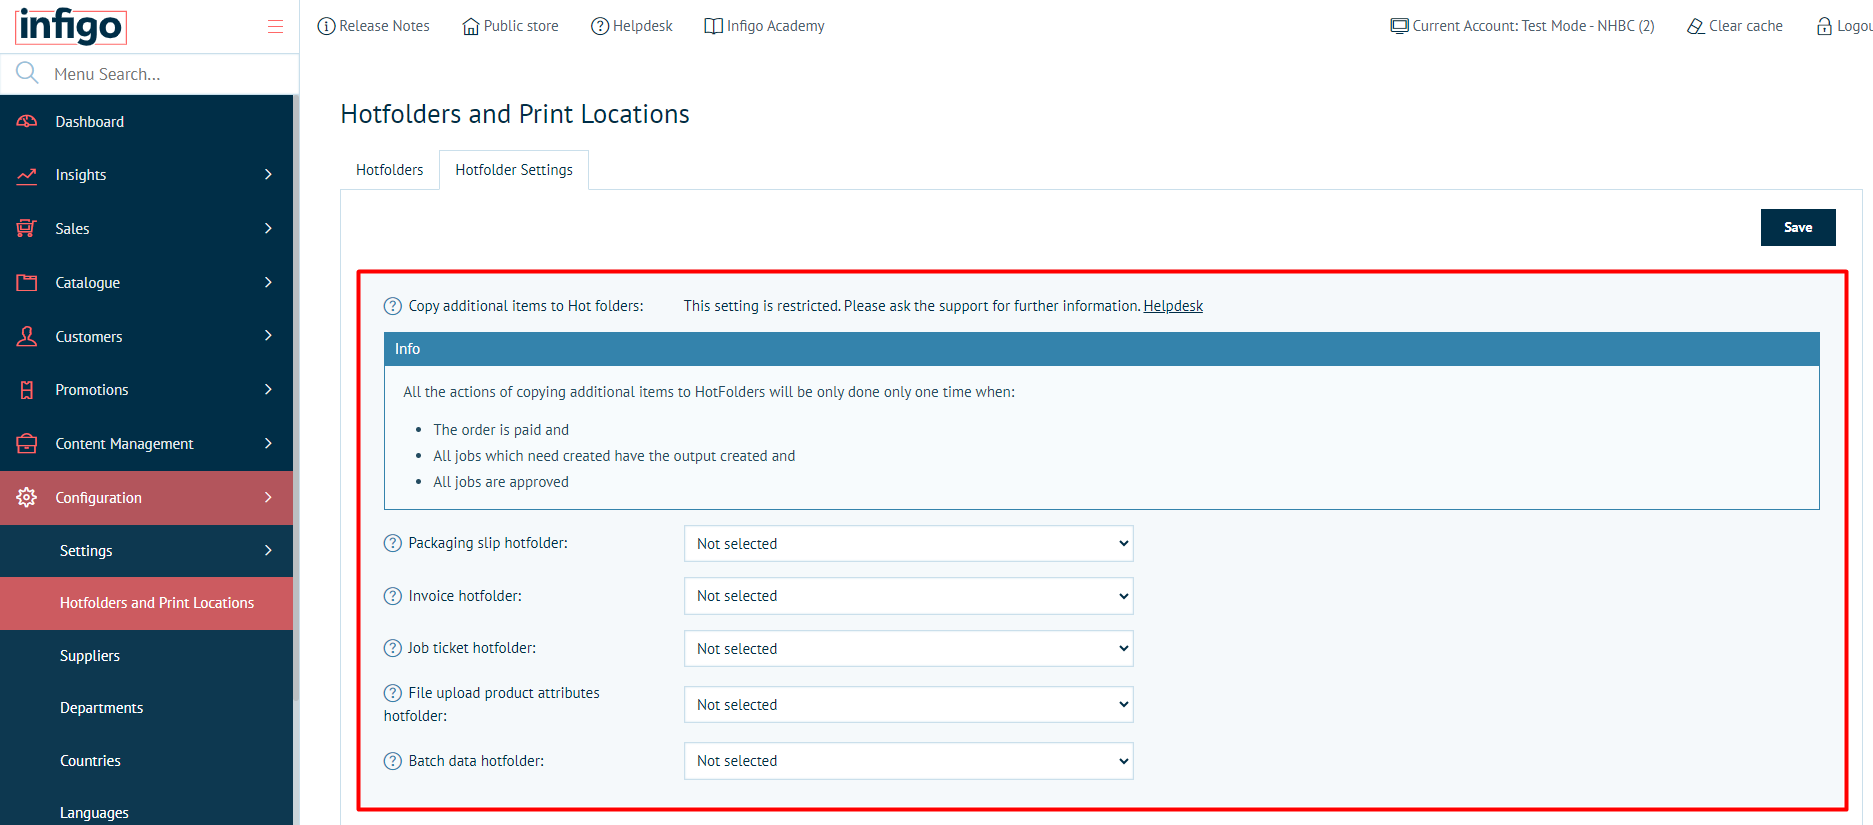
Note: If you do not see these settings, please raise a ticket with Infigo Support as they may need to enable the feature for you.