Overview
The Chameleon module allows you to change the look and feel of your storefronts based on which user is signed in, what pages they are on, the URL they are using, and more.
Using Chameleon, you are able to give different users different versions of the following configurable areas:
- Message Templates
- Editable Content
- CSS Override.
This will allow you to give different users an entirely different view of the same storefront, especially when paired with Access Permissions.
Please note that Chameleon is a paid module. If you would like to inquire about purchasing Chameleon, please contact greg.young@infigo.net
Getting Started
1. After purchasing Chameleon, you will need to raise a support ticket for user access to the module.
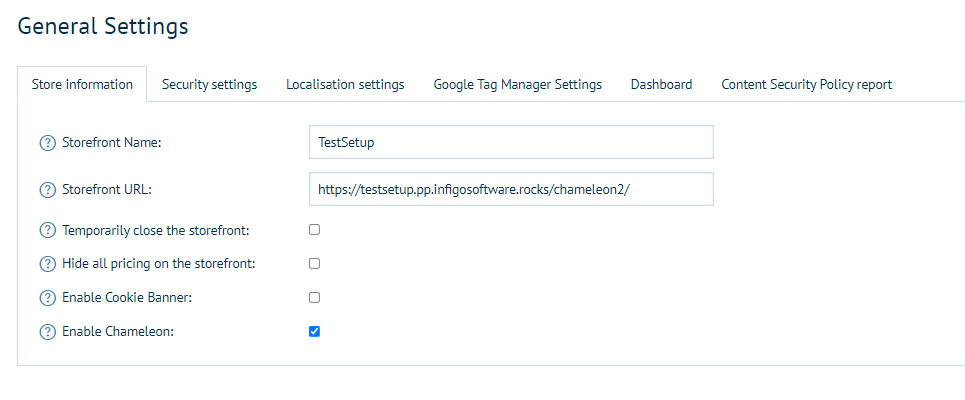
2. Once you have access you need to enable the module. After selecting your storefront, go to Configuration > Settings > General Settings and check the box Enable Chameleon then click Save in the top-right corner.
3. To add / manage a Chameleon Group go to Content Management > Chameleon.
In order to create variations of the editable areas listed at the beginning of this article, you will need to create one or more Chameleon Groups.
Each group will have its own alternative version of the editable area, and you are able to configure up to 15 different groups, meaning you can have up to 15 alternatives to each editable area.
However, please note that an excessive amount of Chameleon Groups can be difficult to manage. It may also result in slower site speeds when a large amount of groups are configured, so please try to limit the number of groups you have.
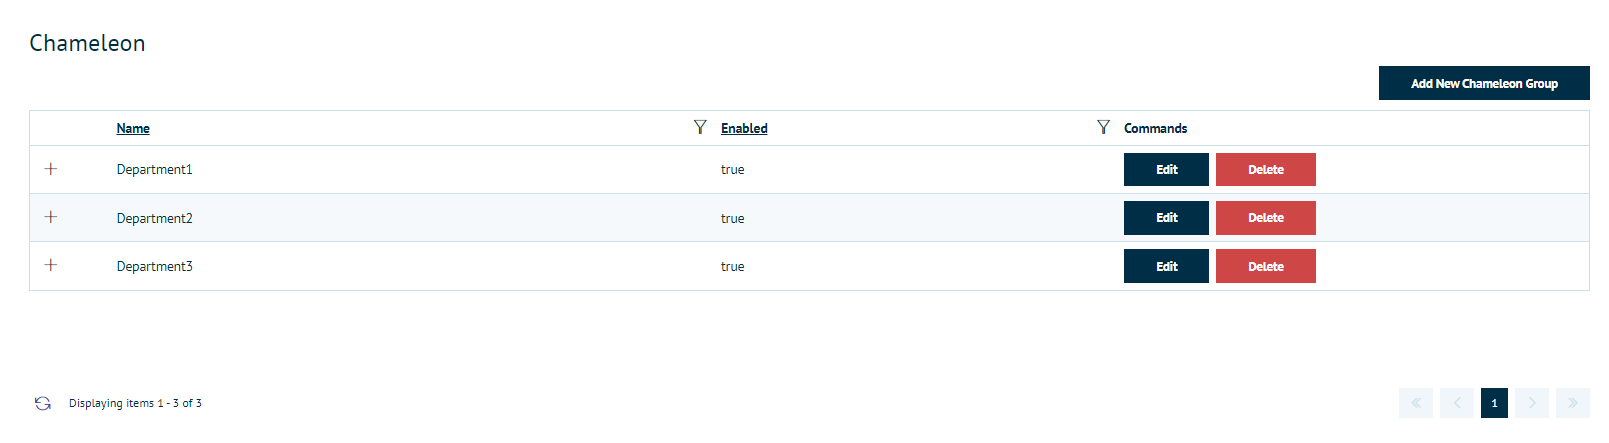
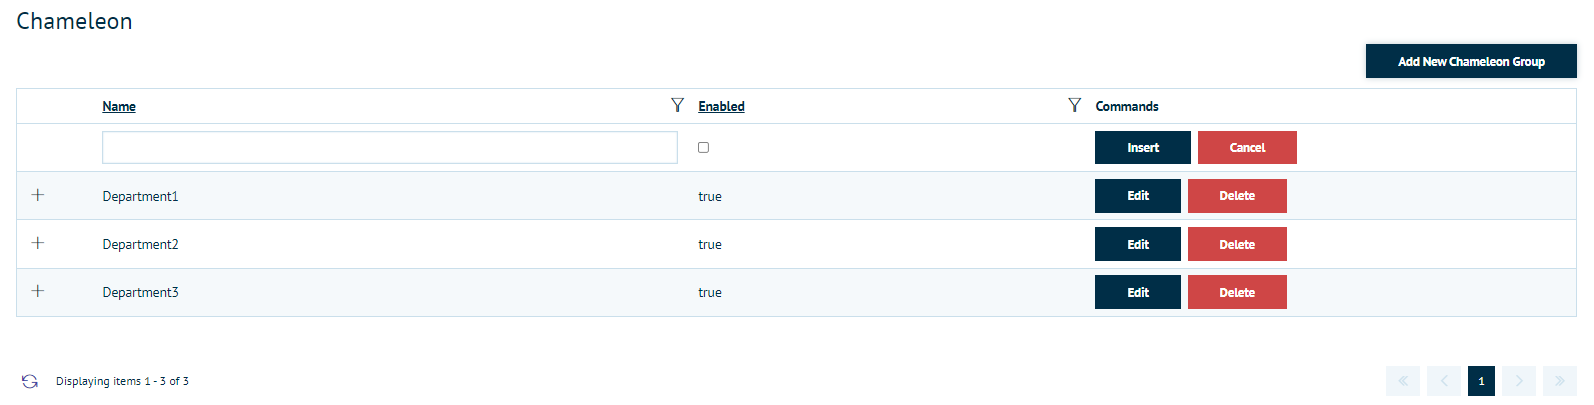
4. When you click on Add New Chameleon Group, a new entry will appear. Give the group a name, tick enable and click insert to save.
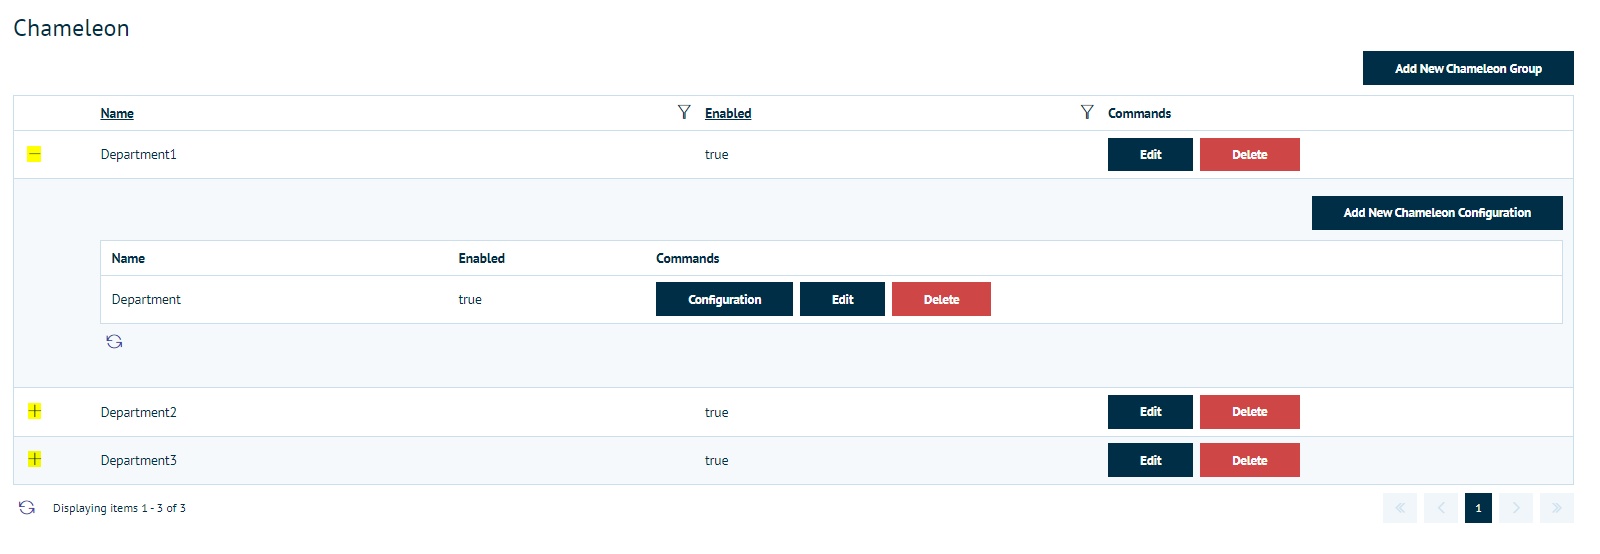
Once you've inserted the new group, you can click on either the "+" to expand the group and continue its configuration, or you can click "Edit" in order to either rename the group or enable/disable it.
Chameleon group rules
To determine whether a user falls into a Chameleon Group or not, you must create rules against each Chameleon Group. Each rule is effectively a set of conditions to be met, and if a user meets all conditions for any of the rules you create, then they will be considered part of that Chameleon Group.
Note: If a user meets one or more rules for separate groups, then they will be considered part of the group which they meet the most rules for. If a user meets an equal number of rules for two or more groups, then this is considered an invalid configuration as your groups should have rules unique enough to prevent this from occurring.
1. To create rule for a Chameleon group, simply expand the group and click Add New Chameleon Configuration. This will add a new record which you will have to name, enable and save (by clicking insert).
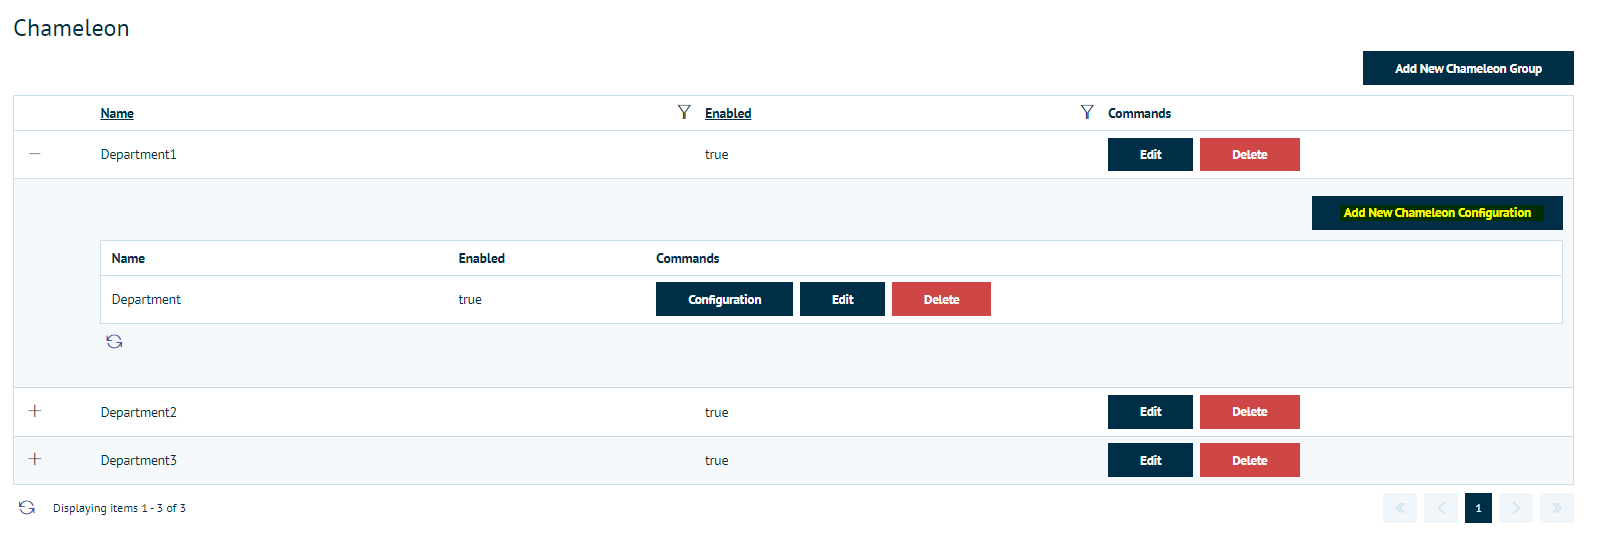
2. Once you have inserted your rule, you will need to click Configuration

3. There are multiple fields which can be used to determine whether or not a user should fall into this Chameleon group.
In order for a user to meet the rule's requirements, they must pass every configured field's test. For example, if you configured both Department and Customer Role then the user will need to both be in the configured department and have the configured role assigned.
Once you're happy with the rules, click save in the top right corner.
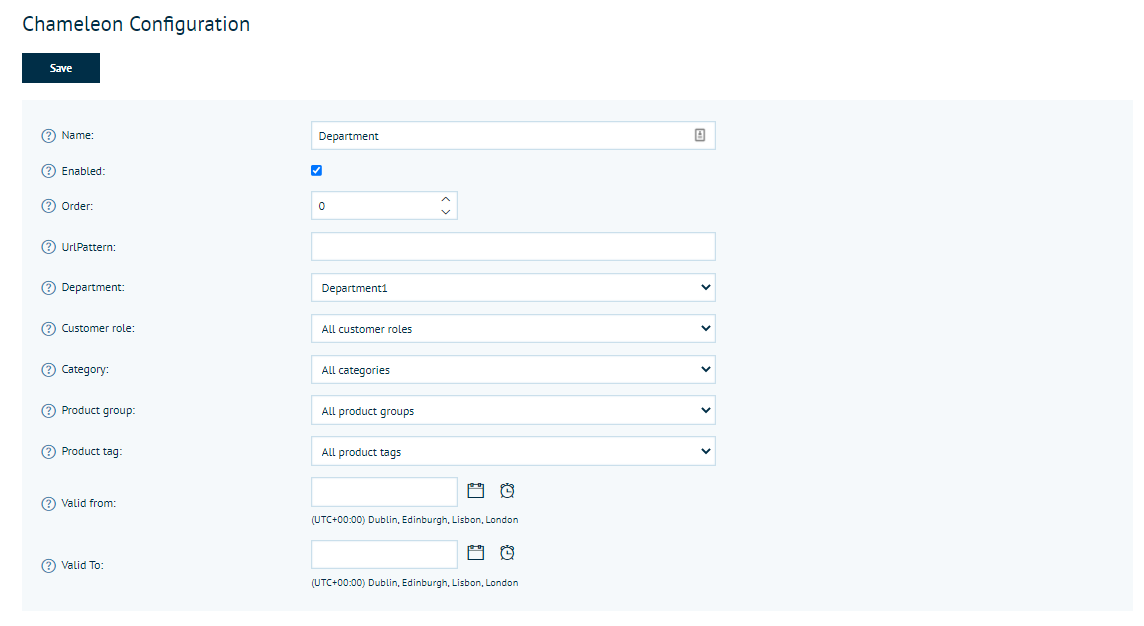
Here is a summary of the fields in the Chameleon Configuration window:
Enabled - Whether or not this Chameleon rule is active.
Order -The display order of the Chameleon rules in admin. The lower this number, the sooner the rule appears in the list.
UrlPattern -You can enter a regular expression in this field that will be used to check the URL. If the user's current URL path matches the expression, they will meet this field's requirement.
Department - If the user is in the department selected from the dropdown, they will meet this field's requirement.
Customer role - If the user has the customer role selected from the dropdown, they will meet this field's requirement.
Category - If the user is currently browsing the category set for this field, they will meet this field's requirement.
Product group - If the user is on the landing page of a product that is part of the configured group, they will meet this field's requirement.
Product tag - If the user is on the landing page of a product that has the configured product tag assigned, they will meet this field's requirement.
Valid from - This allows you to set a start date for the Chameleon group. So long as this date is not in the future, this field's requirement will be met.
Valid to - This allows you to set an end date for the Chameleon group. So long as this date is not in the past, this field's requirement will be met.
Creating Context Variants
Now that Chameleon is enabled and you have one or more groups configured, you can configure what's known as Context Variants for each group. A Context Variant is simply that group's version of that editable item.
The areas you can configure Context Variants for are:
- CSS Override
- Editable Content
- Message Templates
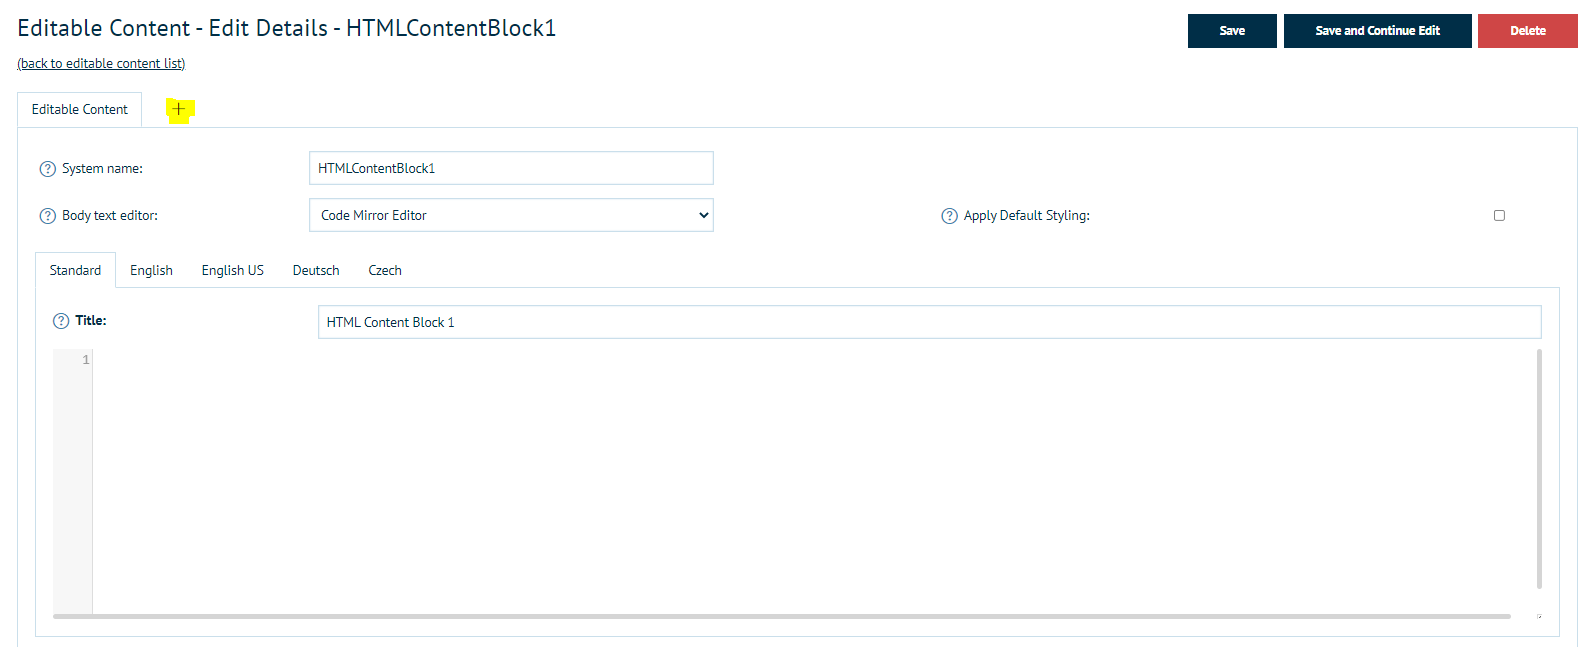
For the purpose of this article, we are creating a Context Variant for the "HTMLContentBlock1" Editable Content item.
1. To create a Context Variant for "HTMLContentBlock1" we need to go to Content Management > Editable Content. You can easily find the section you're looking for by using the Ctrl + F shortcut on the keyboard to search the page.

2. Click on Edit and now that you have enabled Chameleon you'll see a new "+" button
3. Click on the + button, select the Chameleon Group you'd like to use for this Context Variant and click Create.
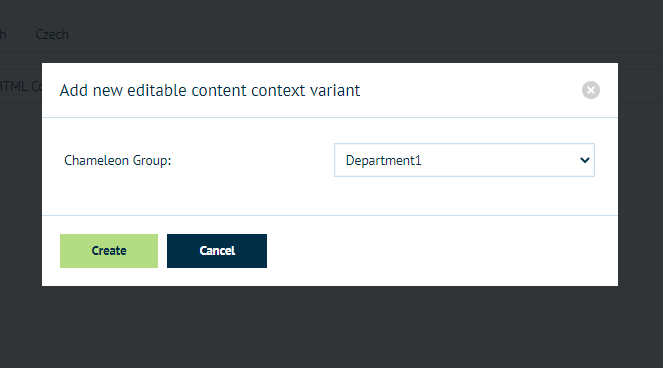
4. The page will refresh and you will see a new tab where the "+" button was with the name of your selected Chameleon Group and a "X" to remove that Context Variant.
If there are Chameleon Groups which do not have Context Variants, then the "+" button will appear as the last tab.
When you click on the tab, you'll see a copy of the original tab, however you can put new content here.
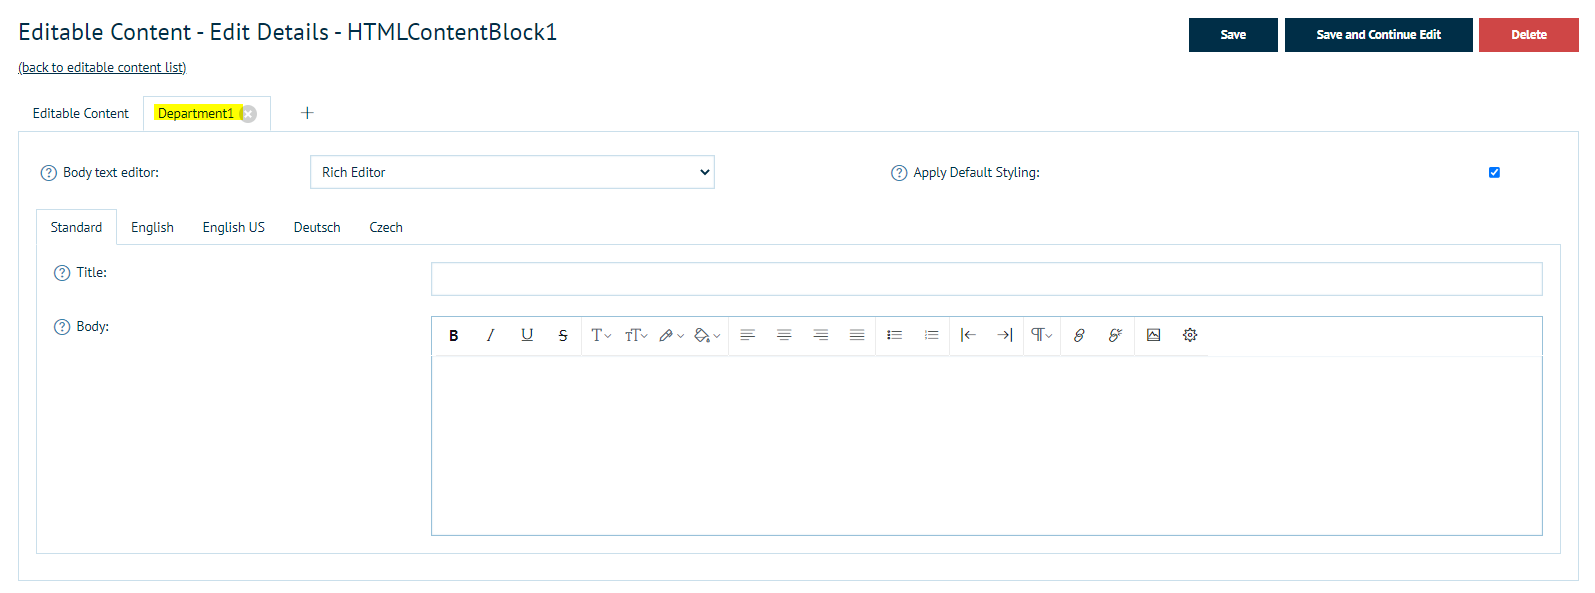
Once you have edited this variant, click Save.