Infigo Academy: Setting up basic variable logic in Invent
Overview
The release of Invent v2.0 brings with it the introduction of variable logic. This allows you to create and perform more complex and inteligent behaviour within your MegaEdit product. Variable Logic is essentially a collection of Rules, with each rule being made up of a series of Conditions and Actions. This article will run you through the high level process of creating some simple logic conditions and actions to demonstrate how this can be used in real life examples.
Variables
Firstly you need to ensure you have created your Invent Variables.
Rules
In order to use Variable Logic you need to start by creating a Rule. You need to specify a name for your Rule and optionally a description so you can explain what this specific rule is doing. Then each rule requires first a Condition (with a maximum of 10 assigned to a single Rule) and then an Action (with a maximum of 50 assigned to a single Rule) if that Condition is met. A single rule can have multiple else if statements, each containing their own Conditions and Actions so that if one Condition is not met, you can check for many more. You can also specify a 'catch all' else statement at the end of your Rule if you wish that has no Condition but only an Action and will always run IF no previous Conditions you have setup are met.
Conditions
Conditions are used in the Variable Logic Rules to determine when an Action should be triggered. A Condition can be set to run Always, Never OR based on a specific Variable. You can also include multiple Conditions within the same statement and set it up so that ALL conditions should be met, some conditions should be met or just one.
When assigning a Conditition to a Variable you can then create statements that will check that Variable if it contains, does not contain, is equal to etc. and then specify a value as the check criteria.
Actions
An Action is something that you want to happen when a Condition that you have setup is met. Actions can be assigned to both Variables and Fields and we support 3 types of action that can be assigned to a Variable or Field:
- Set Value - You can specify a new value for that specific Variable or Field
- Show - You can set that Variable or Field to be shown
- Hide - You can set that Variable or Field to be hidden
If, Else If & Else statements
When creating a Rule it needs contain at least one 'if' statement. Within that if statement you will configure your Conditions and Actions and if those Conditions are not met it will do nothing.
What you can do though is setup multiple 'if' statements so that if one Condition is not met you can check for another and so on. In this situation you should create your first 'if' statement and then create subsequent 'else if' statements underneath. The order of these statements is important because the logic will first check the 'if' statement and only if that is not met, will it then check each of the following 'else if' statements until one returns true.
FInally you can create an 'else' statement at the end that is used as a 'catch all'. This is there to ensure that the Rule you have setup with always do something even if all the Conditions you have created are not met. For the 'else' statement you do not create a Condition, only an Action as it will always run IF any of the previous 'if' and 'else if' statements have not been met (returned false).
'Real Life' Scenario
In order to make sense of the information above, lets run through a working scenario of how this can all be applied so that you can follow the steps and see it working.
Firstly, download the Indesign Package attached (or alternatively you can work on your own file if you have one ready) then ensure you have downloaded and installed the latest Invent plugin.
Unzip the contents and open the InDesign file.
Now the scenario we are going to walk through is taking the Business Card file and allowing customers to dual brand it with a second logo. We then have an option that offers the dual brand approach and if a customer decides they want this then we will show a second logo field on the canvas and also a second logo selection in the form.
First, as per the instructions above we need to create the variables, 3 in total, that will control the dual branding option the user can choose, and then the two image logo selectors.
We also need a Clipart Resource set that will contain all the logo options the customer can select from that will be linked to both the logo variables.
Now we have our variables, we can start to setup the logic.
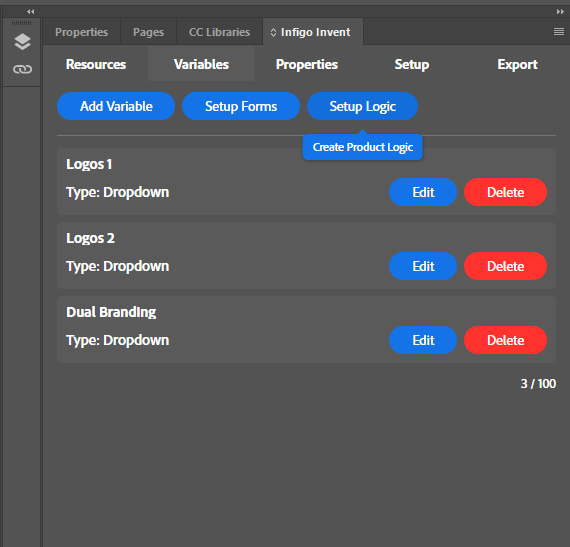
First, click on the Variables tab in the Invent panel, and from the buttons at the top click on 'Setup Logic'.
Then in the popup that follows click on the 'Add Logic' button in the top right.
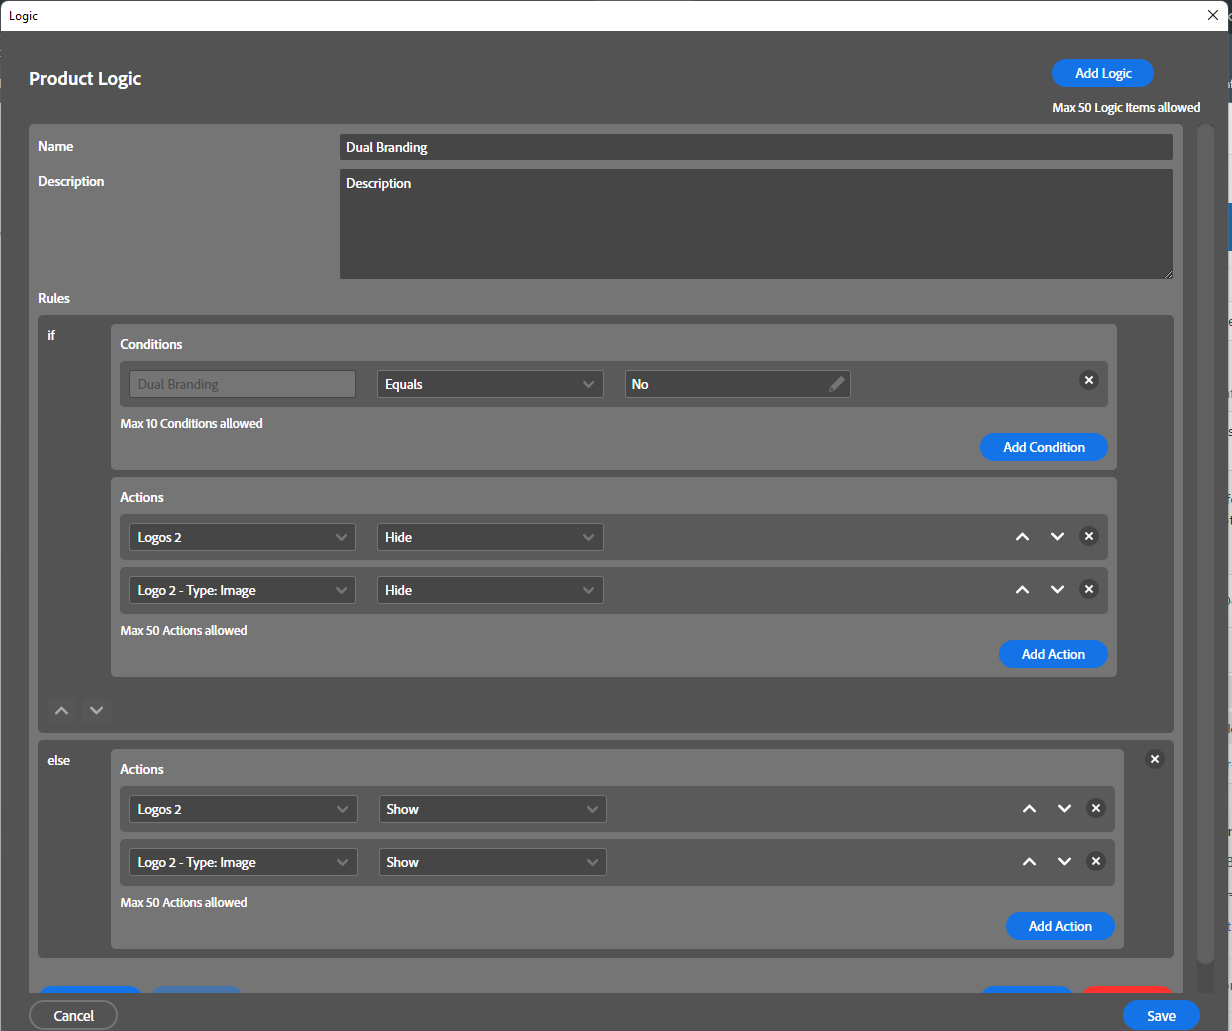
Now we can give this logic set a Name, we should call this 'Dual Branding' and then also a description that is optional but helps describe what this logic set does.
To add our first condition, which is how every rule starts, click on the 'Add Condition' button. Here we have a number of options:
- Always - which means this condition will always be met, regardless.
- Never - which means that this condition will never be met.
- Variables - Here you will see a list of all your variables that you can assign a rule to.
In this case, we should select our 'Dual Branding' variable.
In the second drop down, which is the comparison type, we should select 'Equals' and then in the third dropdown it gives us the Dual Branding variable options to select from, and we should choose 'No'.
Now we have our condition, so we want to define some actions that we want to happen when the end user selects No for Dual Branding.
So click on 'Add Action'.
Now we want to define the variables and fields that we want to be impacted by this condition. So from the list in the first drop down we should select our 'Logos 2' variable. Then from the second drop down we should select the action type which in this case is 'Hide'.
Click 'Add Action' again and repeat the steps above but this time selecting the 'Logo 2 - Type: image', so that we can not just hide the variable from the form, but we also hide the field from the canvas.
Finally, with those rules in place, we want to add an 'else' statement that will catch any other situations (i.e. when Dual Branding is not No)
So click on 'Add else' at the bottom and from here we can only select Actions as these will always run if any previous configured conditions or if statements are not met.
Now we are going to add two actions, similar to what we did above, one for the Logos 2 variable, one for the Logo 2 field, but this time instead of setting them to 'Hide', we are going to set them to 'Show'.
You should end up with a Product logic setup that looks like this:
Now we can click 'Save' and export the MEX package and import it into one of your MegaEdit products to see how it behaves in the editor.