Pre-requisites
Prior to following this article, you will need to have enabled Infigo Designer's Advanced Mode. Please see this article for an explanation on how to do so.
You will also need to have downloaded the attached .js file and moved it to your Infigo Designer "JavaScripts" folder. The file can be downloaded either at the end of this article, or by clicking here.
The directory for this folder can be found below:
PC
C:\Program Files (x86)\Adobe\{Your Acrobat Version}\Acrobat\plug_ins\Xclusive\JavaScripts
MAC
Macintosh HD -> Library -> Preferences -> Infigo -> Javascripts
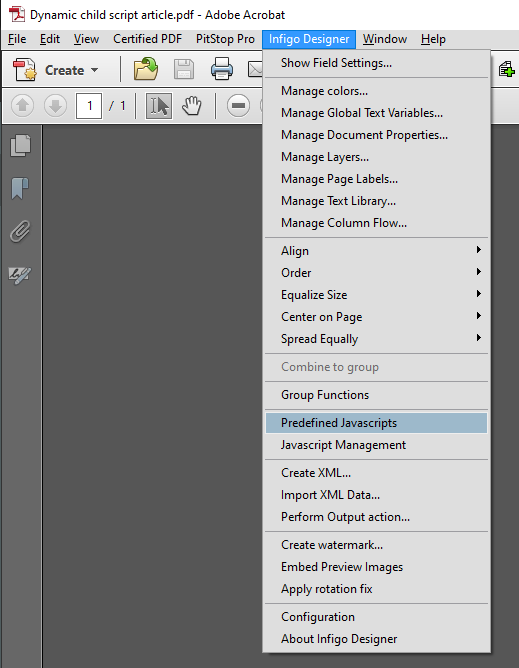
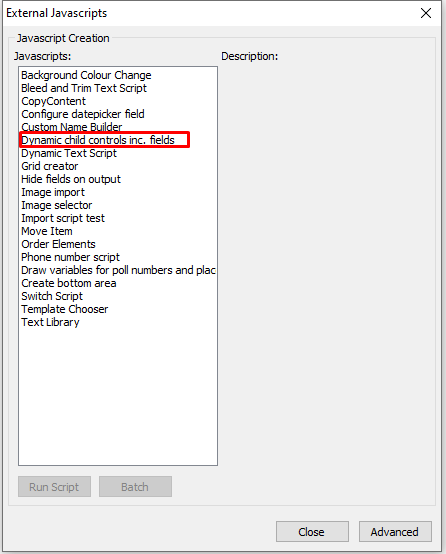
You will know the script is in the correct folder when you see it in the list of pre-defined scripts which can be found by navigating to "Infigo Designer -> Predefined Javascripts":
What this script does
The purpose of this script is to show/hide fields in the Infigo editor's form to allow you to dynamically build/destroy the user experience based on how they interact with the template.
For example, you can allow the user to choose between one name or two, and if they choose two, then the entry fields for the second name will appear. If they choose one, however, then the entry fields will disappear.
Variable and Field Creation
Variables
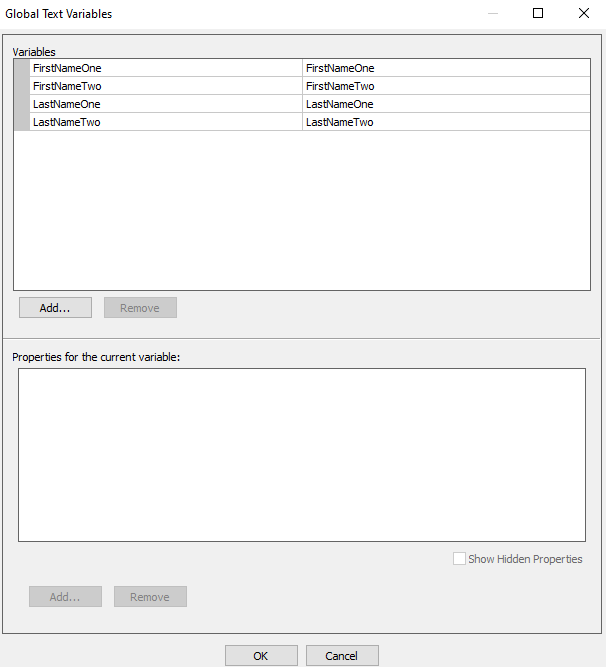
Using the "One name" vs "Two names" example above, you will need to create four global variables:
- FirstNameOne
- LastNameOne
- FirstNameTwo
- LastNameTwo
As the names imply, this will be a set of global variables for each name.
Please note that you do not need to separate this into four variables, and whilst the article will be using the variables above, if you would like the user to enter the first and last name into the same field for each name, you can instead create the following variables:
For this article, the document's global variables will look like this:
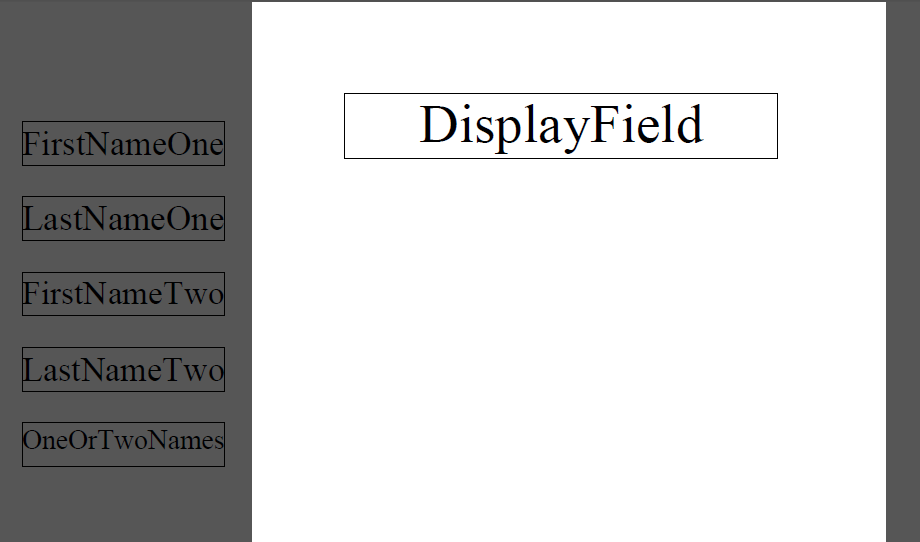
Fields
For this script, you will always need one field per global variable, one to control which fields are shown (usually a dropdown), and one for the variables to be displayed in.
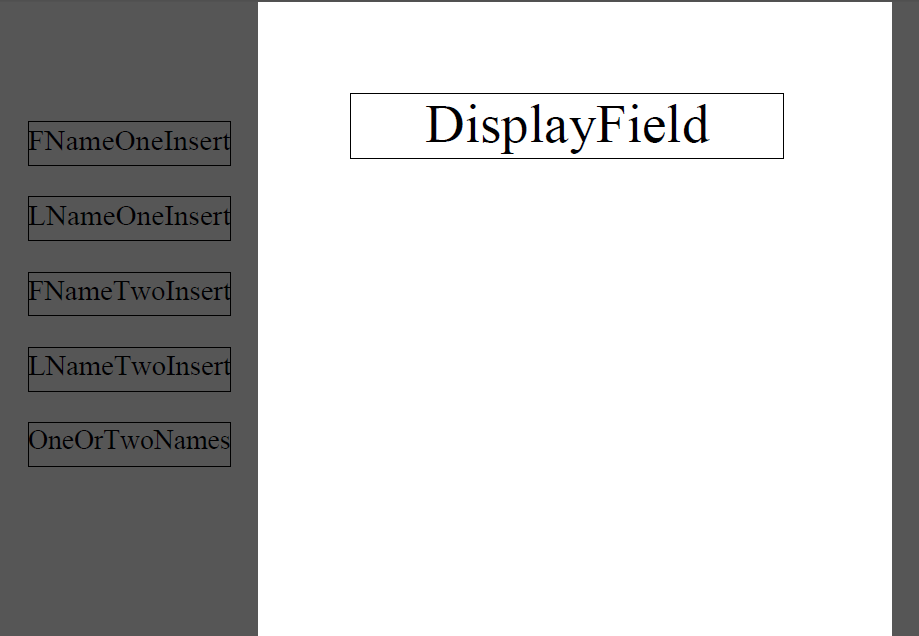
The fields created for this article will be:
- FNameOneInsert
- LNameOneInsert
- FNameTwoInsert
- LNameTwoInsert
- OneOrTwoNames
- DisplayField
Note: the only field that needs to be on the canvas is "DisplayField". This is because the other fields do not need to be shown to the end user, and so they can exist outside of the PDF's canvas (Infigo Designer will still see the fields).
Below is how the fields have been created for this article:
Field Configuration
"Insert" fields
For each "Insert" field, you will need to add the respective global variable placeholder:
Field | Placeholder |
FNameOneInsert | FirstNameOne |
LNameOneInsert | LastNameOne |
FNameTwoInsert | FirstNameTwo |
LNameTwoInsert | LastNameTwo |
To keep the fields clean, the default text has been removed from each "Insert" field and entirely replaced with the placeholder, and so the fields now show the placeholder's default text instead:
OneOrTwoNames field
The "OneOrTwoNames" field will need to be a dropdown that has the options "One" and "Two".
Below is the "OneOrTwoNames" field's property configuration to achieve this, with the relevant properties highlighted:

For a more in-depth explanation of how these properties work, see this article.
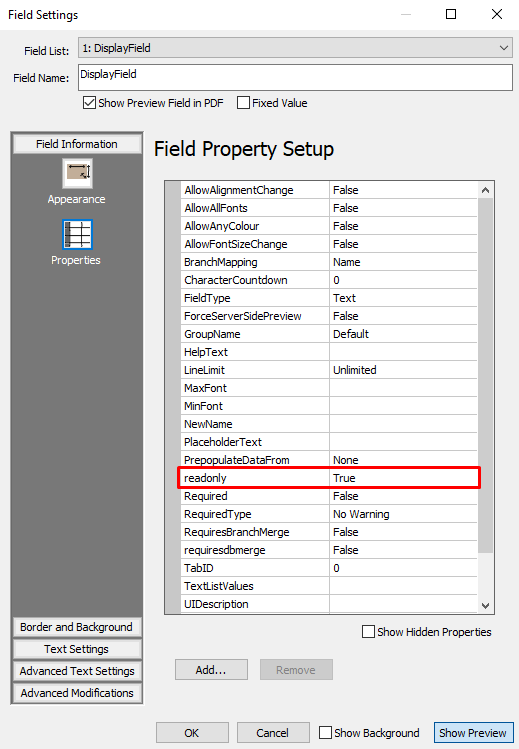
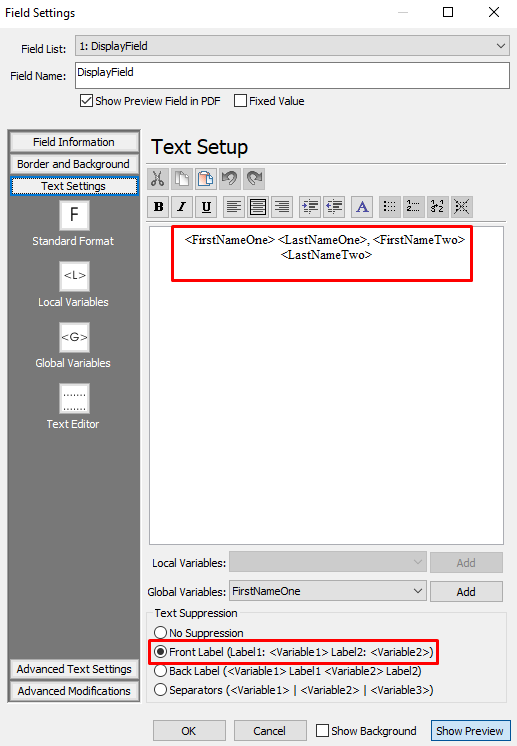
DisplayField
The DisplayField should have the "readonly" property set to "True":
As well as a placeholder for each variable, and "Front label" suppression enabled:
Configuring the Script
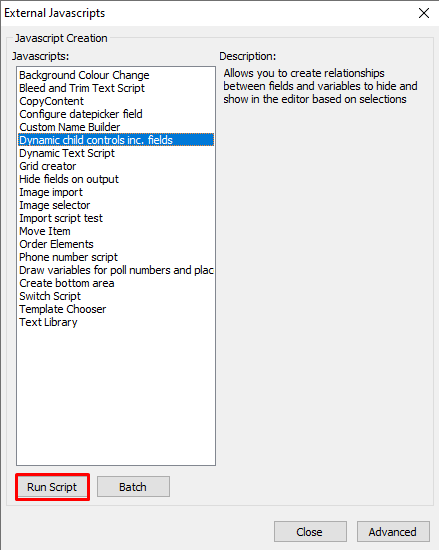
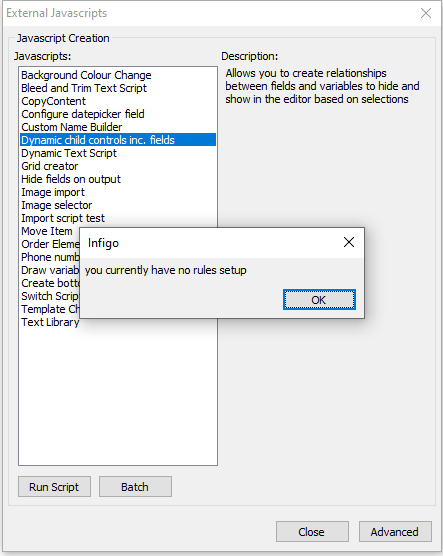
- Now that the setup has been done, you can run the script from "Infigo Designer -> Predefined Javascripts" by selecting it in the list and clicking "Run Script":
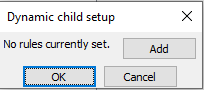
- If this is the first time you have configured this script on the PDF, then the message "you currently have no rules set up" will show:
Simply click "OK" to acknowledge this, and it will take you to the next step. - In the next popup, click "Add"
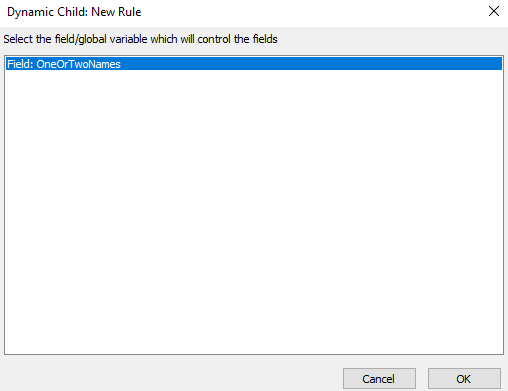
- Select the field which will control whether or not the other fields show - "OneOrTwoFields" in this case - then click "OK"
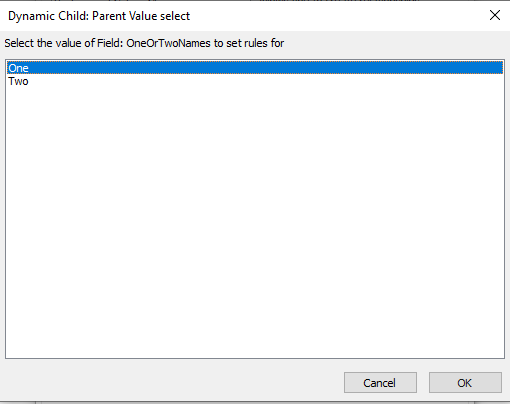
- Select the fist value then click "OK"
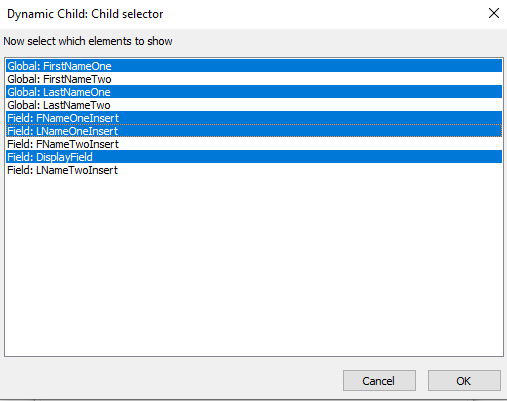
- In this step, select all fields which you want to show if the user chooses the option from step 5. In this case, just the first name's variables, first name's fields, and "DisplayField" then click "OK":
- Click "OK" to acknowledge that the rules have been updated

- Repeat steps 3 -> 5, but on step 5, you will need to select the other option instead - "Two" in this case:

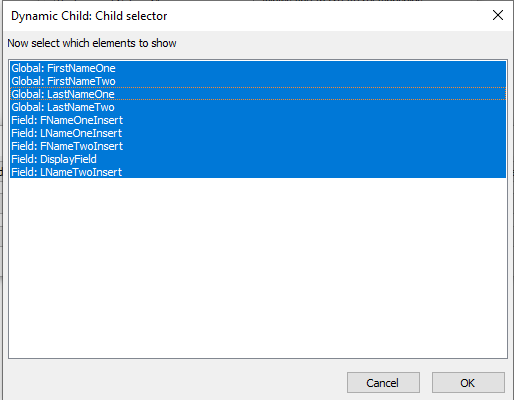
- As you want both the first name and last name fields to show if the user chooses "Two", you will need to select all fields in the list:
- Following the rest of the steps as before, you will see the new rules have been set up, and can click "OK" to save them:

- After closing out of the "Predefined Scripts" menu, you can save your template and then upload it to the storefront
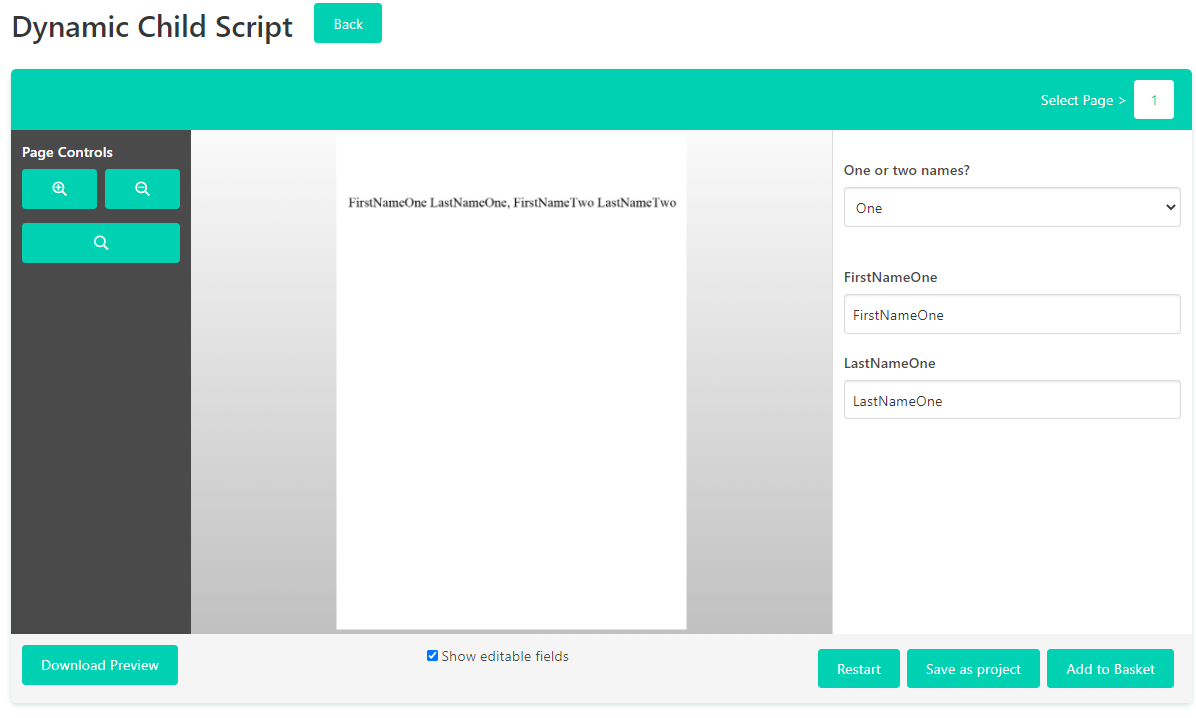
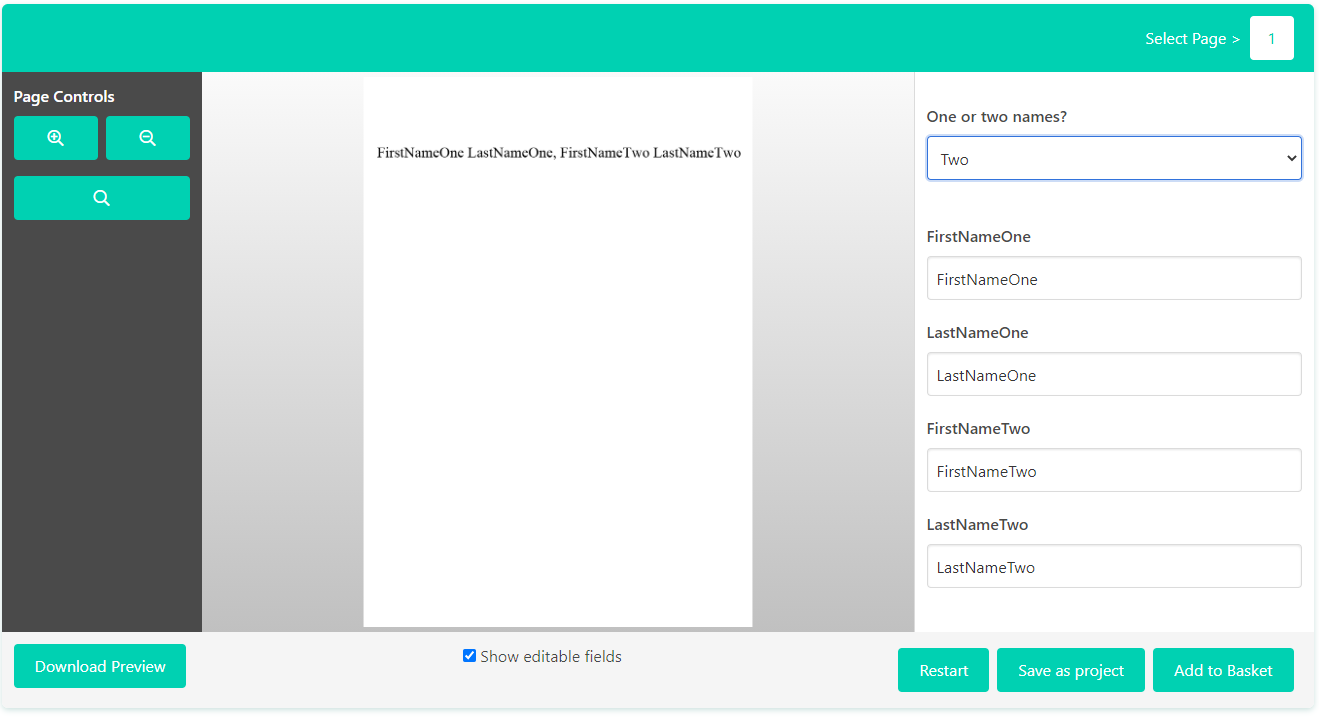
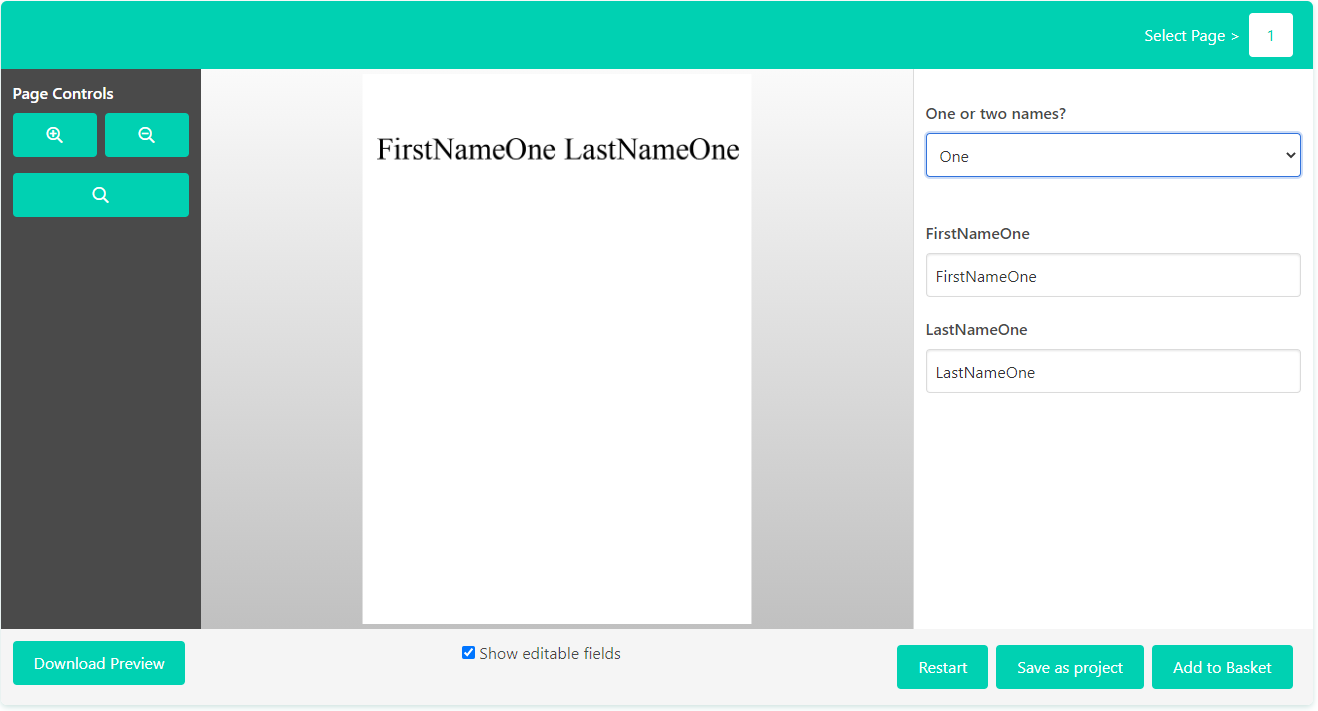
As you can see, if you select "One" then only the first person's name fields are shown:
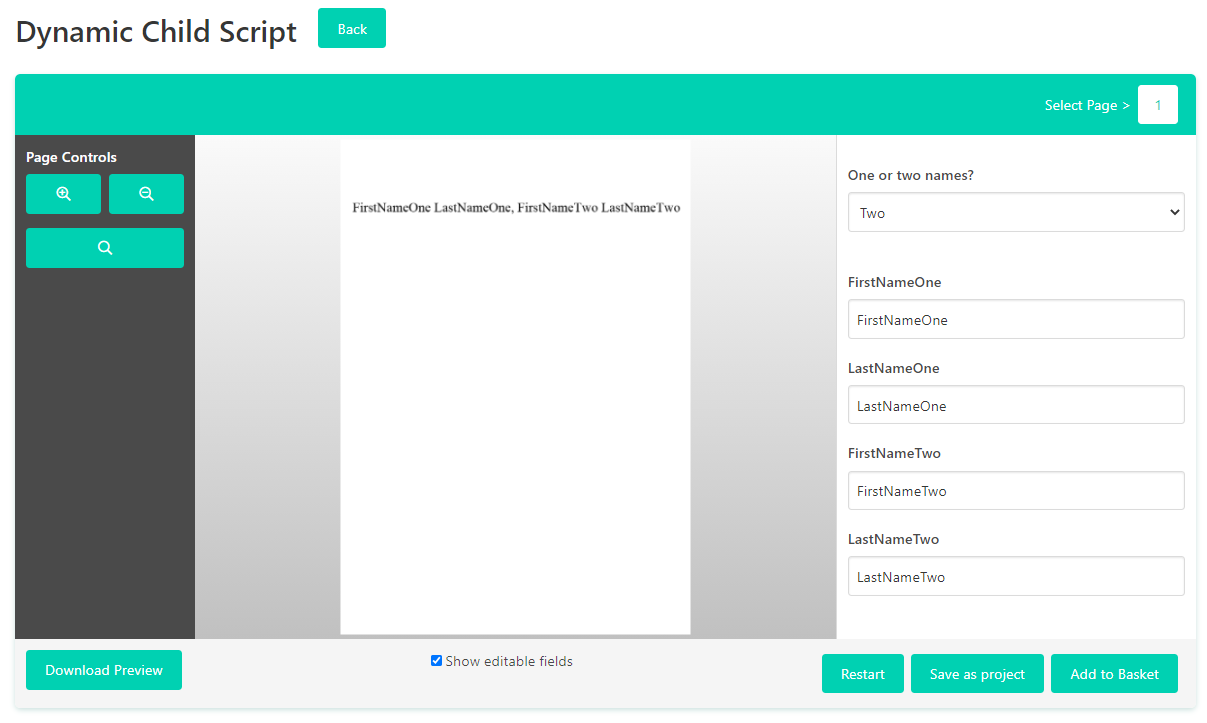
Whereas if you select "Two", then both the first and the second person's name fields are shown:
Clearing the second name
As you will have seen in the previous section, the dynamic child script only removes the fields from the form, it does not hide the actual content of the fields.
Therefore, if you want the hidden fields' text to also disappear, you will need to use the Javascript Wizard to empty the fields when they are hidden.
To do this, follow the steps below.
Create the condition
First, you'll need to create the condition or "IF statement", which is simply just telling the code to check if something is true or not. If it is, the code will go down the "If" path, if it is not true, then it will go down the "else" path.
It helps to visualise the condition like a sentence: "If this is true, then do this, else, do that".
To create the condition you need for this article, follow the steps below:
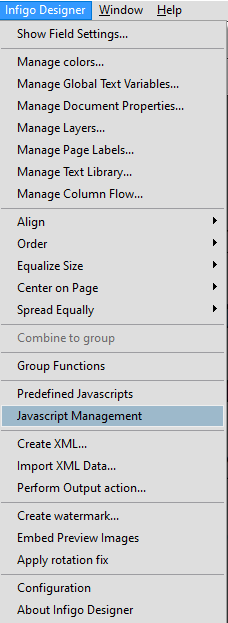
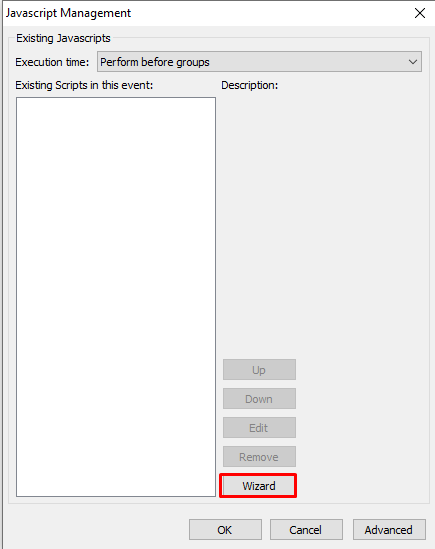
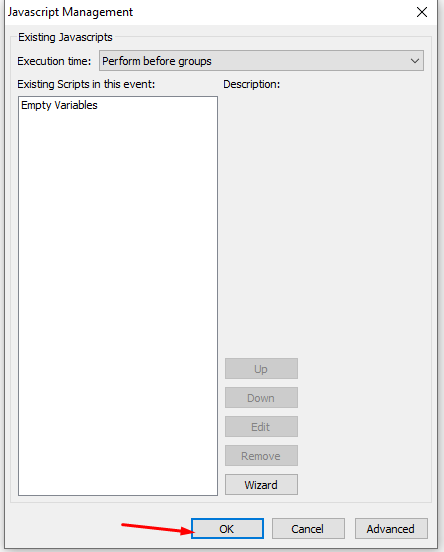
- Navigate to Infigo Designer -> Javascript Management
- Click "Wizard"
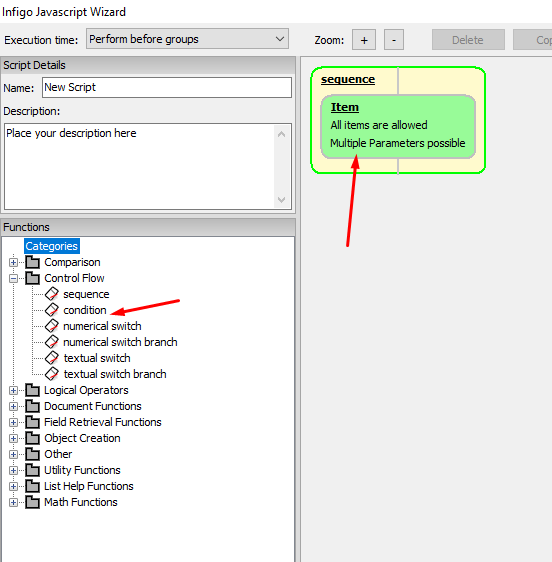
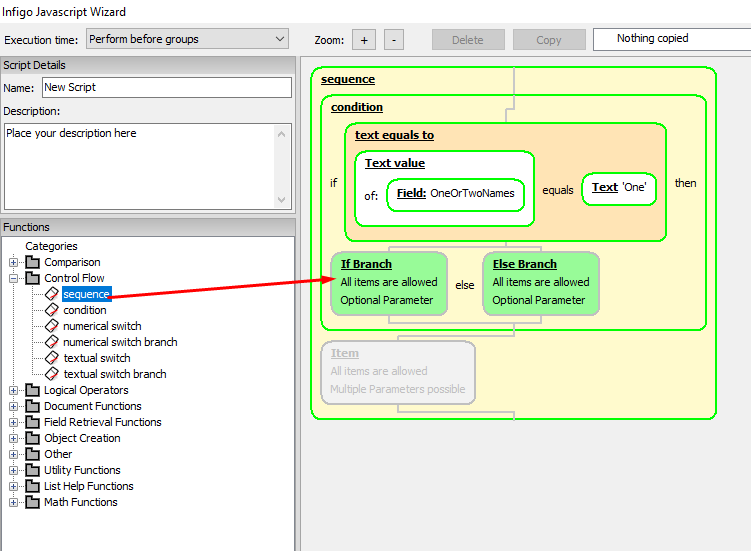
- Drag the "Condition" function to the empty "Item" section
- Drag the "Text equals to" comparison to the empty "Test" section
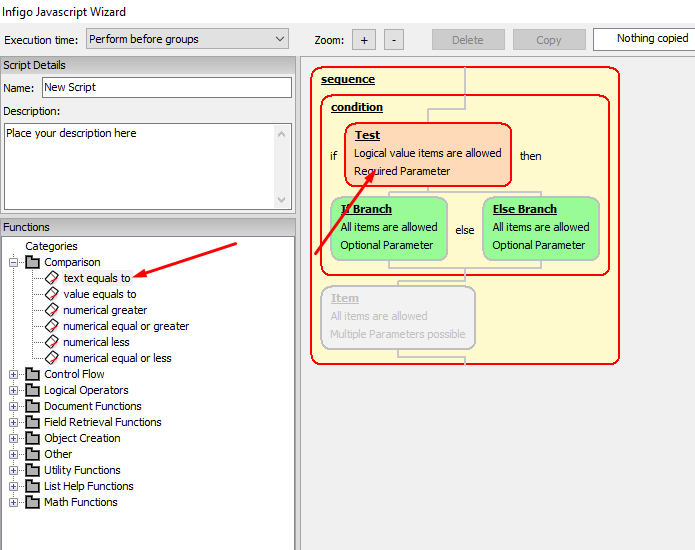
- This script is now going to be testing whether text A is equal to text B. You can use this to see if the text the user selected from the dropdown is equal to the text you manually enter. In other words, if you set text B to "One", then it will compare text A to the word "One".
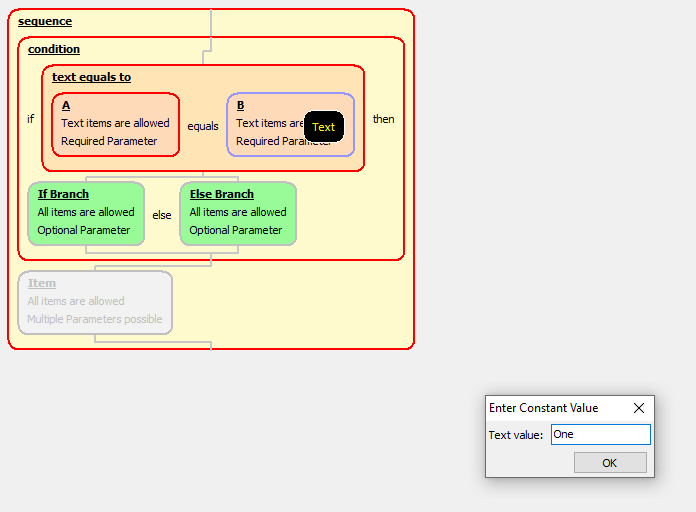
You can set B by hovering over it, then clicking the "Text" popup
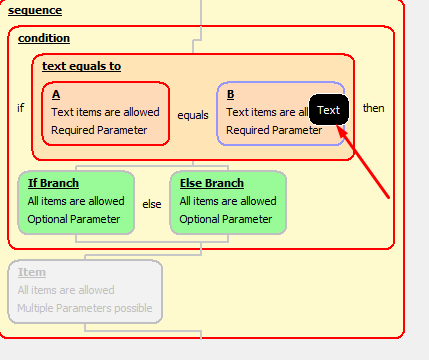
- Enter the text you're checking against - "One" in this case - then click "OK"
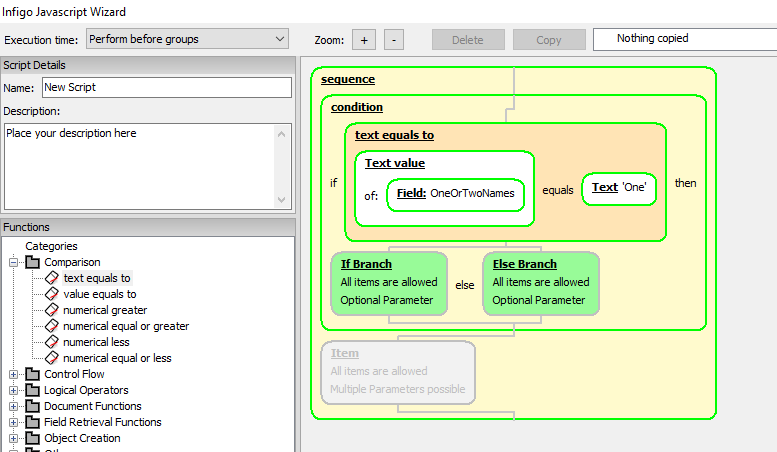
- In the field list on the right, expand the field you're using as a dropdown - "OneOrTwoNames" in this case, then go to "Get... -> text value:" and drag "Text value" to A as highlighted below:
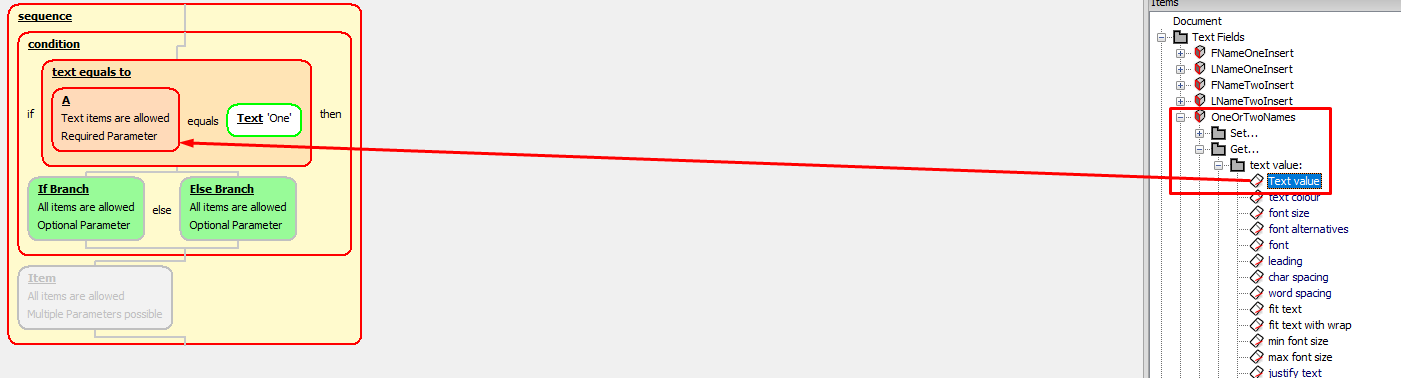
- The steps above will have created your condition, and it should look something like this:
Empty the text fields
Now that the condition is set up, you can tell the script what you want to do if the comparison is true; if the user has chosen "One" from the dropdown.
To do this, you will need to drag your logic down the "If Branch" since, as explained earlier in this article, this branch of code will run "If" the comparison is true.
The steps below will take you through the rest of the script:
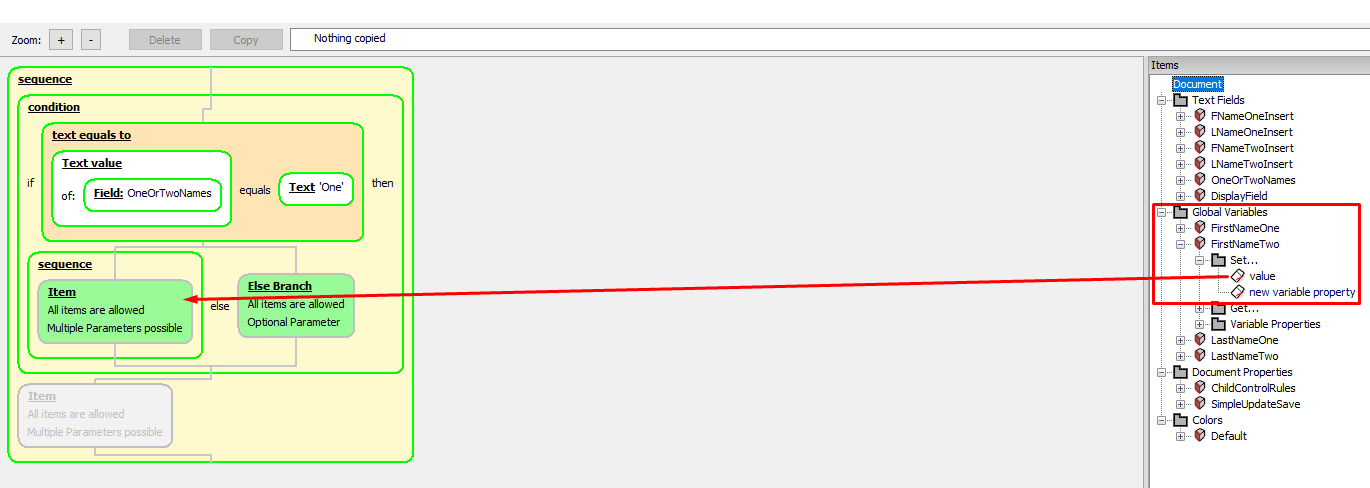
- Since you want to remove the text for multiple variables (both "FirstNameTwo" and "LastNameTwo"), you need the "If Branch" to contain a sequence of events - changing the first variable, and then changing the second one.
To do this, drag the "Sequence" function from the "Control Flow" category into the "If Branch":
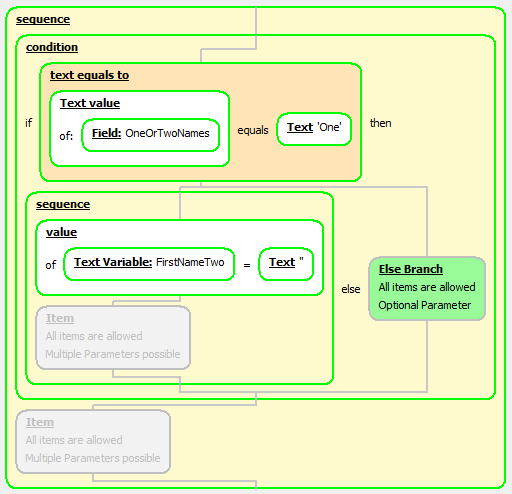
This will allow you to add as many events/items to the "If Branch" as you would like. - In the global variable list on the right, below the field list, expand the folders "FirstNameTwo -> Set..." and drag "value" to the first empty "Item" section of the sequence created in the previous step
- From the "General Contents" area in the bottom left, drag "Text" into the new "value" section that was just created:
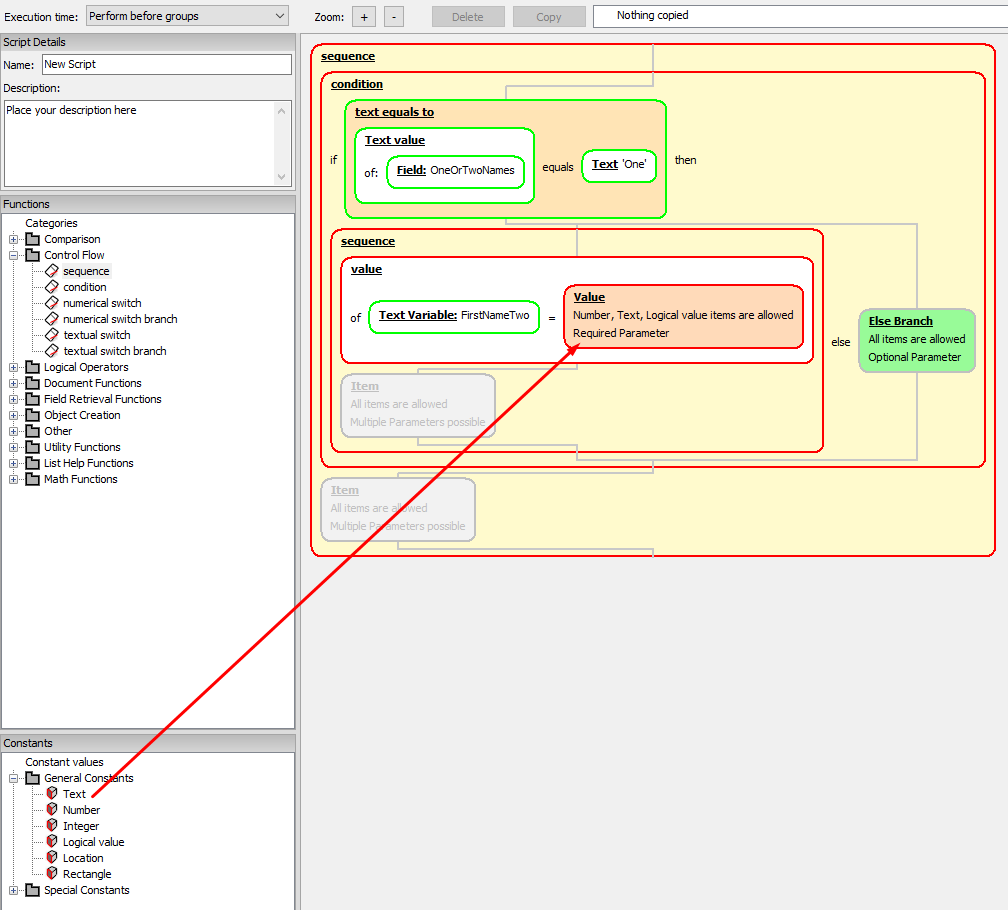
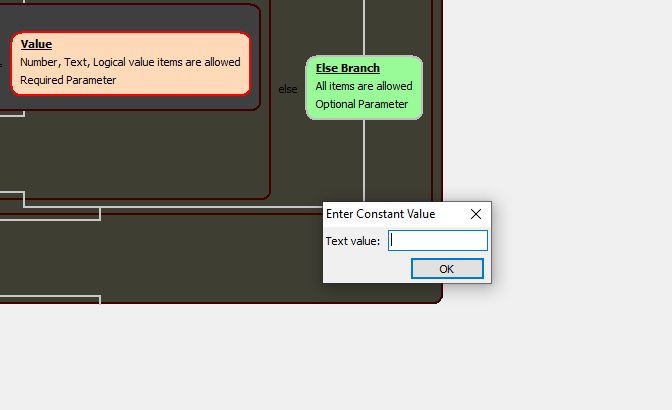
- Since you are wanting to set the variable to be empty, simply don't enter anything in the popup box, then click "OK"
- If you have followed the steps above, the script should now look something like this:
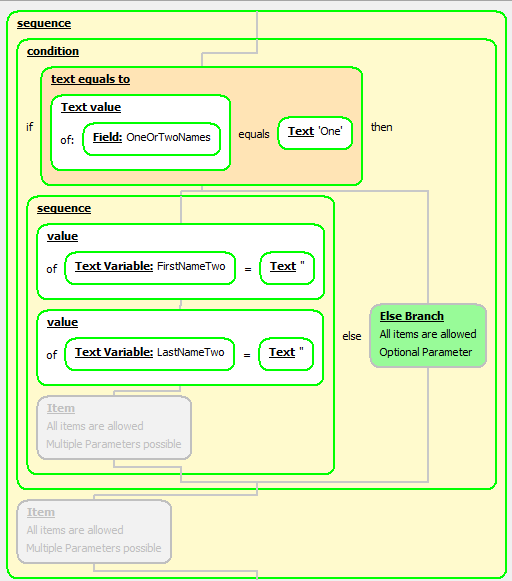
By reading the text, you can follow the logic that "If the text value of the field OneOrTwoNames equals 'One', then follow the sequence 'set the value of the text variable 'FirstNameTwo' to equal '' " - Now that the first variable is being set to be '', follow steps 2 -> 4 for the other variable, "LastNameTwo". Once completed, your script should look like this:
- Lastly, you should give your script a name and description. This will help you identify what the script is and what it does. This is really for your benefit, so enter whatever makes the most sense to you.
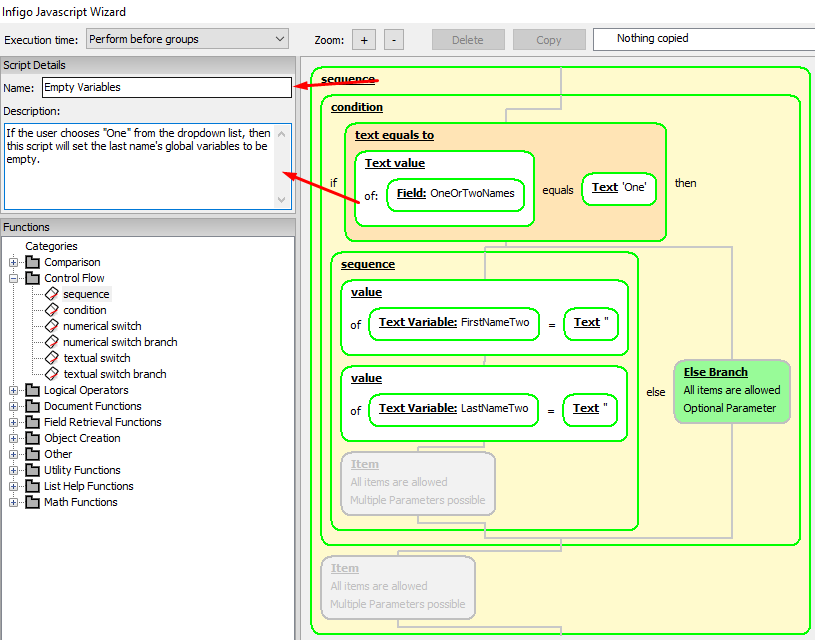
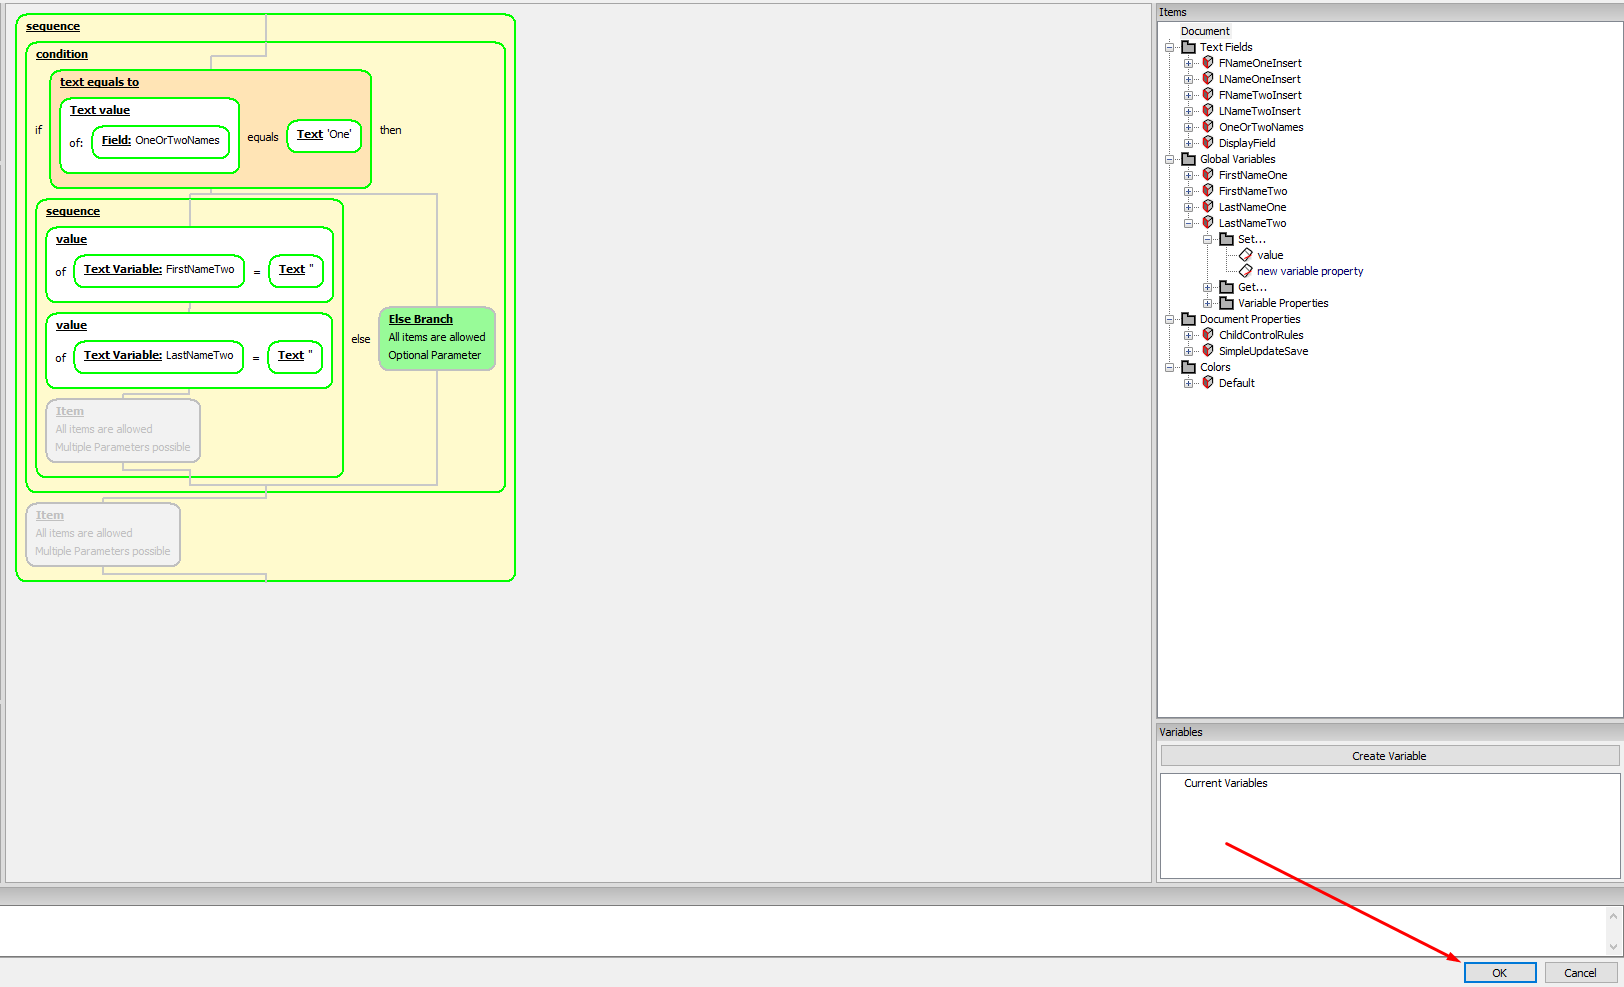
- Click "OK" in the bottom right corner, "OK" again in the popup that appears, then save and upload your template
Final Product
With everything in this article completed, your users should be able to choose one or two names, with the second name's fields hiding or showing both in the form and on the artwork depending on which choice they make:
The template used in this article has been attached to this ticket and can either be downloaded below, or by clicking here.