Prerequisite - Elastic Search URL
Before you can use Custom Data, please raise a support ticket to the Helpdesk requesting for the Elastic Search URL to be enabled on your storefront.
Using Custom Data
Custom Data allows customers to search from a list of predefined records which then populate data into the products via the field data. This is uploaded through a CSV and applied individually to products. The availability of the records can be limited to a Department and upload modes can be Batch, Single or both.
Setting up Custom Data
1. Create your CSV file, the mapping is absolute which means column headings used have to match the fields on the variable product for the data to map from the CSV to the right field.
2. Navigate to Configuration > Resources > Custom Data. Press Add new record to setup your custom data category. Once you have the name setup, press Insert.

3. Once this has been saved press Manage to be taken to the upload screen. Here you can select a department to assign the data to. Only users within the department will have access to the data.
4. Upload your CSV file here
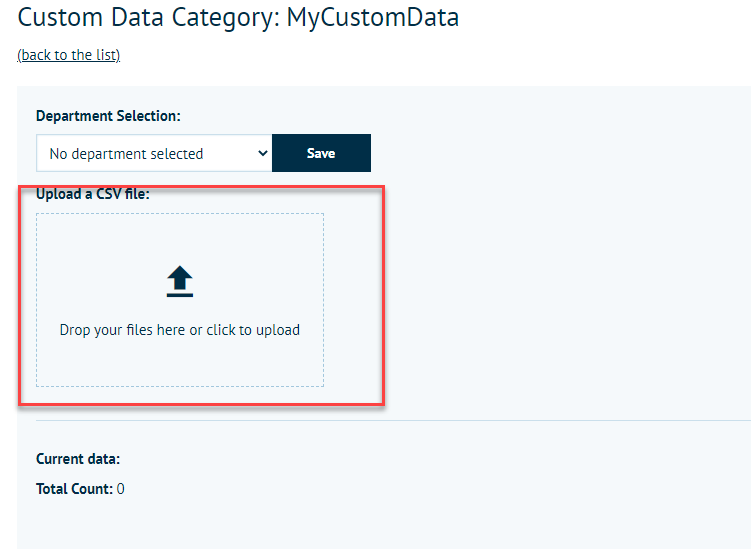
After you upload your CSV, a pop-up dialog will confirm the number of records that have been uploaded. Then, you will see your data below, if you have more than 10 records the data will show in pages of 10.
5. Now, you must assign the custom data to your Infigo Product. Navigate to Catalog > Product Types > Infigo Editor > Infigo Products and press Edit against the product you want to assign the custom data.
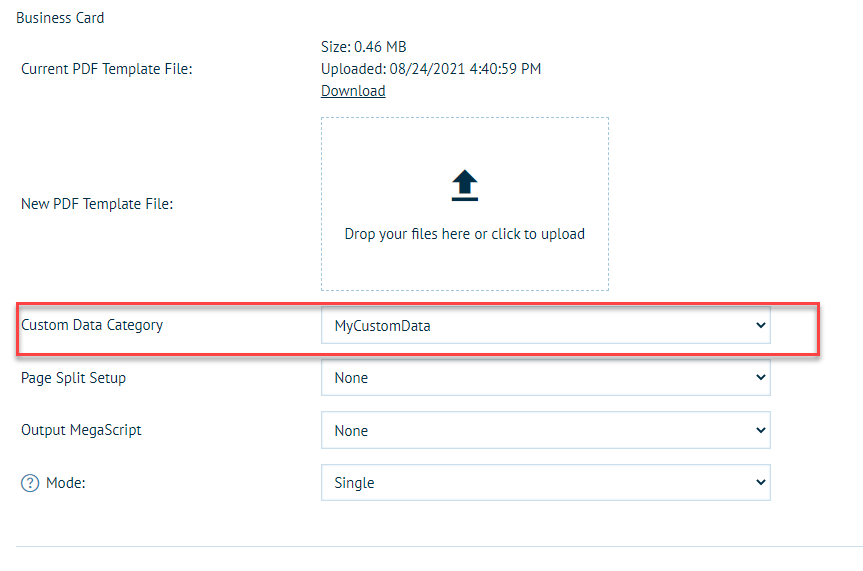
6. Under the Infigo Product Info tab, on Custom Data Category, select the custom data category you want to map. Save the product.
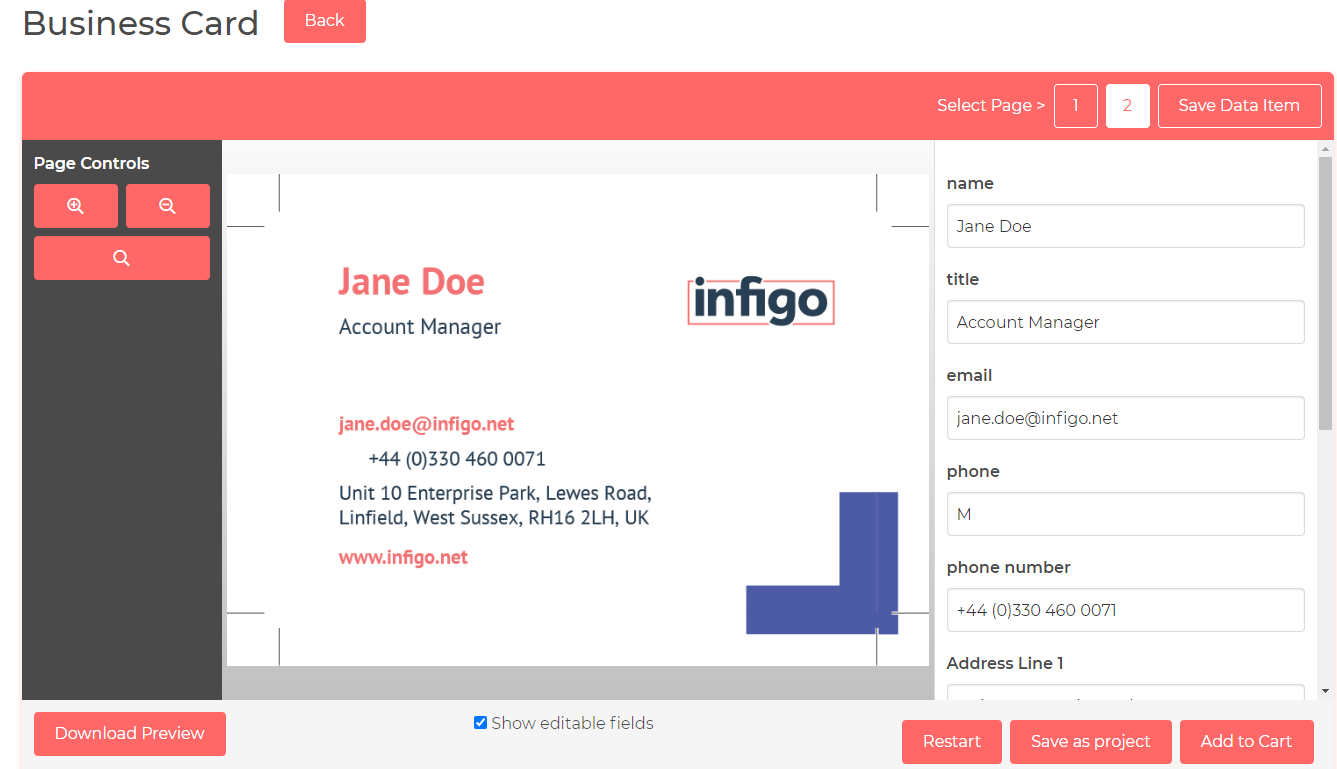
7. Save your configuration and then go to the product landing page on your storefront to test further.
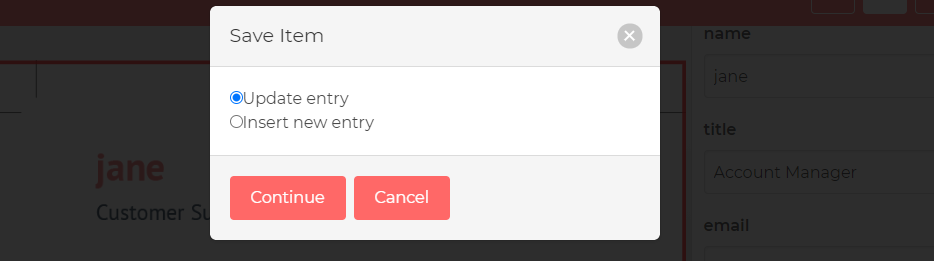
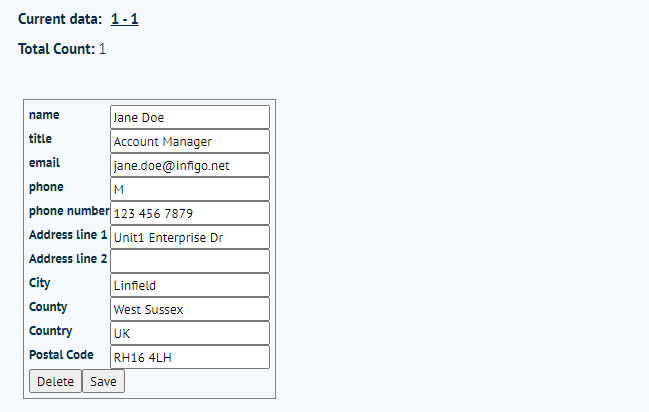
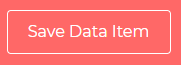
Open the product in the editor and if you can see the 'Save Data Item' button then that confirms the Custom Data is functioning.
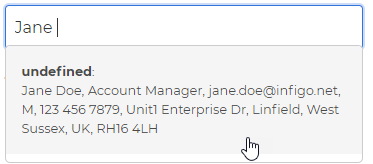
Test further by searching in fields for records

You can save new records or update existing ones in the editor by loading a record, making a change in a field and clicking the 'Save Data Item' button which will open the 'Save Item' dialog box shown below. Whether you save as a new entry or update the existing one your browser will throw another dialog box to confirm the action has been completed. Changes made will then populate into the Custom Data Category.