This article will talk you through all of the features that are supported by Infigo out the box around managing stock and inventory from low stock notifications, displaying stock counts to allowing back orders.
Setting up your Stock Management
The setup of the Stock and Inventory settings is done on each product individually. If you navigate to the product variant you will find the section below where the default method of managing the inventory is set to 'Don't track inventory' - so by default it is disabled.
To enable it on a product simply change this setting to one of two:
1. Track Inventory
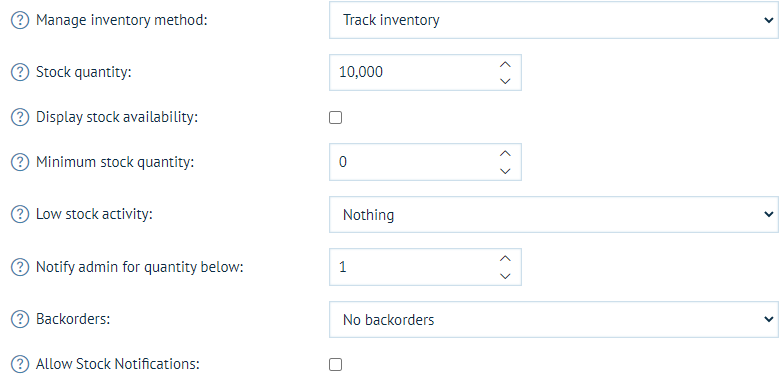
Upon the selection; you will have the following options available:
- Stock quantity: You can define the available quantity in the stock.
- Display stock availability: Enabling this option allows you to show to end users whether or not their is stock availability or not - this translate to a simple message being shown to let them know its either in or out of stock.
- Display stock quantity: If “Display Stock Availability” is checked, a new option "Display stock quantity" is then provided that allows you to determine whether or not you display the quantity of the remaining stock to the customer.
- Minimum stock quantity: Here you enter in the minimum stock count. This allows you to always keep a reserved amount of stock that you do not want to go under - as soon as the stock count falls below this level you can configure certain actions to be carried out (see low stock activity).
- Low stock activity: This setting allows you to determine what actions should be carried out if you fall below your minimum stock quantity.
- Nothing: Customers can still order the product
- Disable buy button: This will keep the product active and searchable but it will be not available to order.
- Un-publish: By setting this you are asking Infigo to automatically remove this product from the catalogue so it is no longer visible or searchable to your end users.
- Notify admin for quantity below: By enabling this option storefront owners can also get notified about the quantity of the product *
- Backorders
- No backorders - When stock is gone or if the customer is trying to purchase more than are in stock the system will not allow it.
- Allow quantity below 0: Customers can place orders
- Allow quantity below 0 and notify customer: Customers can place orders but will also get notified
- Allow stock notification: If the stock gets refilled by the storefront administrator, customers who are trying to order the product will also receive a notification from the storefront. **
2. Track inventory by product attributes
This method allows you to utilise our concept of Attribute combinations. So rather than setting inventory and stock counts against a single product in Infigo, you can create attributes against that product and then based on combinations of those attribute assign stock codes to them.
For example:
I have a t-shirt product in Infigo, but in the warehouse and what I actually want to offer to the customer is a number of different sizes and colours of that t-shirt. Instead of creating a separate product in Infigo for each of your different sizes and colours you can create one t-shirt product and then one attribute called 'Size' and one attribute called 'Colour' and then have your S, M, L values assigned to the size and your 'Red', 'White', 'Black' values assigned to your colour.
Then you can create a number of attribute combinations, each essentially creating the different stock items you hold.
Product: t-shirt
Attributes: Colour (Red, White, Black), Size (S, M, L)
Attribute Combinations:
Colour: Red, Size: S
Colour: Red, Size: M
Colour: Red, Size: L
Colour: White, Size: S
And so on.
For each of these combinations, in the same way you can setup a separate SKU for each, you can also setup a separate stock count. Only when that specific combination is ordered will it deduct stock from each of them. So its a little more involved to management and setup, but offers you the flexibility and control without creating lots of products individually.
Updating to your stock levels
In order to add the stock on to products, it's pretty simple.
Navigate to the product variant where you want to change the stock level (Catalogue > Products > Product Management then navigate to the product variant) and then simply change the value of the Stock Quantity (either against the product variant or the attribute combination depending on how you have set it up).
Please note, this process is really a case of updating the stock count and not adding to it. There is no real transaction history of stock being added incrementally, you simply overwrite the stock quantity.
Stock Notifications Configuration
In order to ensure Administrators receiving emails in case the stock is low, ensure the following email templates are enabled.
You can check the message templates under Content Management > Email Message Templates and look for the following templates.
"Quantity Below - store owner"
"Back in stock"
PLEASE NOTE:
Stock levels are set on a storefront level, there is no way to manage stock across multiple storefronts.