It is possible to link a custom barcode field to a form field so an end user can simply add in a value and a barcode will get updated by that data entered.
Enable the barcode field
If not already previously enabled you will need to ask the Helpdesk to enable this on a specific storefront OR at platform level so it is then available on all storefronts current and newly created.
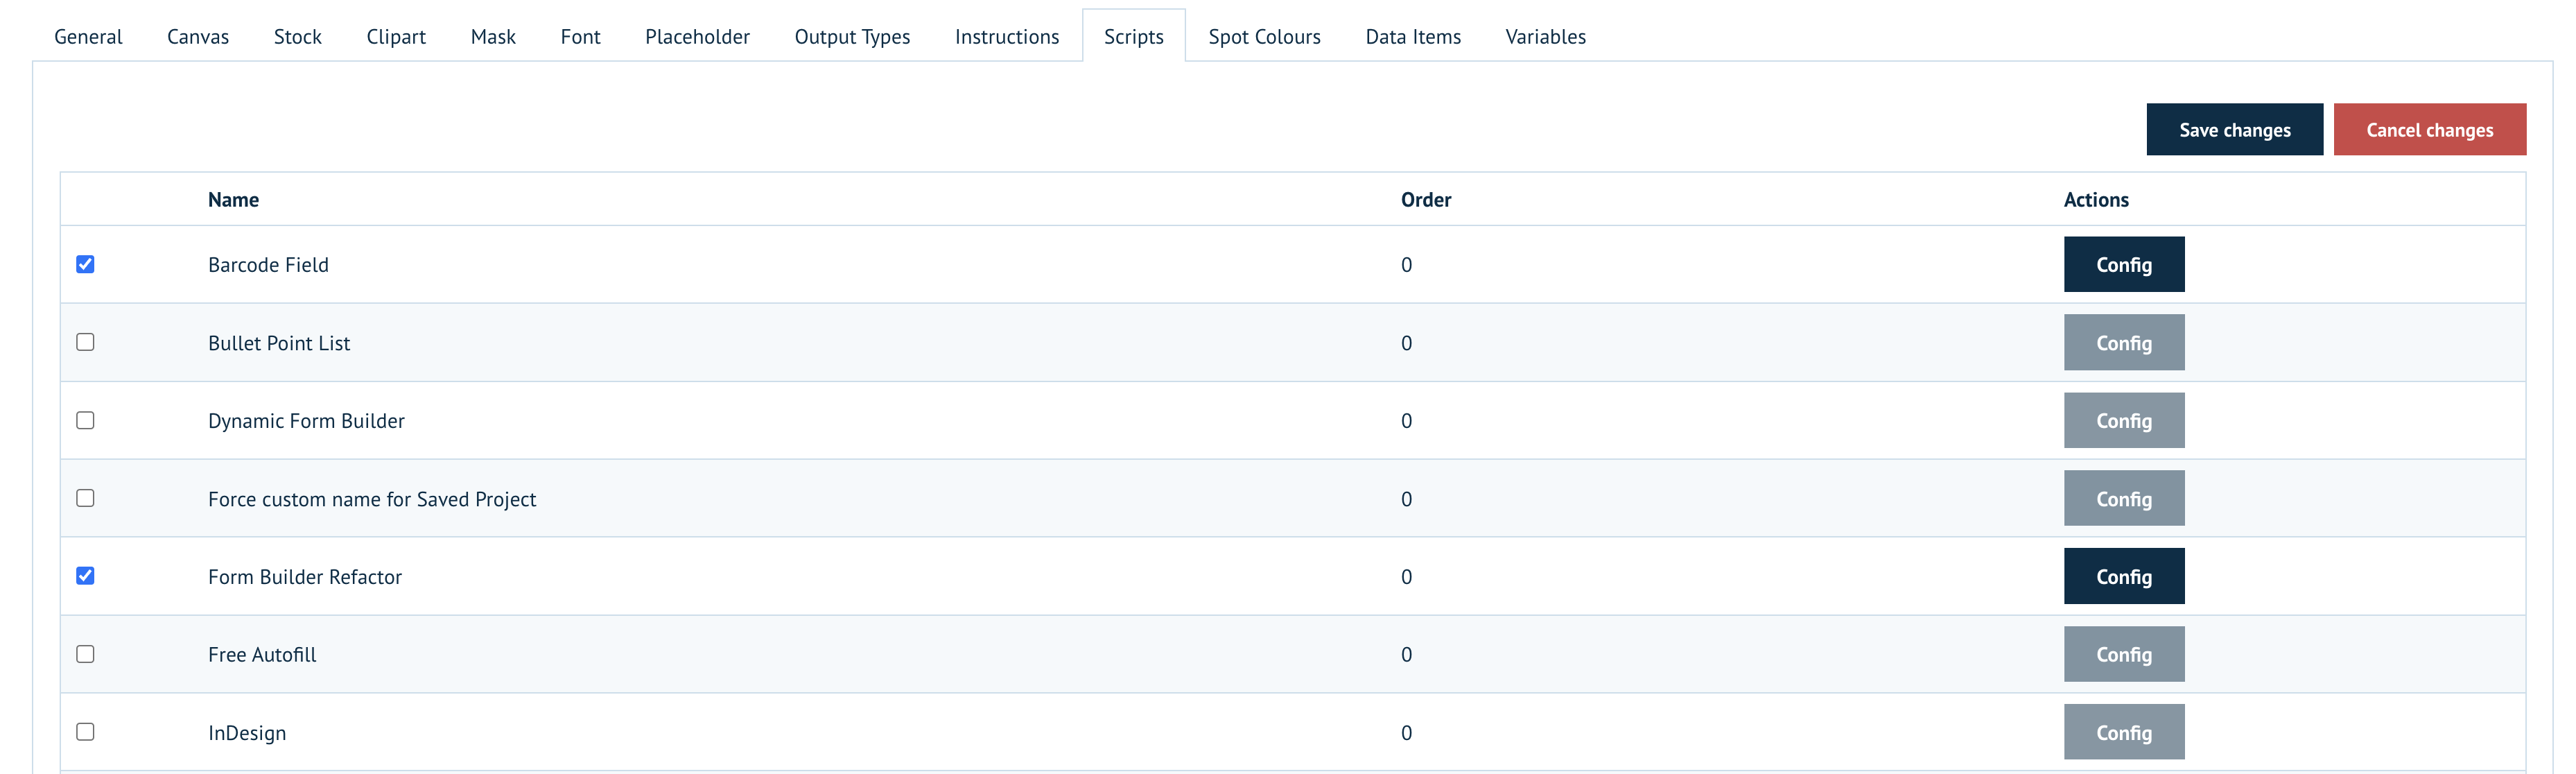
Form Builder Refactored script
If not already on a storefront you will also need this uploaded on a specific storefront OR at platform level so it is then available on all storefronts current and newly created. Again please request this via the Helpdesk.
Once these are enabled you can program the necessary parts to enable this functionality.
Product setup
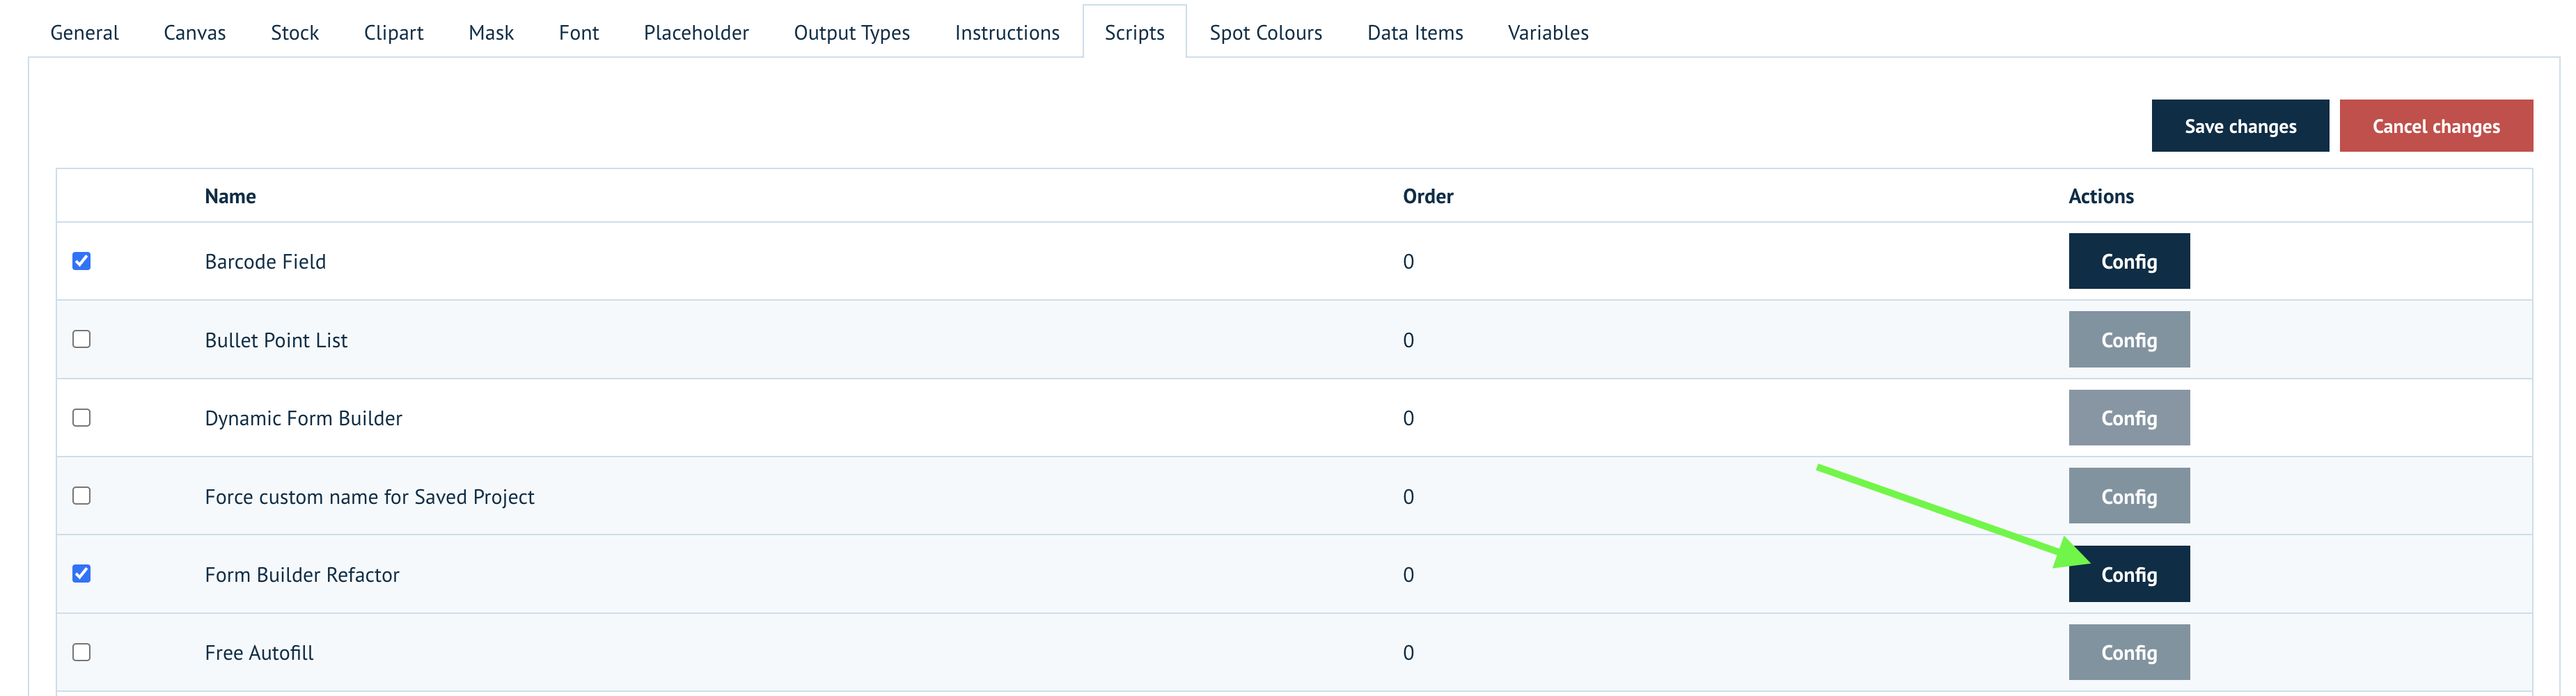
Create a MegaEdit product and go to the MegaEdit product section to apply the 2 scripts.
Now navigate to the editor where you can setup the barcode functionality
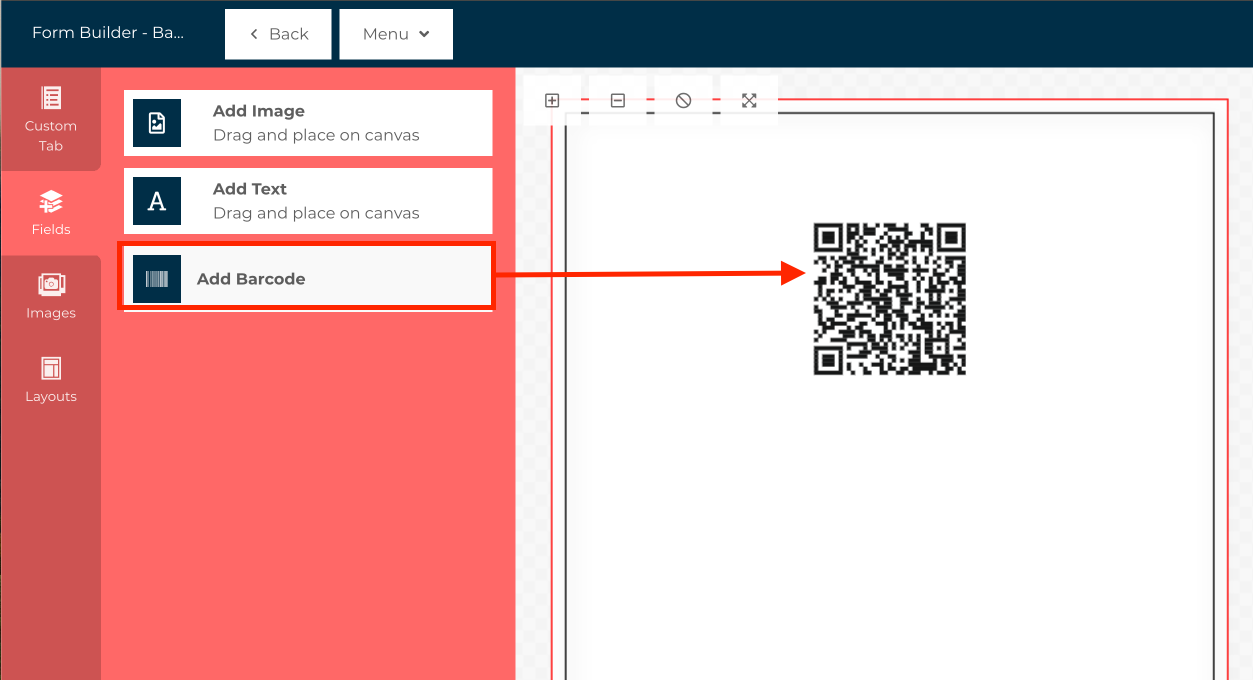
Firstly you need to a barcode field to the canvas
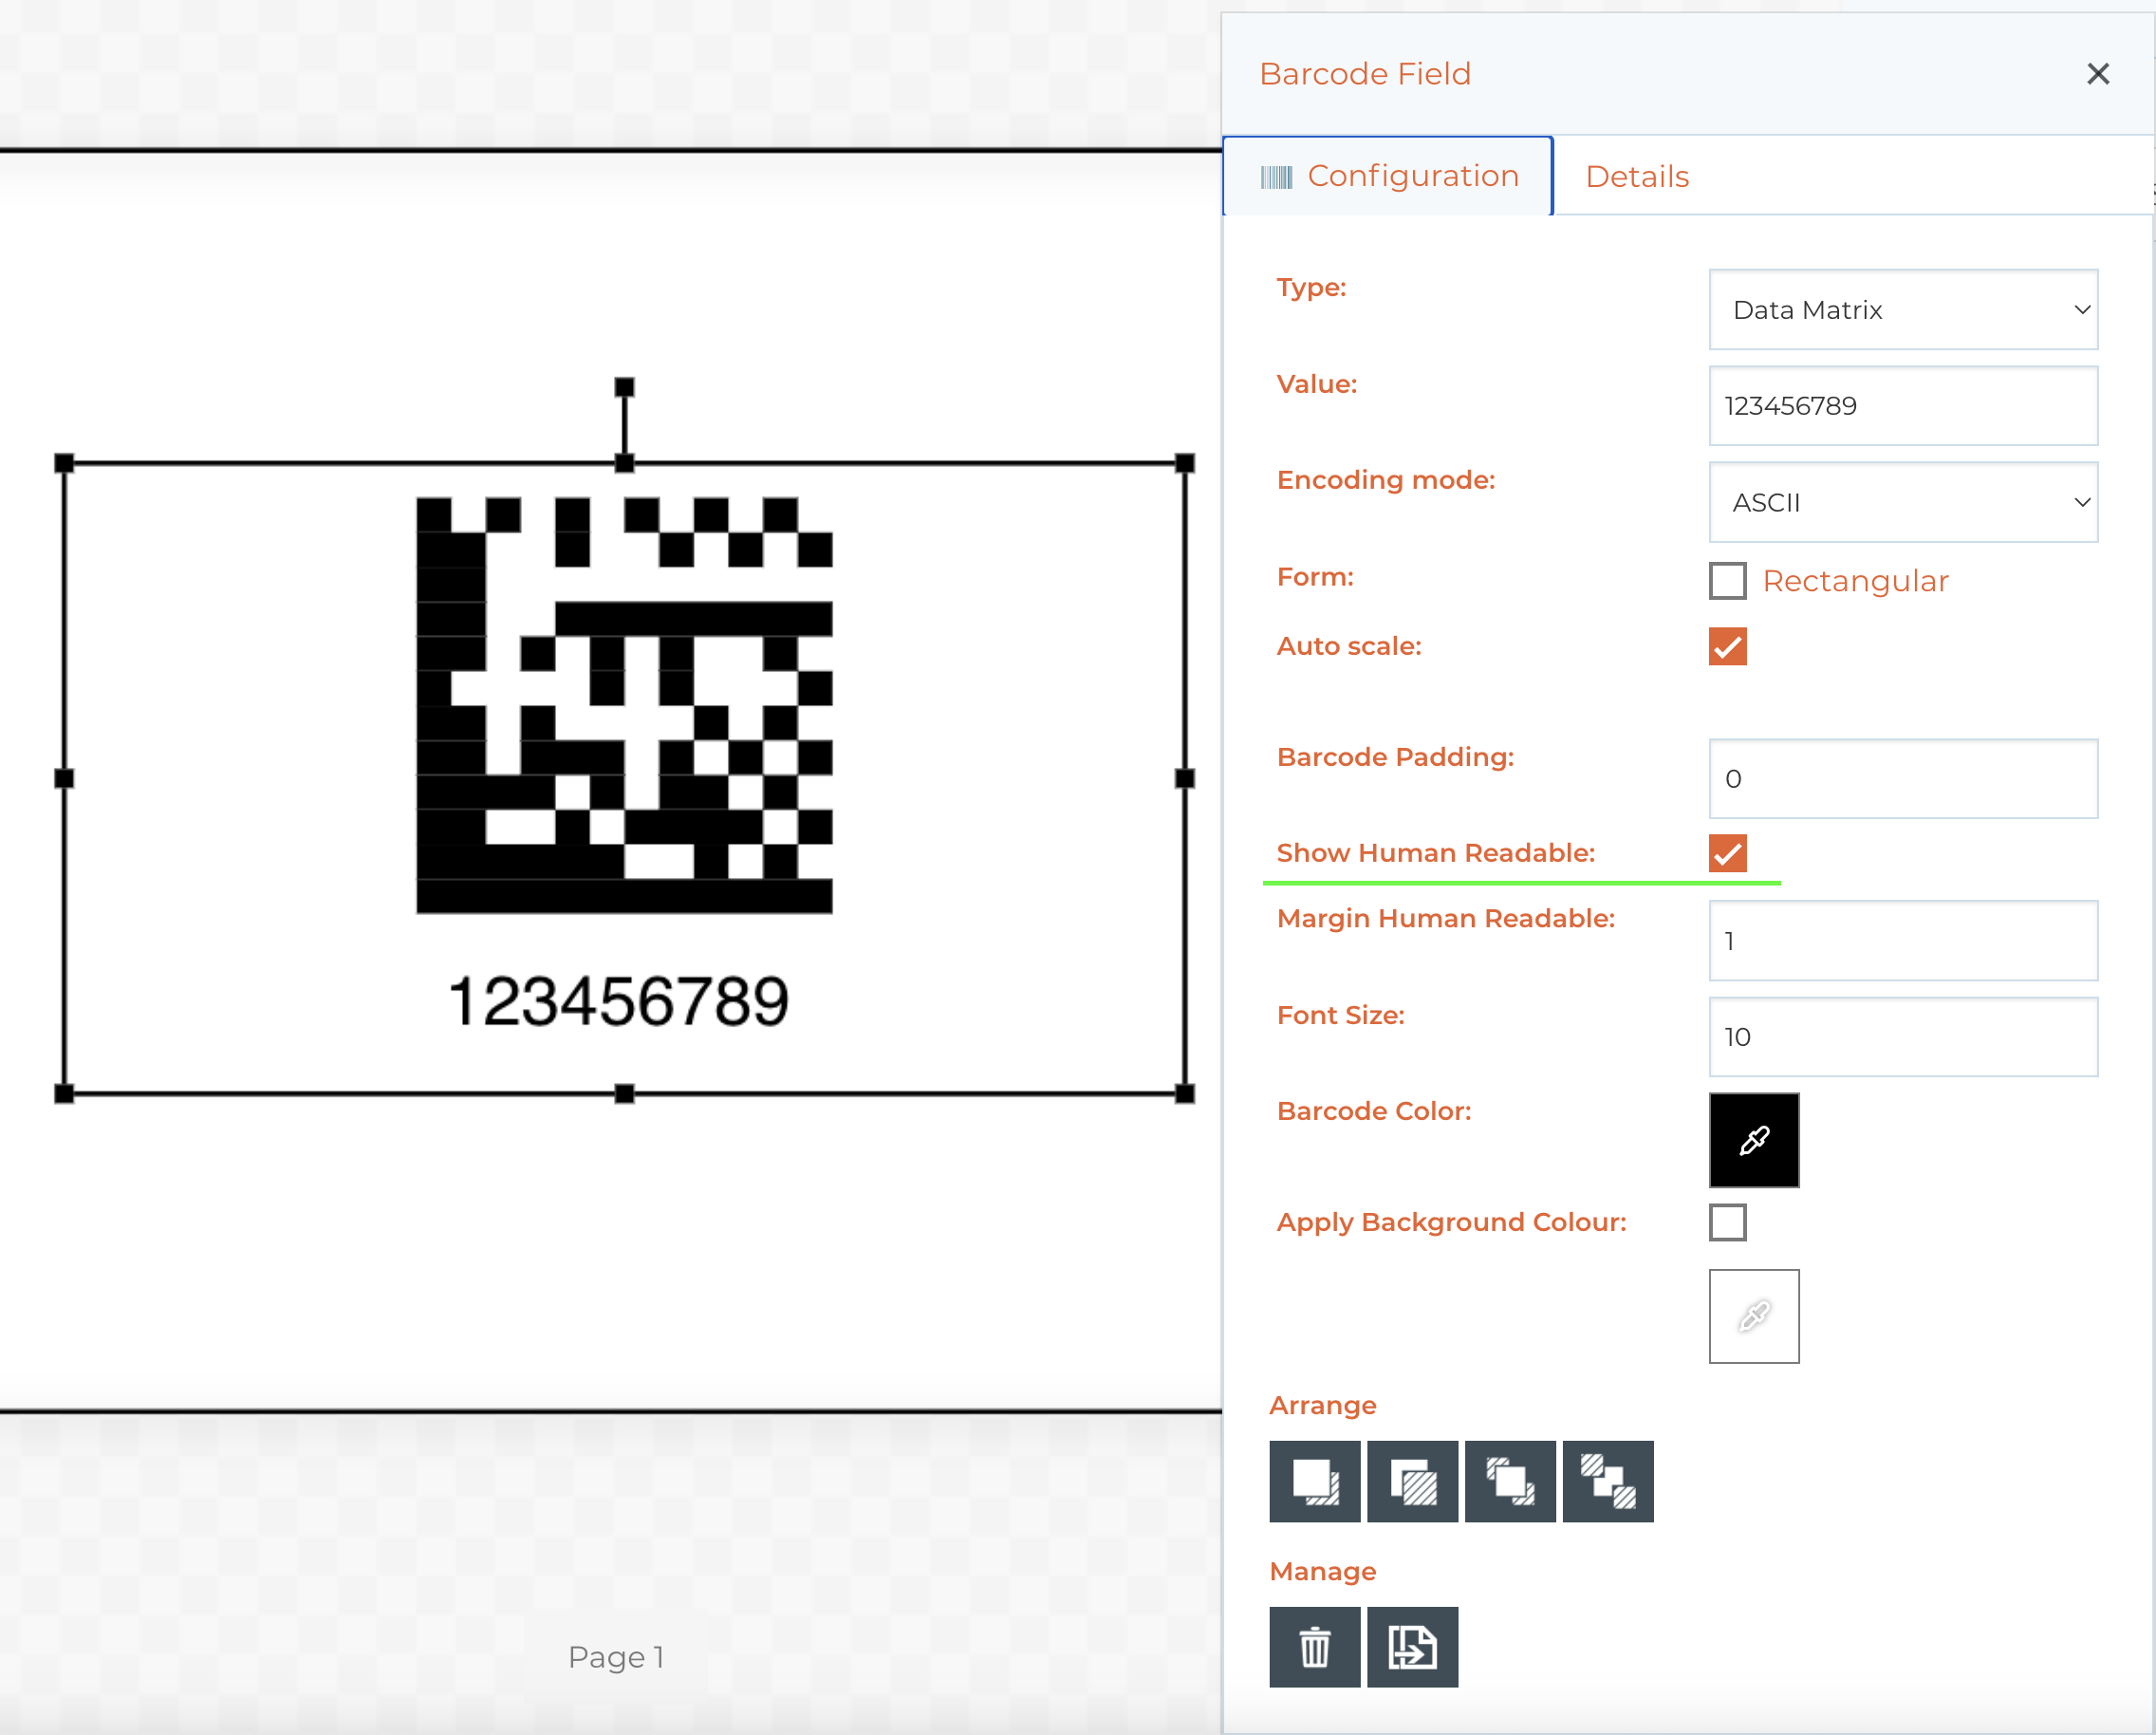
Click the barcode itself and turn off any features like AutoScale or Human readable value options
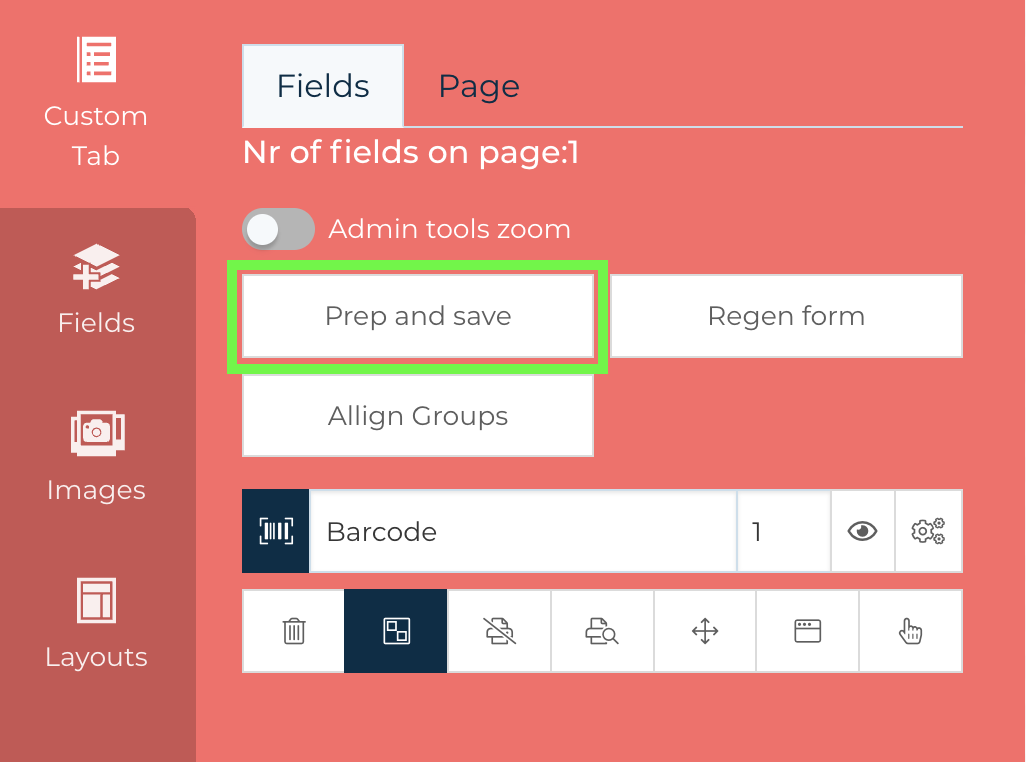
Go to the Custom tab (which you will need to 'Form Builder Refractured' script to see) to set the rest of the features for the field.
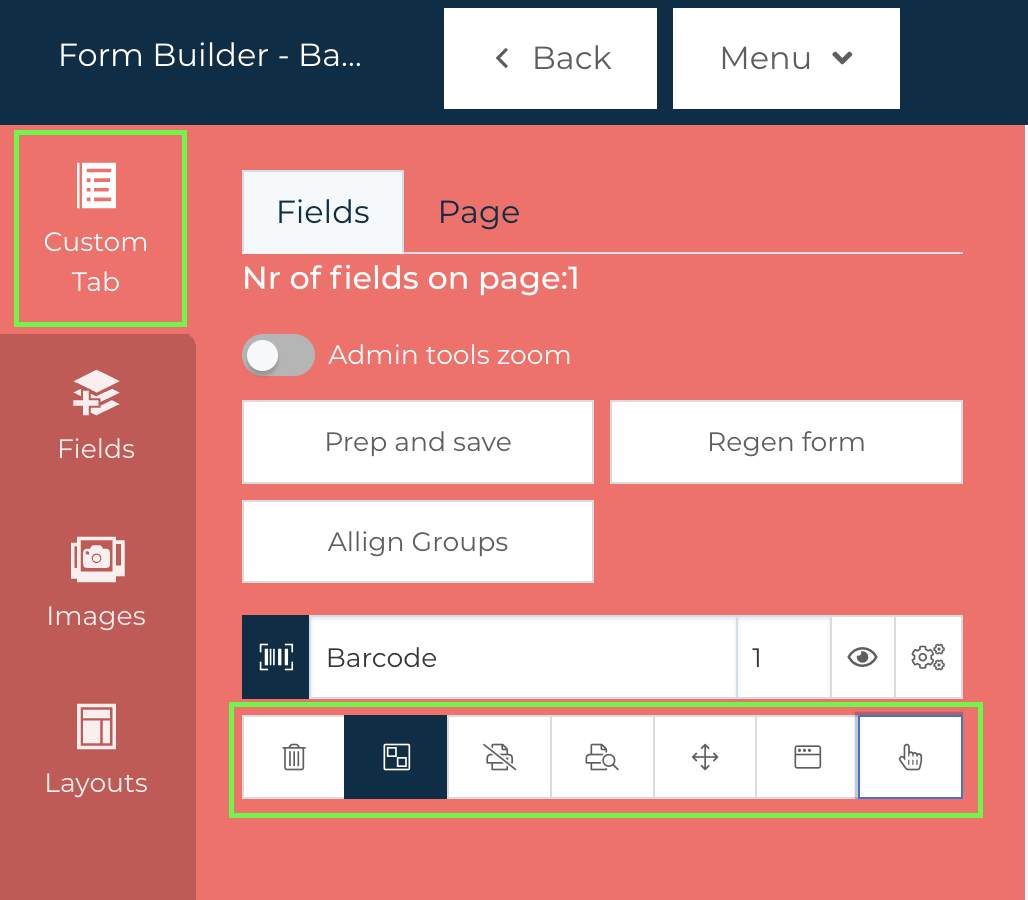
The area marked out in green control field elements like Allow selection, do not delete and do not print to name a few, in general most clients wish to lock the field down entirely and just allow the end user to add a value in the form field. These marked icons control this behaviour.
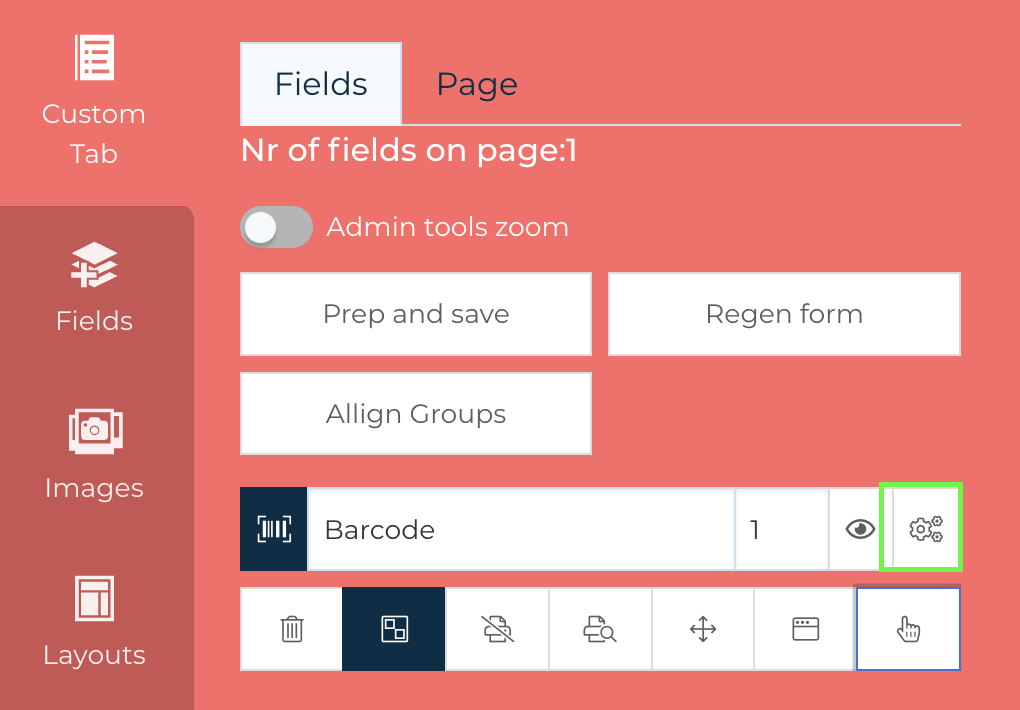
Once that has been set you need to click the cog icon to set the Barcode field as a field entry.
From here you can set the barcode field to allow a form input on the right-hand side but turn on the "Barcode field" switch
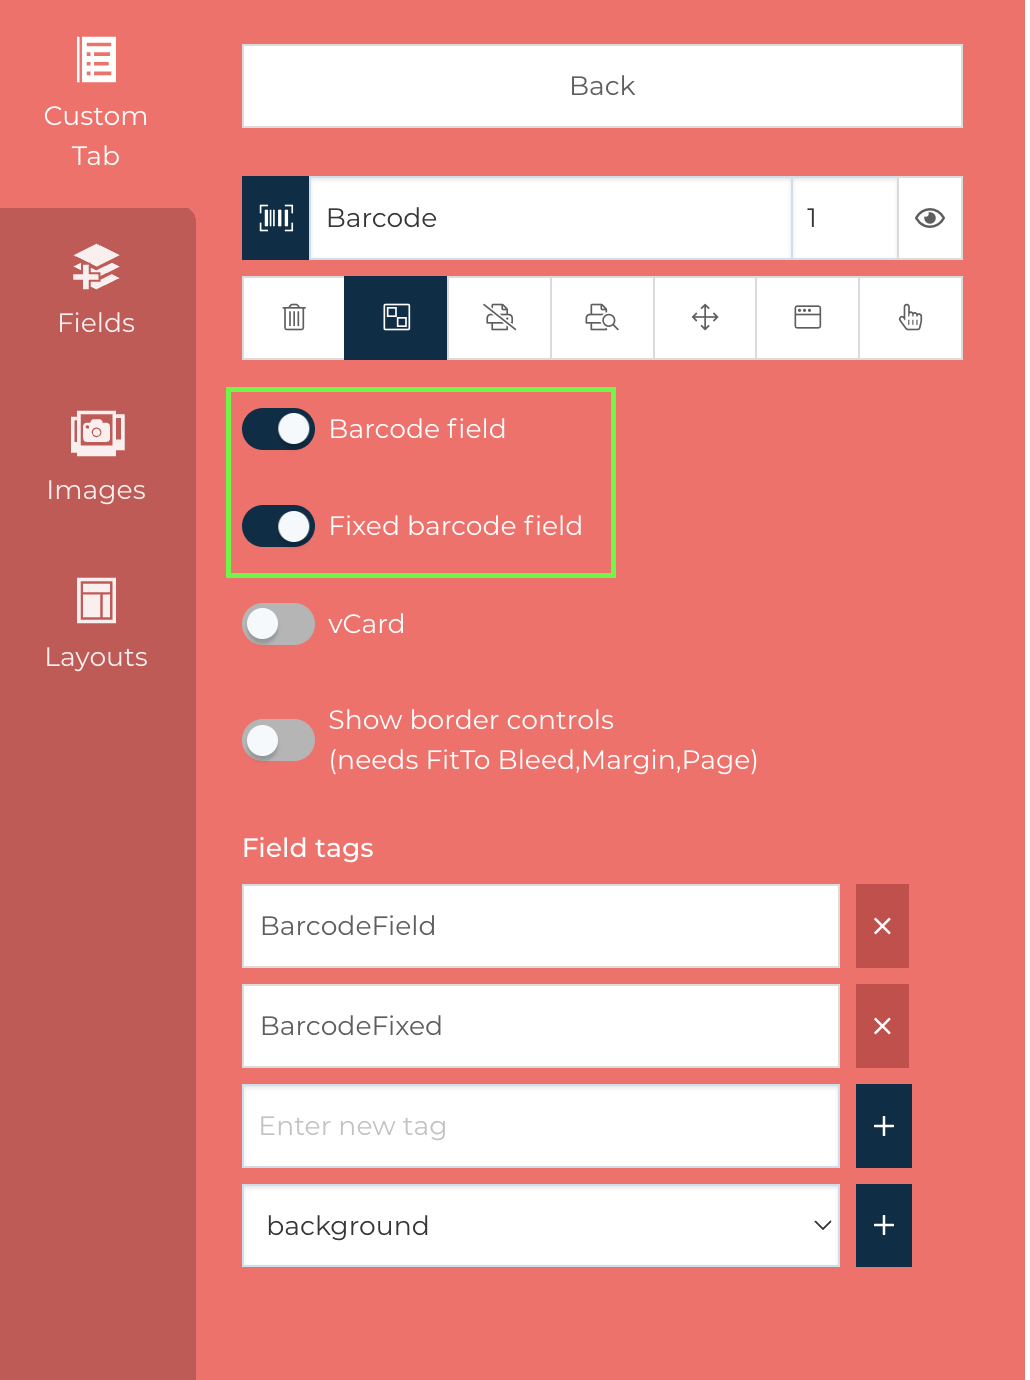
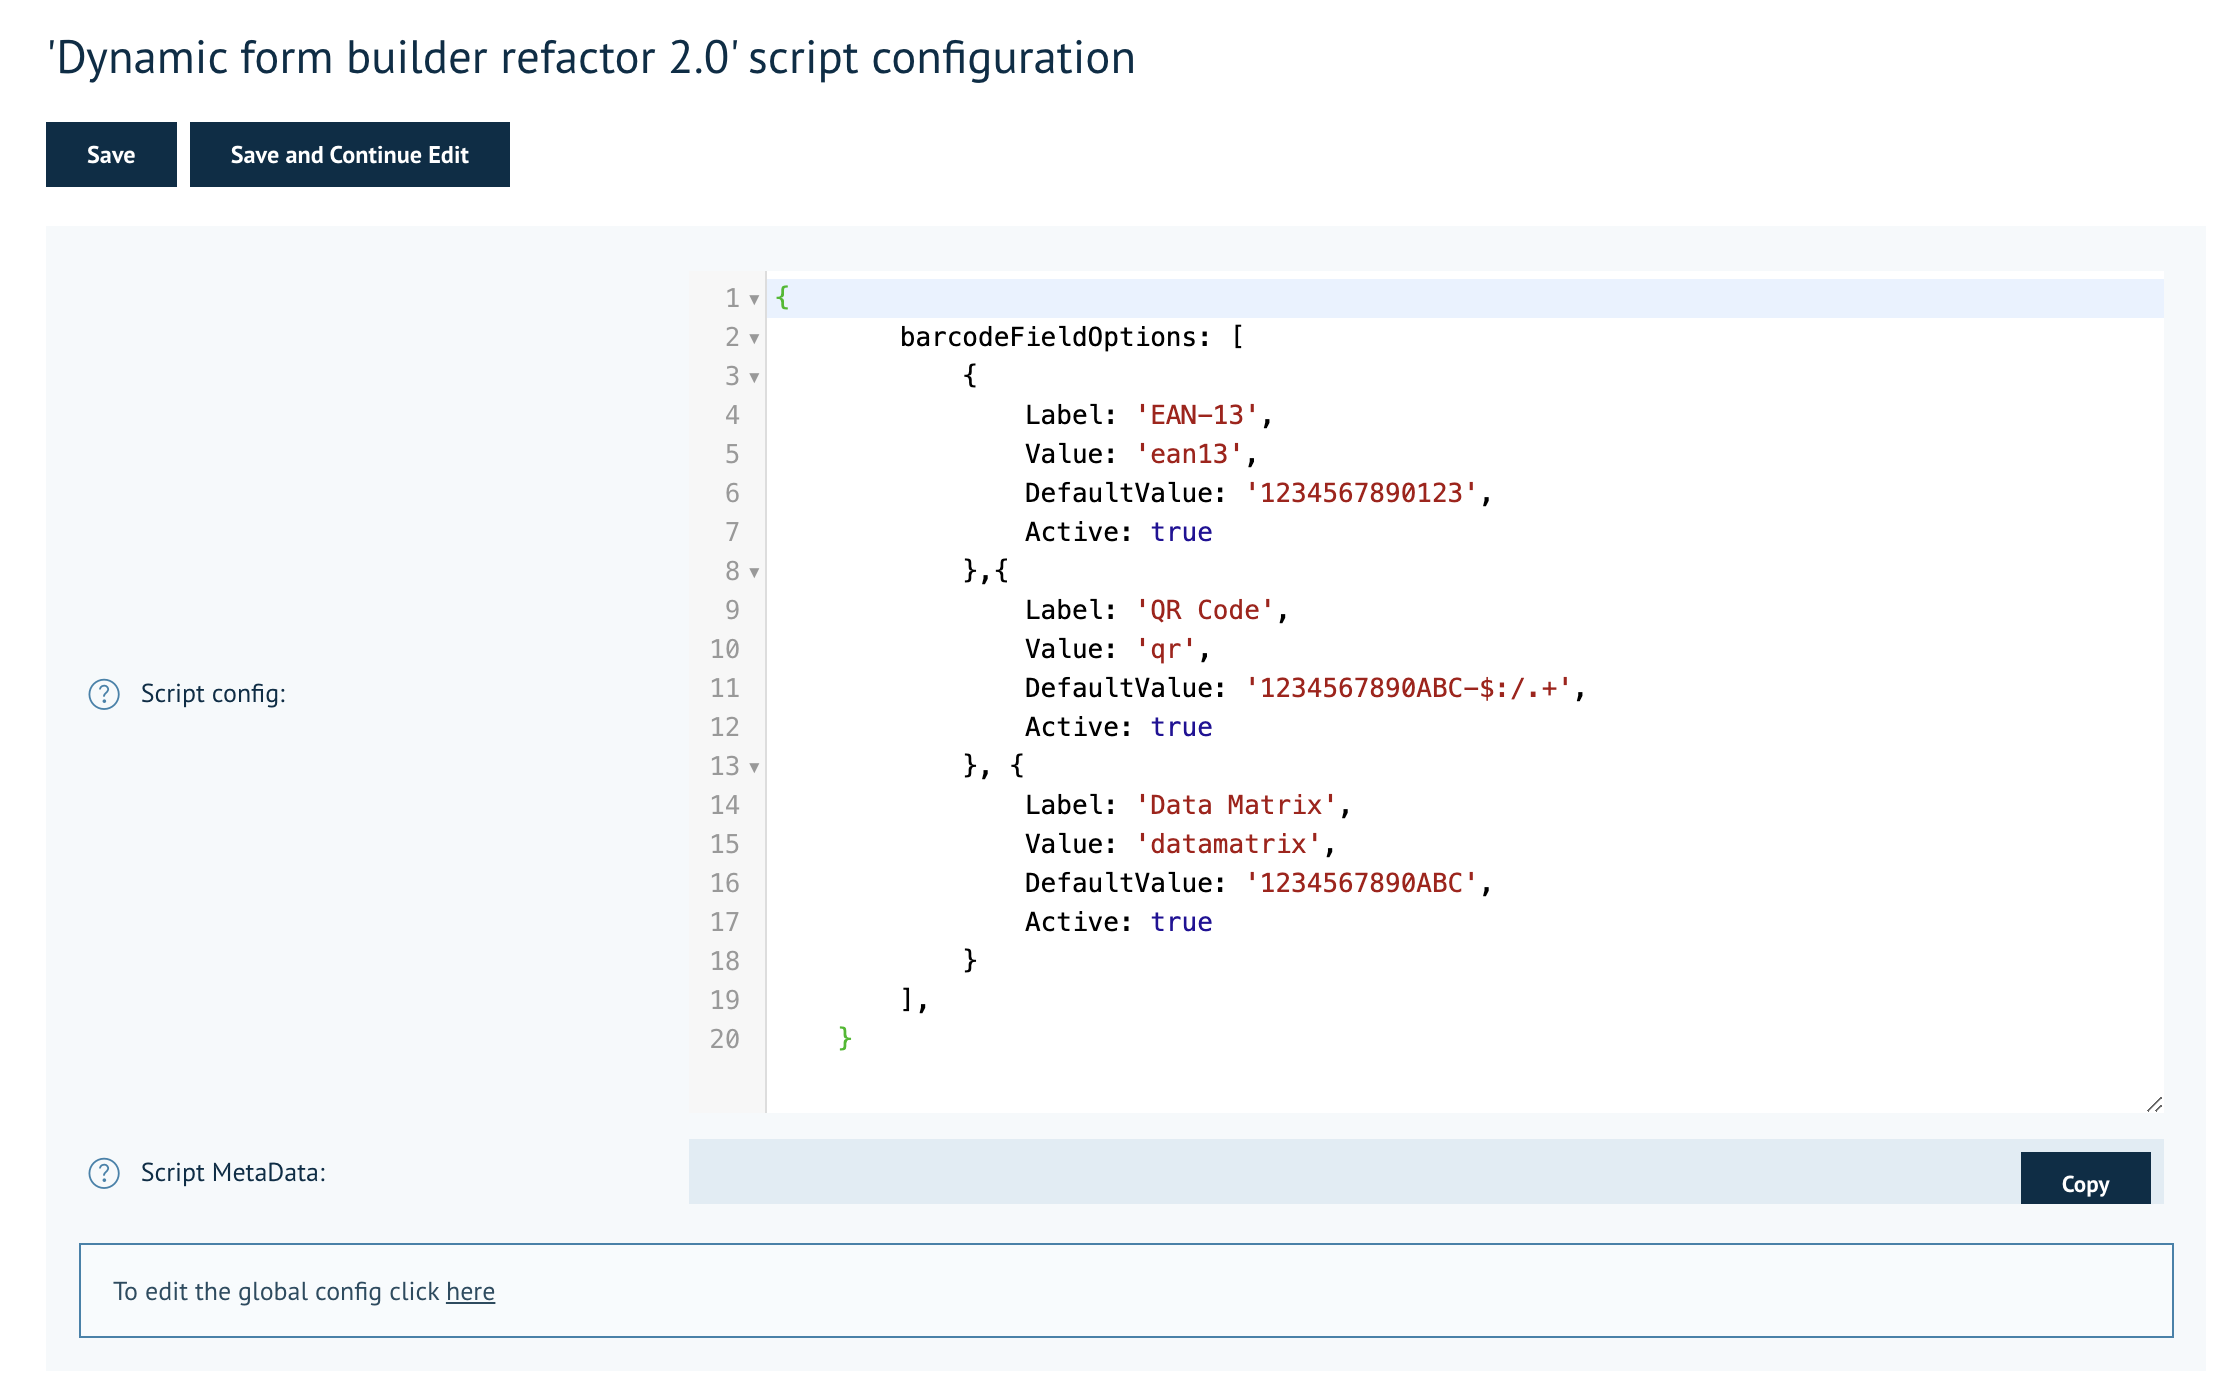
The "Fixed Barcode field" switch sets the barcode to a single barcode format. The form builder script allows for a number of barcode types - by default the full list of options is restricted to just the QR code. You can control what barcodes you wish to use/offer by setting up a snippet under the script config at product level or set a global config for all products. Then simply set the "Active part to 'true' to turn on a particular barcode type.
barcodeFieldOptions: [
{
Label: 'STD-25',
Value: 'std25',
DefaultValue: '1234567890',
Active: false
}, {
Label: 'INT-25',
Value: 'int25',
DefaultValue: '0123456789',
Active: false
}, {
Label: 'EAN-8',
Value: 'ean8',
DefaultValue: '12345678',
Active: true
}, {
Label: 'EAN-13',
Value: 'ean13',
DefaultValue: '1234567890123',
Active: true
}, {
Label: 'UPC-A',
Value: 'upc',
DefaultValue: '123456789012',
Active: false
}, {
Label: 'UPC-E',
Value: 'upce',
DefaultValue: '123456789012',
Active: false
}, {
Label: 'Code 11',
Value: 'code11',
DefaultValue: '12345678901',
Active: false
}, {
Label: 'Code 39',
Value: 'code39',
DefaultValue: '1234567890ABC',
Active: false
}, {
Label: 'Code 128',
Value: 'code93',
DefaultValue: '1234567890ABC',
Active: false
}, {
Label: 'Codabar',
Value: 'codabar',
DefaultValue: '0123456789ABC-$:/.+',
Active: false
}, {
Label: 'MSI',
Value: 'msi',
DefaultValue: '12345678901234',
Active: false
}, {
Label: 'ITF-14',
Value: 'itf14',
DefaultValue: '12345678901234',
Active: false
}, {
Label: 'QR Code',
Value: 'qr',
DefaultValue: '1234567890ABC-$:/.+',
Active: true
}, {
Label: 'Data Matrix',
Value: 'datamatrix',
DefaultValue: '1234567890ABC',
Active: true
}
],
A shorter version example to allow QR, Data Matrix and EAN-13 is illustrated below;
Once all the above has been updated you can then click "Prep and Save" to save the template and the form field will allow you to type in data and the barcode updates dynamically.