Overview
Kit Custom Products allows you to give the user the choice of adding multiple products to the basket through a single landing page.
This can be useful in allowing the user to select different orderline quantities and can theoretically serve as an alternative to using a category. An example use case would be a product such as a jumper, with the option to select multiple sizes and colours in different quantities and see the stock of each size/colour at a glance.
Please Note: The products used can not be editor products (stock and static PDF only).
The Basics
Parent-Child Relationships
The terms "Parent" and "Child" explain the relationship of one product to another. The parent is the category, and the child is the subcategory. An example of this in Infigo categories would be two categories "Stationery" and "Business Cards". The "Stationery" would be the parent / category, and the "Business Cards" is the child category as it would fall under "Stationary".
When you're using a Kit Custom Product, you will be creating one parent product - the Kit Custom Product itself, and one or more child products that are linked to it.
Creation & Configuration
Creating a Kit Custom Product
To create a Kit Custom Product, first, you must create a product through "Catalogue -> Products -> Product Management". This will become the parent Kit Custom product and will be the main product that the users interact with.
You should also create a few child products - these can be any product so long as it is not one of the following product types:
- Infigo Product
- MegaEdit Product
- MultiPart Product.
Once you have created your parent and child products, follow the steps below:
- Navigate to "Catalogue -> Product types -> Custom Products", then click "Add new" (You may need to enable this product type to have access to it.
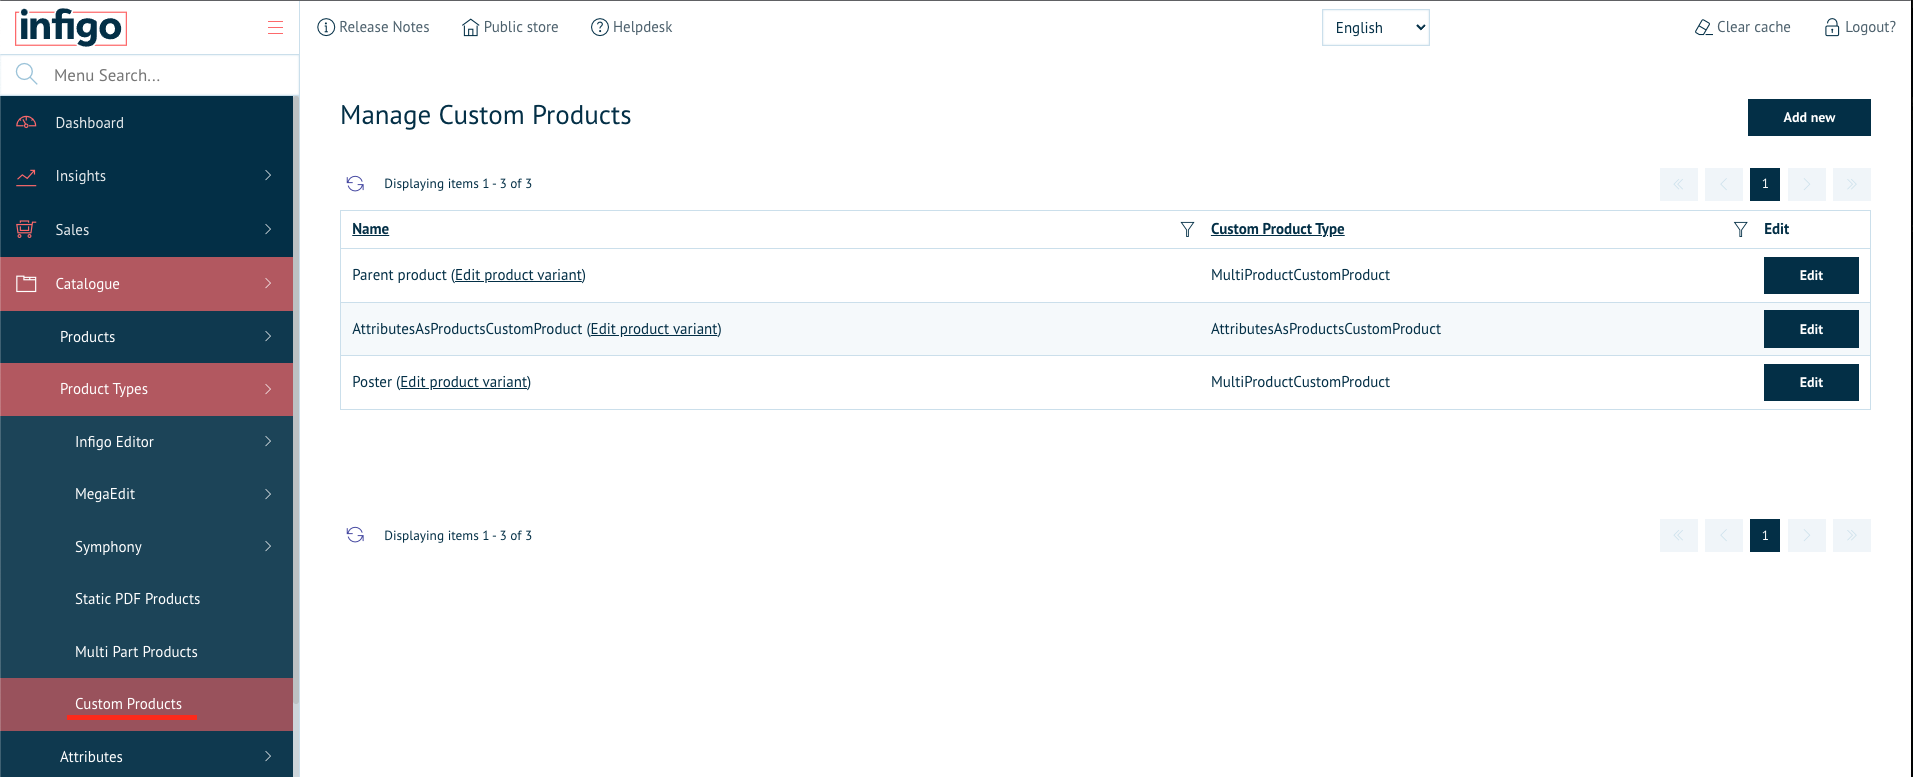
- Select "KitCustomProduct" from the "Custom Product Types" dropdown, then select your parent product from the "Product Variants" dropdown and click "Add New Custom Product"

Basic Configuration
- Select all the products you would like to set as child products by clicking on them in the "Available Products" list:
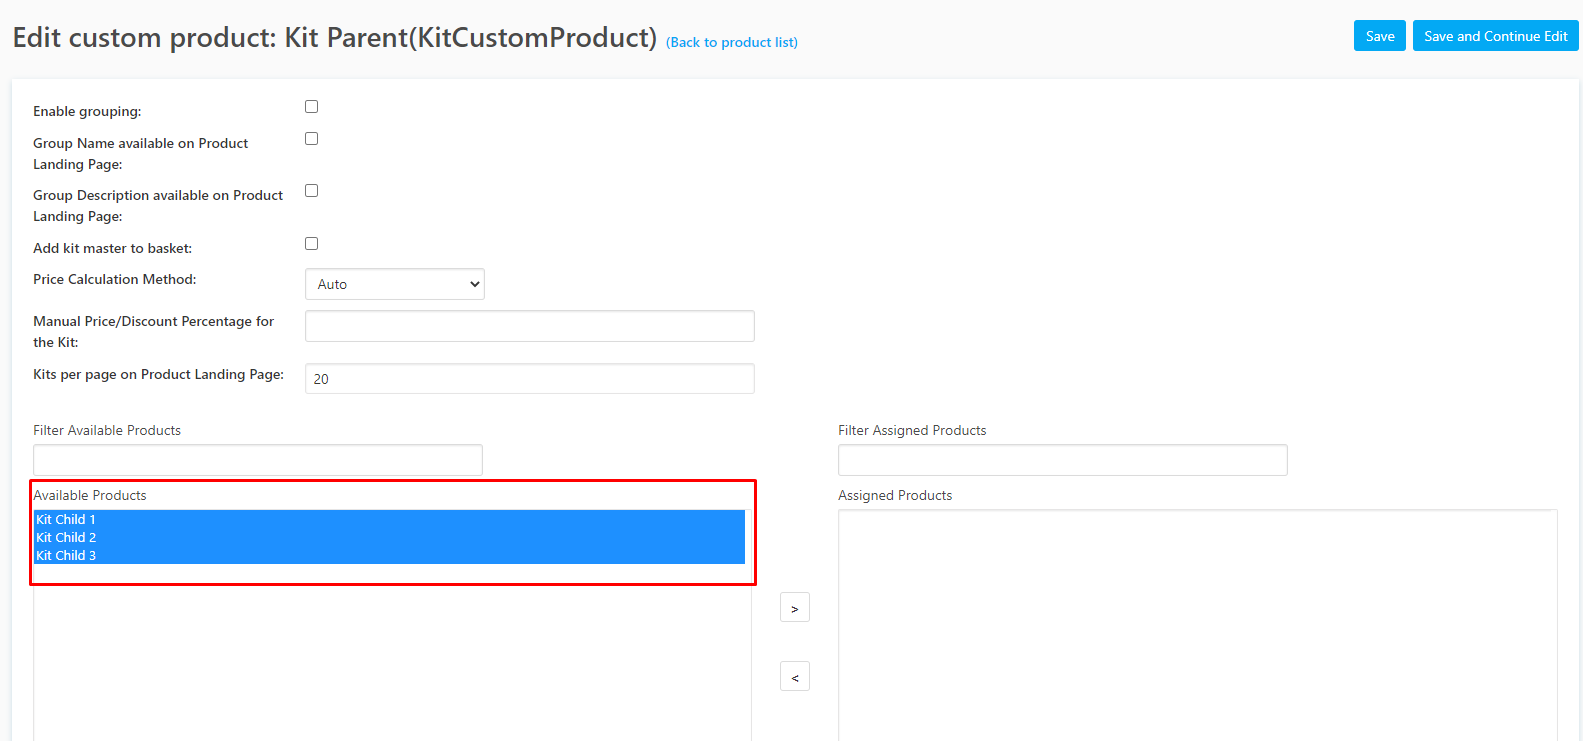
Note: You can hold CTRL whilst clicking on the products to select multiple products, or hold SHIFT and click on a product to select a range of them at once. - Once you have highlighted all of your products, click the ">" button and you will see them move to the "Assigned Products" list. Both the button and the list are highlighted below:
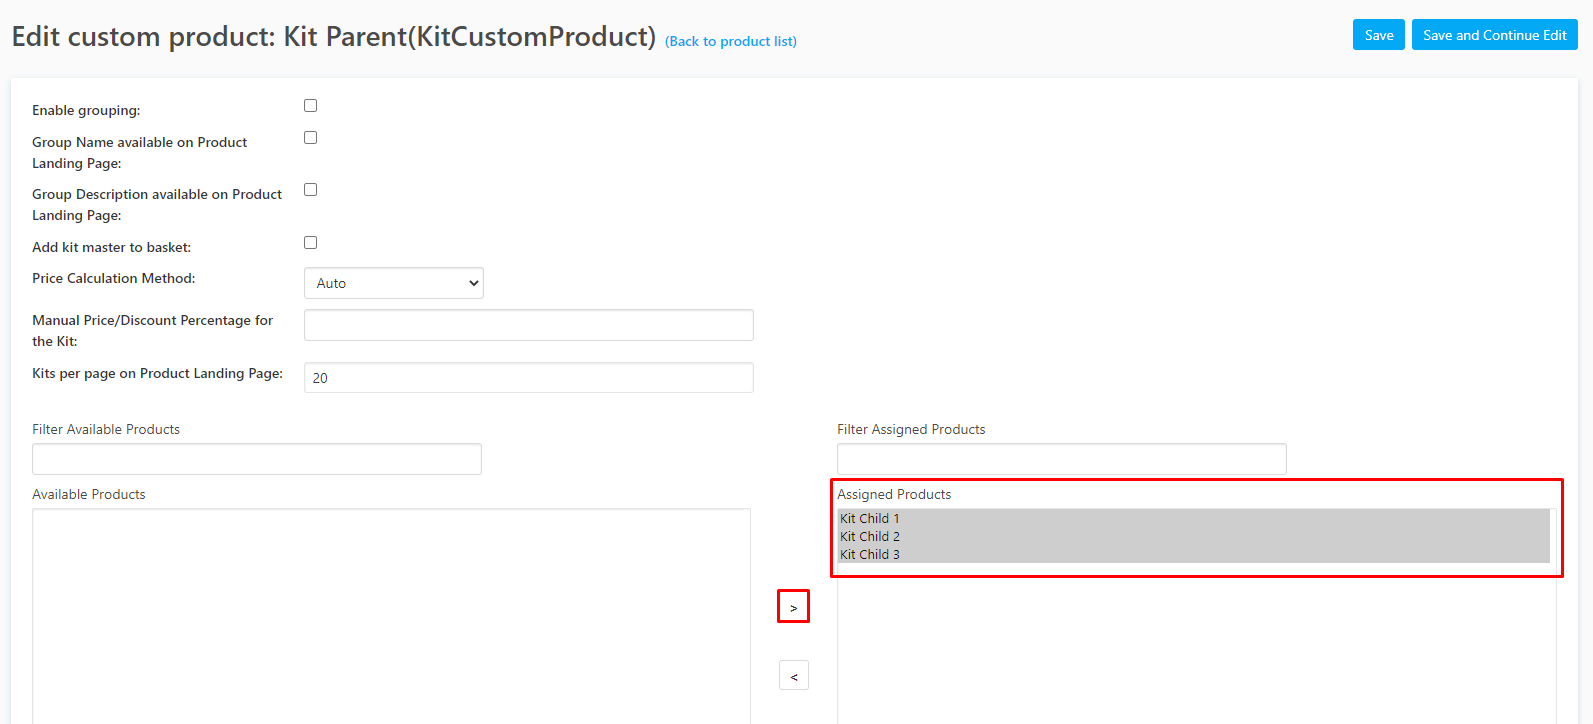
- Click either "Save" or "Save and Continue Edit" in the top-right of the page.
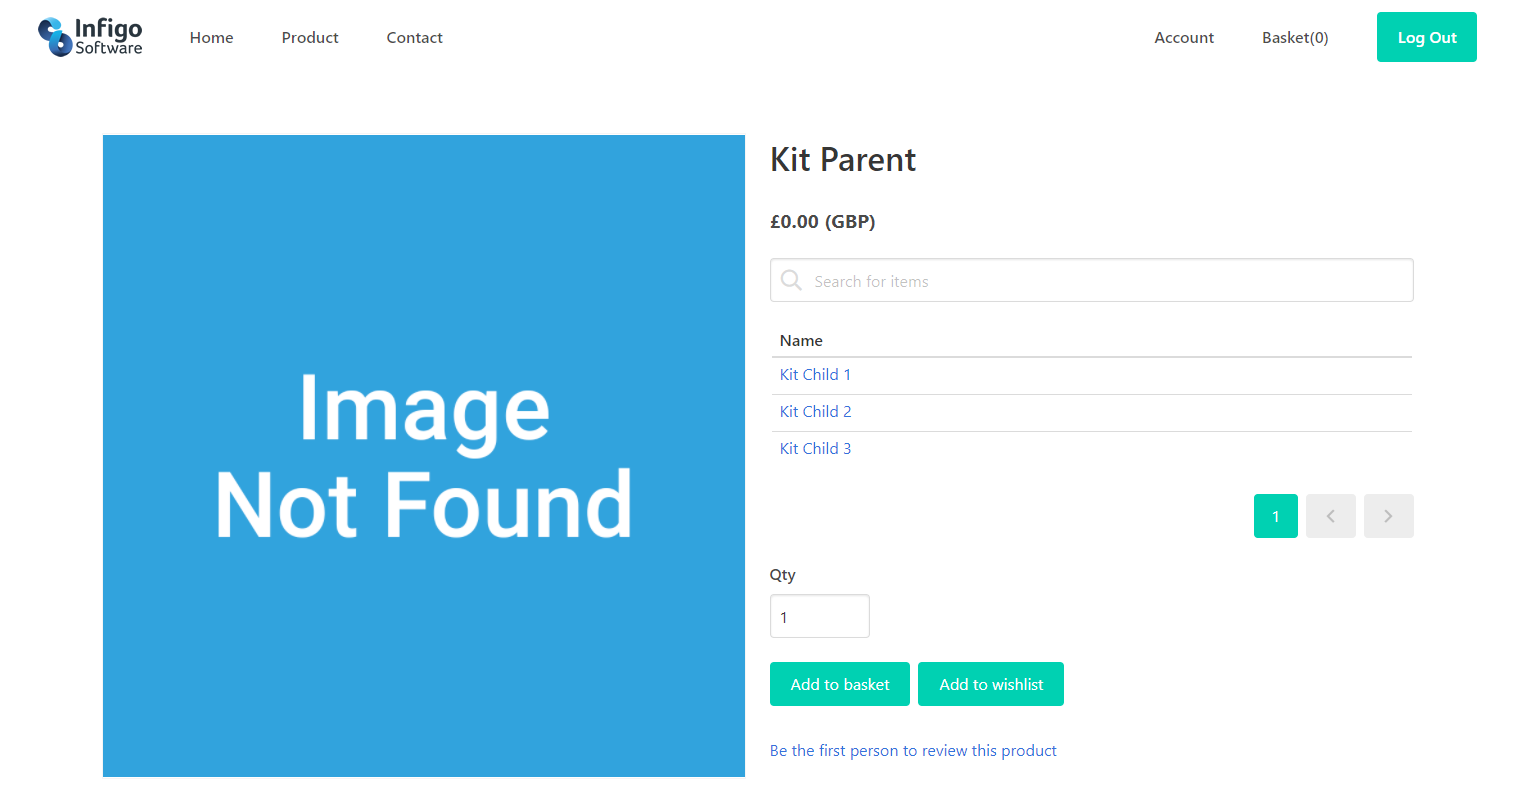
With this configuration, when the user goes to add the kit parent to the basket, they will instead have each child product added to the basket with the quantity selected on the parent product's landing page.
The user will be able to search through all assigned child products and click on them directly to go to their landing page:
Assigned Product Options
Once you've assigned your child products, you will see them listed at the end of the parent kit product's configuration page:
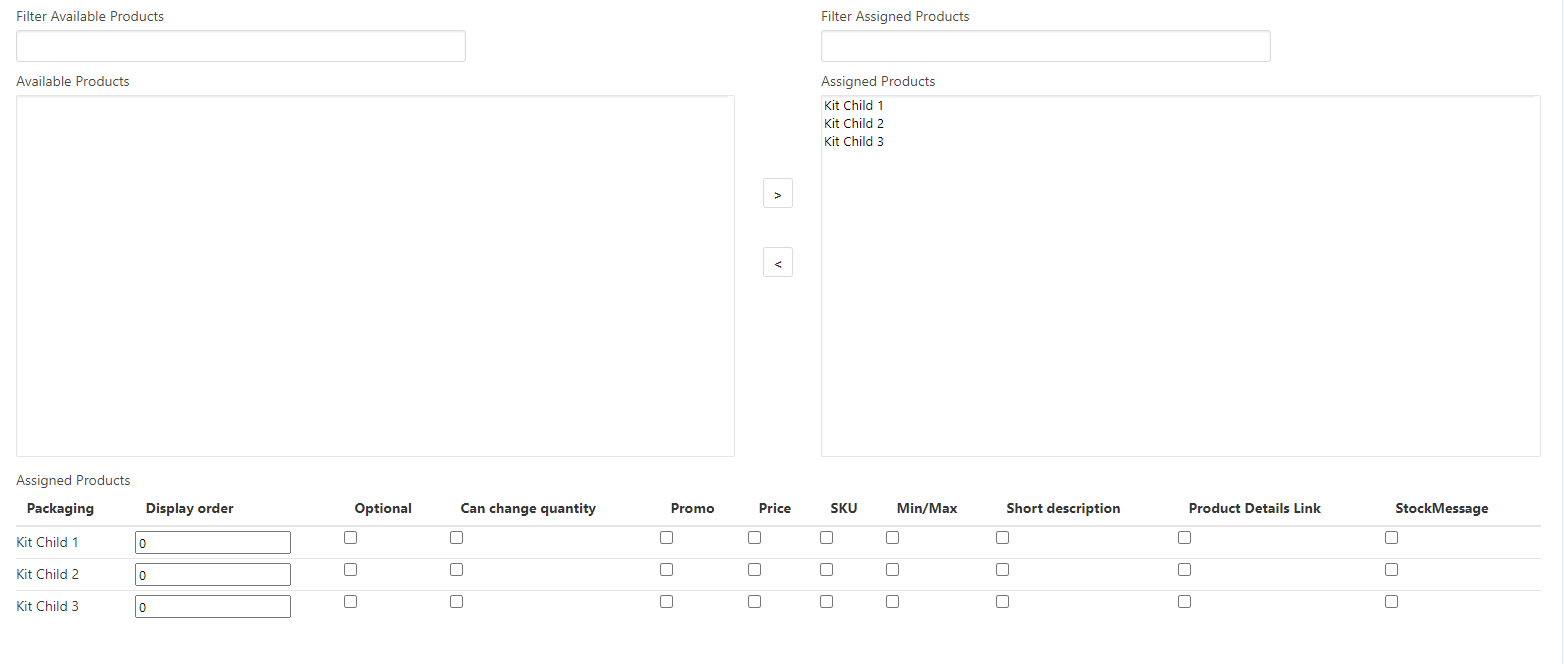
Each product will have the following features you can configure/enable:
Display order - this determines the order in which the products appear. The lower the number, the sooner it appears in the list.
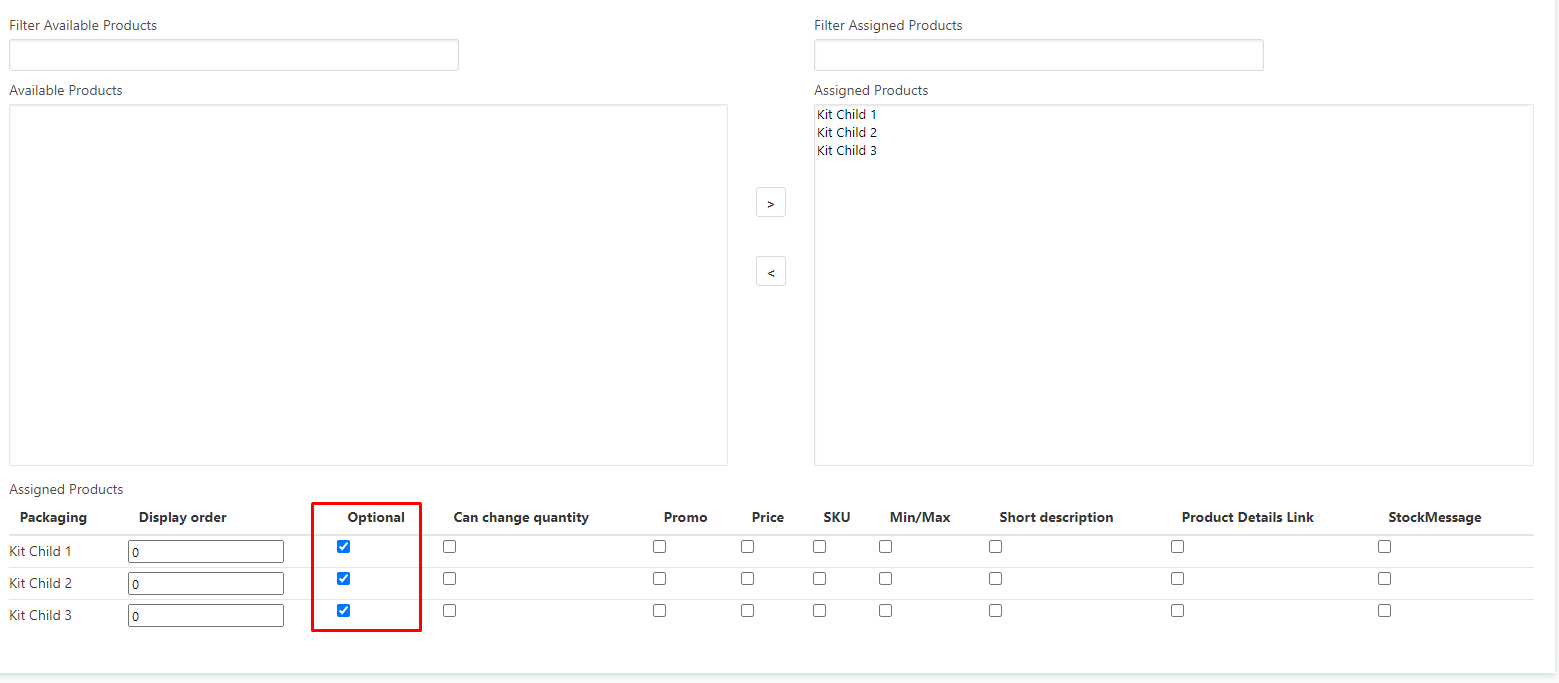
Optional - If enabled, the user will be able to choose whether or not they want to add this product to the basket.
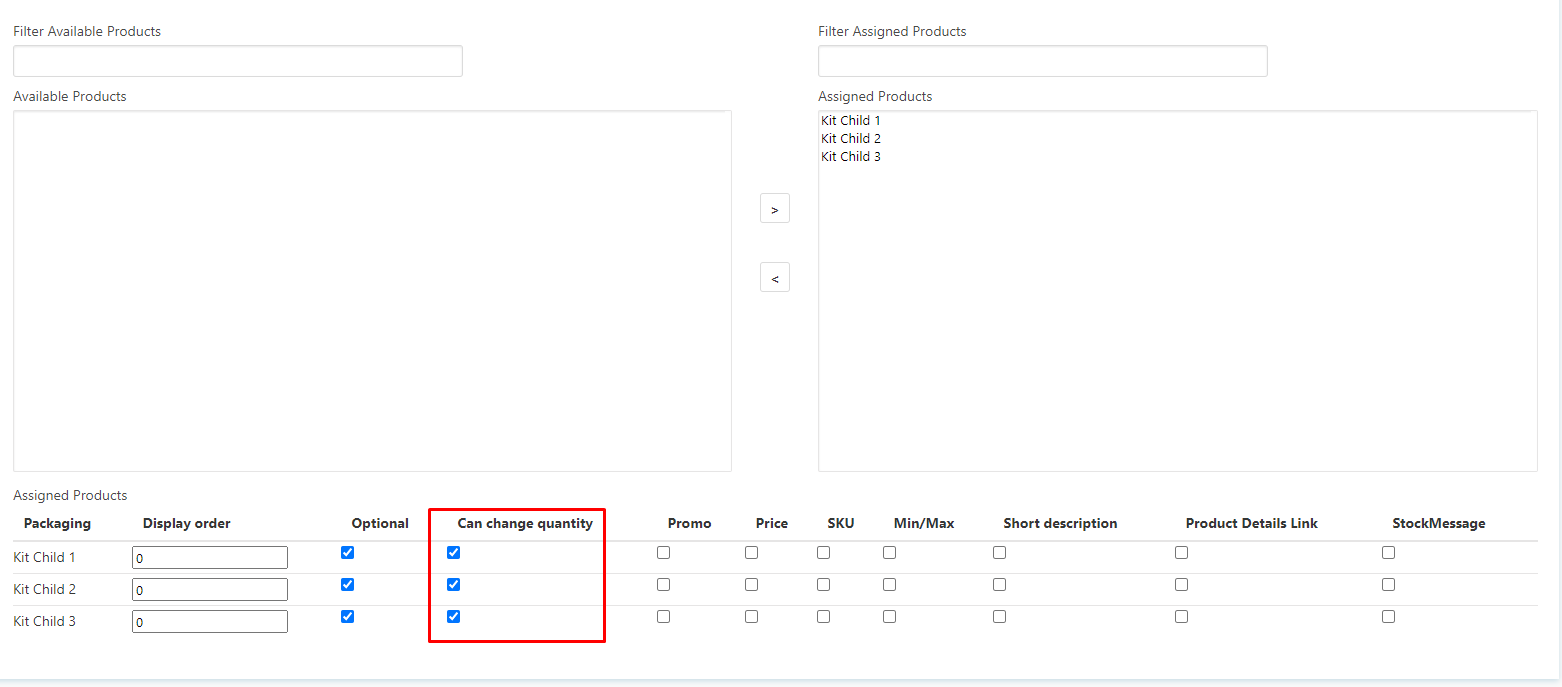
Can change quantity - If enabled, the user will be able to decide how many of these items they would like to add to the basket.
Promo - If enabled, this product will always appear before the products which do not have this enabled, regardless of the display order. If you have multiple "Promo" products, then these will all load first and will respect the display order of other "Promo" products.
Price - If enabled, the price of this product will be shown in the "Price" column. Note: this column is hidden if there are no products with this setting enabled.
SKU - If enabled, the SKU of this product will be shown in the "SKU" column. Note: this column is hidden if there are no products with this setting enabled.
Min/Max - If enabled, the Minimum and Maximum basket quantity of this product will be shown in the "Min/Max" column. Note: this column is hidden if there are no products with this setting enabled.
Short description - If enabled, the short description of this product will be shown in the "Short Description" column. Note: this column is hidden if there are no products with this setting enabled.
Product Details Link - If enabled, a link to the landing page for this product will be shown in the "Link" column. Note: this column is hidden if there are no products with this setting enabled.
StockMessage If enabled, the stock message for this product will be shown in the "Stock message" column. Note: this column is hidden if there are no products with this setting enabled.
Please also note that if neither "Display stock availability" nor "Display stock quantity" are enabled on at least one child product, this column will remain hidden.
Suggested Configurations
To set up each of these configurations, you must first perform the basic configuration explained earlier in this article.
Pick and Choose
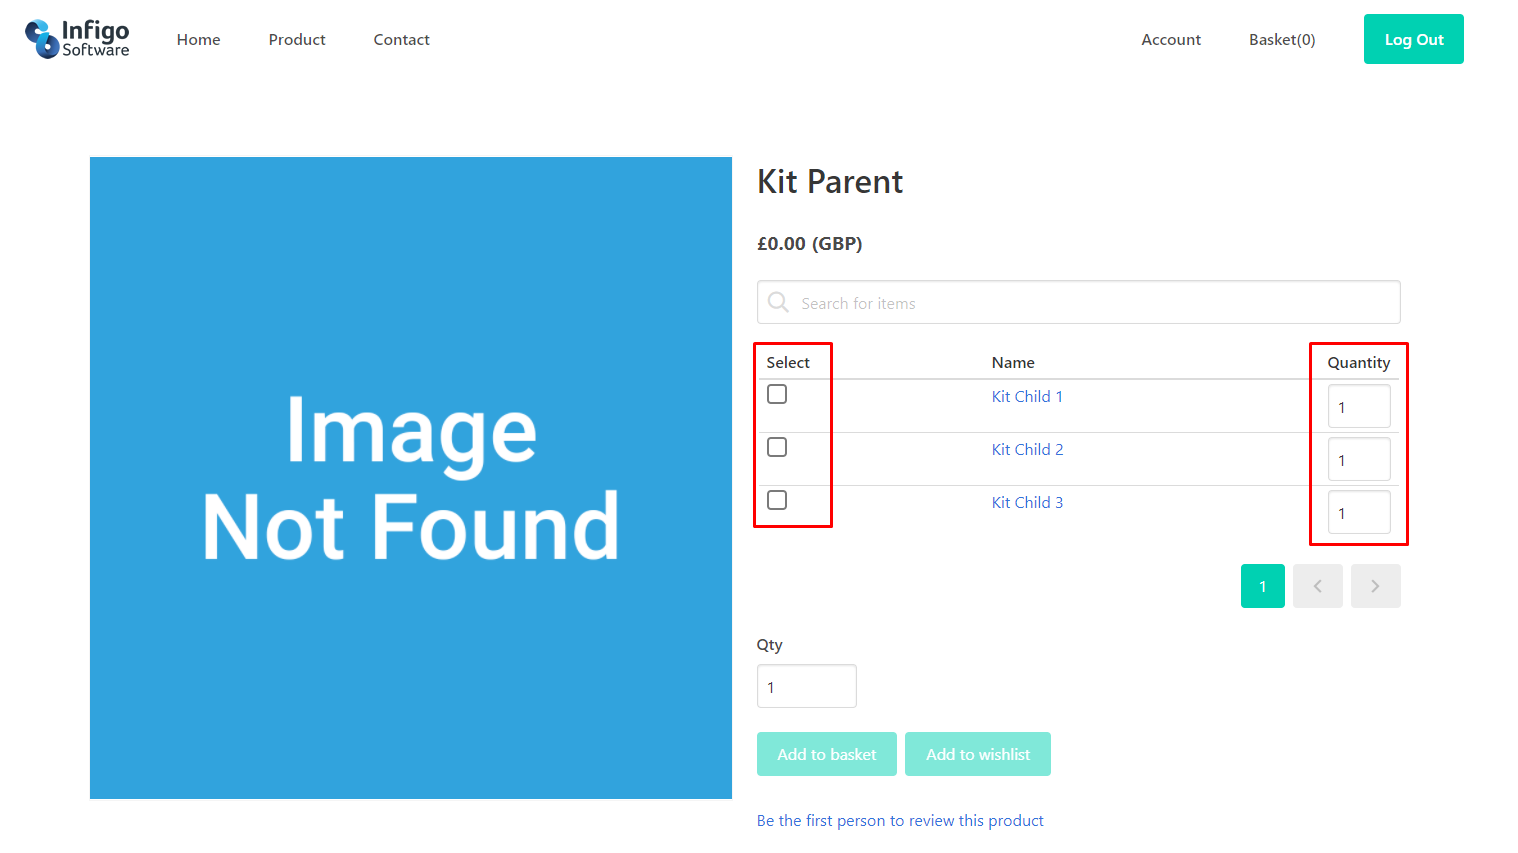
This will allow the user to select which of the child products they want to add to the basket, and also how many of each child they would like to add.
To set up this configuration:
- Scroll down to the list of assigned products and check "Optional" for each product you want the user to be able to choose from. If you don't do this, the products will always be added to the basket.
- In the same area, also check "Can change quantity"
Your users will now see the "Select" and "Quantity" columns on the parent product's landing page:
Grouping Orderlines
It's useful to group orderlines so that you can easily keep track of which products were added by the kit, and what they were added alongside.
To do this, simply follow the steps below:
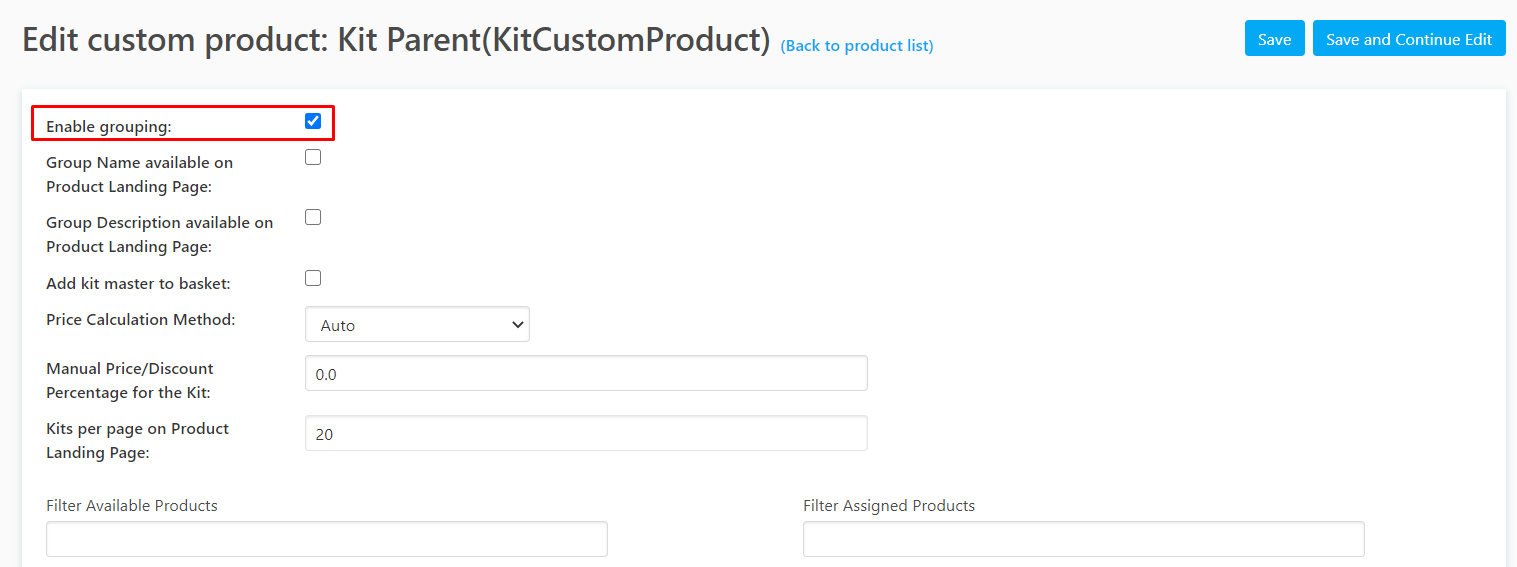
- Enable the setting "Enable Grouping":
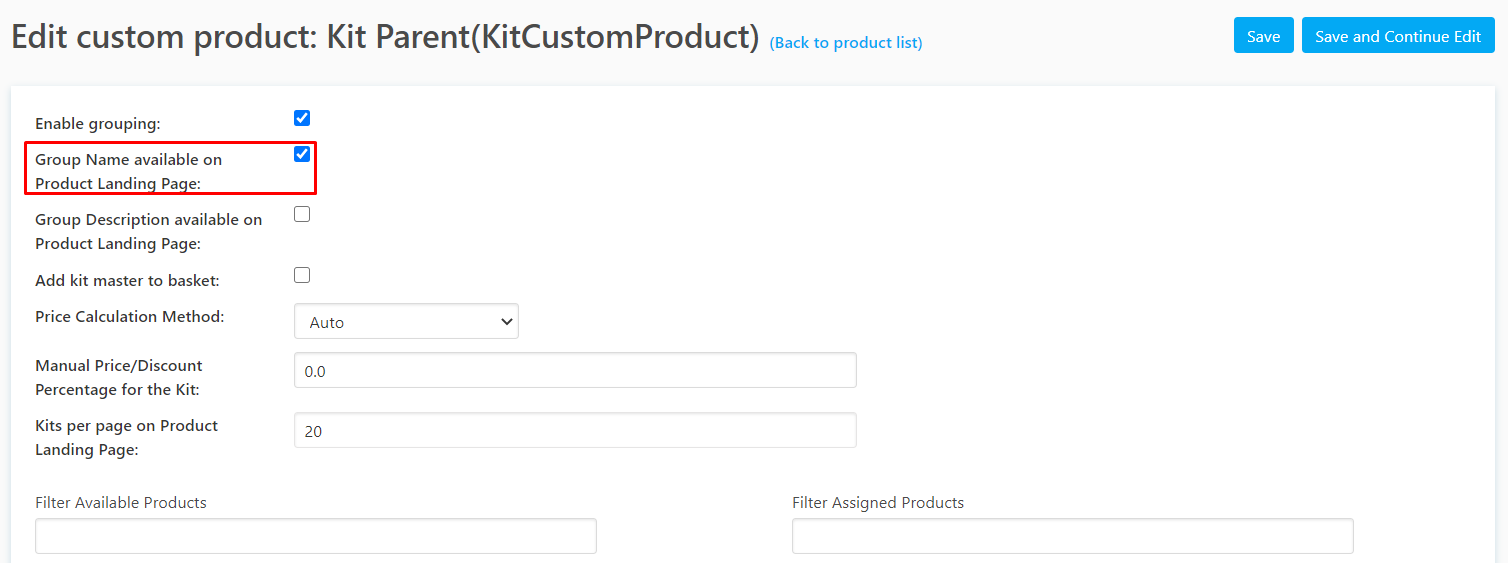
- (Optional) enable "Group Name available on Product Landing Page" to allow your users to give the group a name:
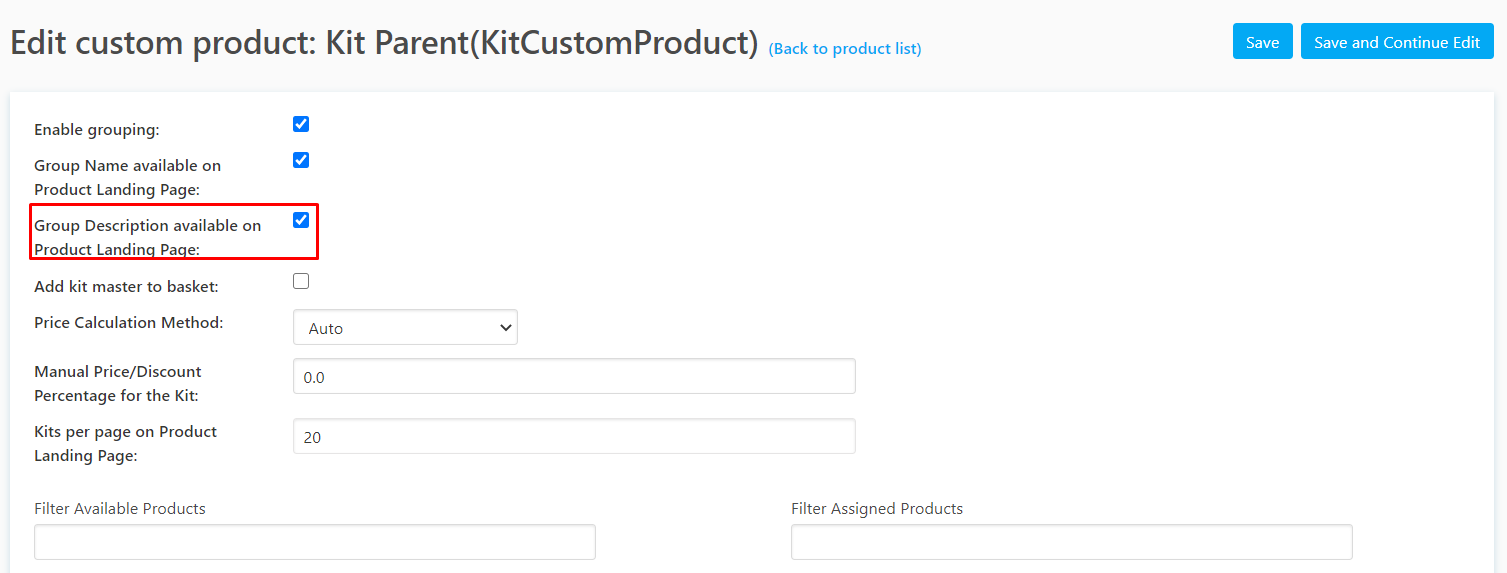
- (Optional) enable "Group Description available on Product Landing Page" to allow your users to give the group a description:
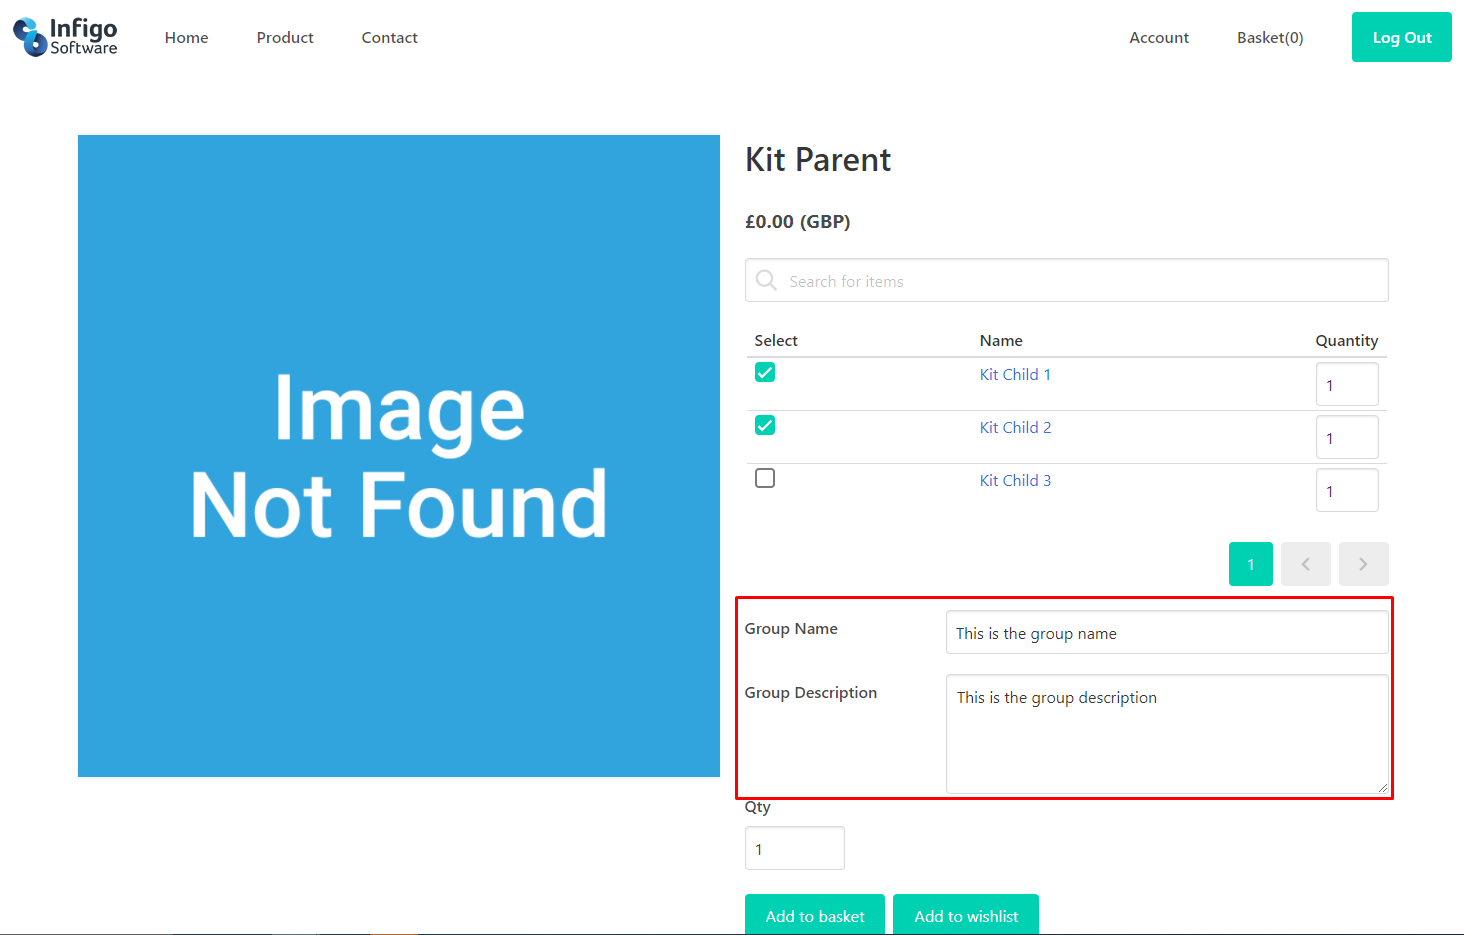
Once these settings are enabled, your users will be able to give a group name and description on the landing page:
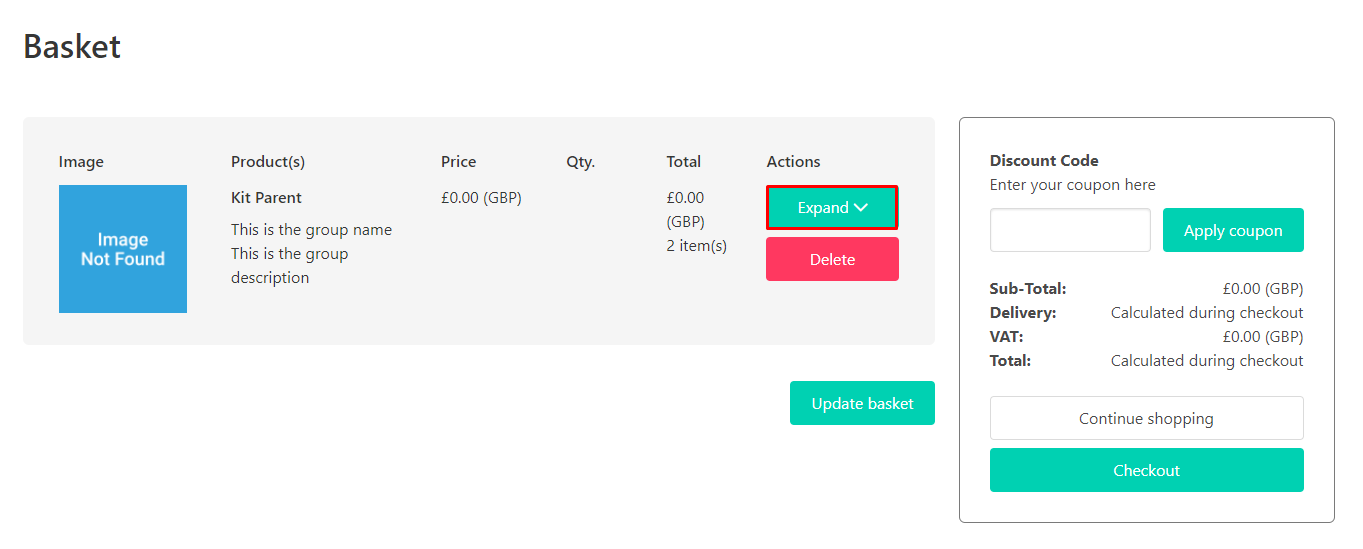
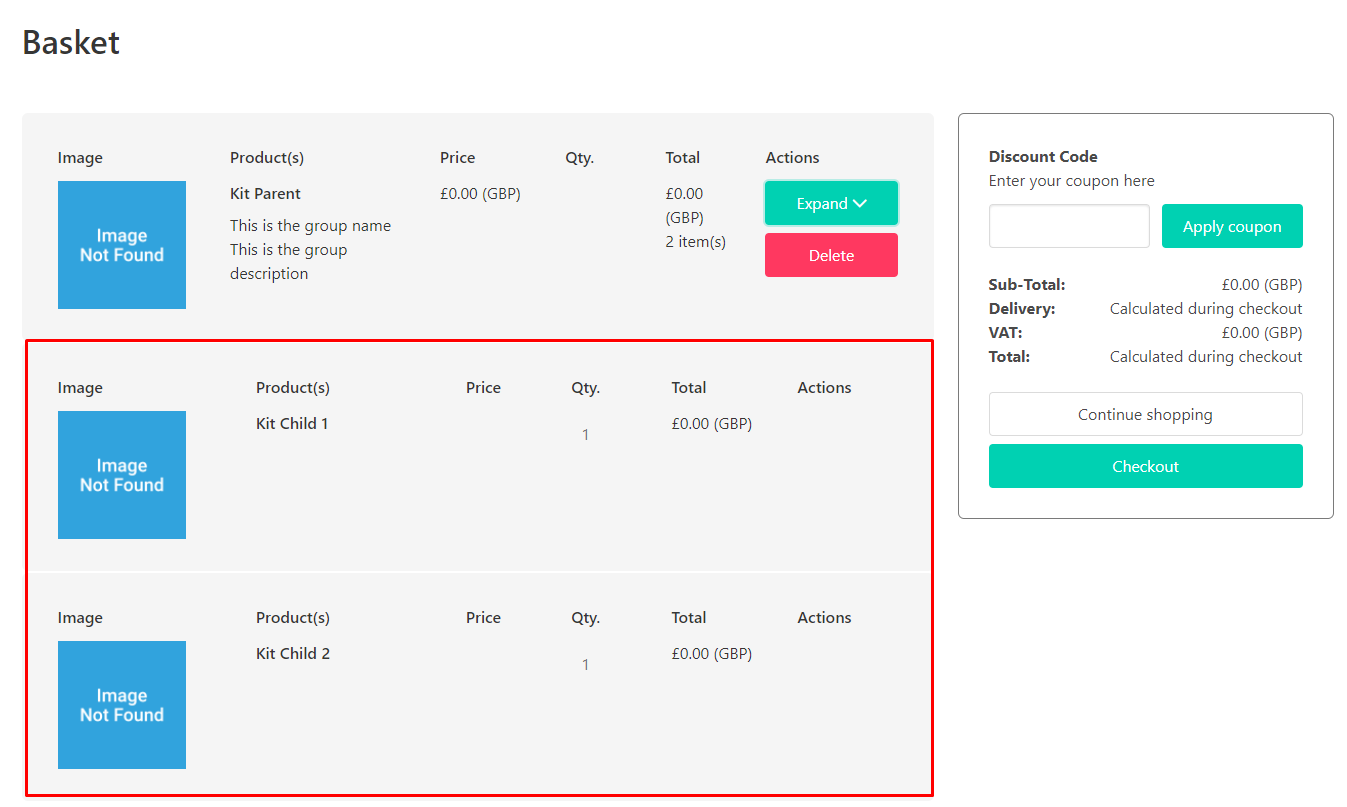
When they add the kit items to the basket, they will be able to see the name and description they gave, as well as expand the orderline to see the kit items within it:
Miscellaneous Settings
If enabled, the parent product will also be added to the basket as its own product, along with the other kit items.
This setting has the following options:
- Auto: the price for the kit will be automatically calculated by adding the price of each selected child product.
- Manual: if all child products are selected, the value entered in "Manual Price/Discount Percentage for the Kit" will be used as the kit price.
- AutoWithDiscount: if all child products are selected, the system will add the price of each child product, then use the value entered in "Manual Price/Discount Percentage for the Kit" as a discount percentage. for the kit.
For example, if you have two child products, each worth £5, enable "AutoWithDiscount", and set "Manual Price/Discount Percentage for the Kit" to 10, the system will:
- Add the price of the two child products, setting the price to £10
- Take 10% off that price, leaving the kit price at £9
As explained above, this setting is used by the "Price Calculation Method" feature.
This setting controls how many kit items are listed per page on the Product Landing Page.