Overview
To manage resources in our system, we offer a cloud storage solution where resources can be available for different operations. This feature is the Upload folders and it serves different purposes depending on the configuration.
Creating a new record
To access the list of upload folder navigate to Configuration > Resources > Upload Folders
Before managing the content, you need to create a new record with:
- The name has to be unique
- Description (optional and just for your understanding)
- Folder (this has to be a folder name that will be created in the server so it has to also be unique)
- Active
- Valid (this will be evaluated according to the folder)
- Post Processor System Name: We support different plugins, so if there is a plugin enabled that works with upload folders it will appear here
- Custom Data Category Id: this is used to link files and related data by the plugins
After adding an entry you can manage the content by clicking the "Manage" button in the row.
Managing content
This is the view when editing.
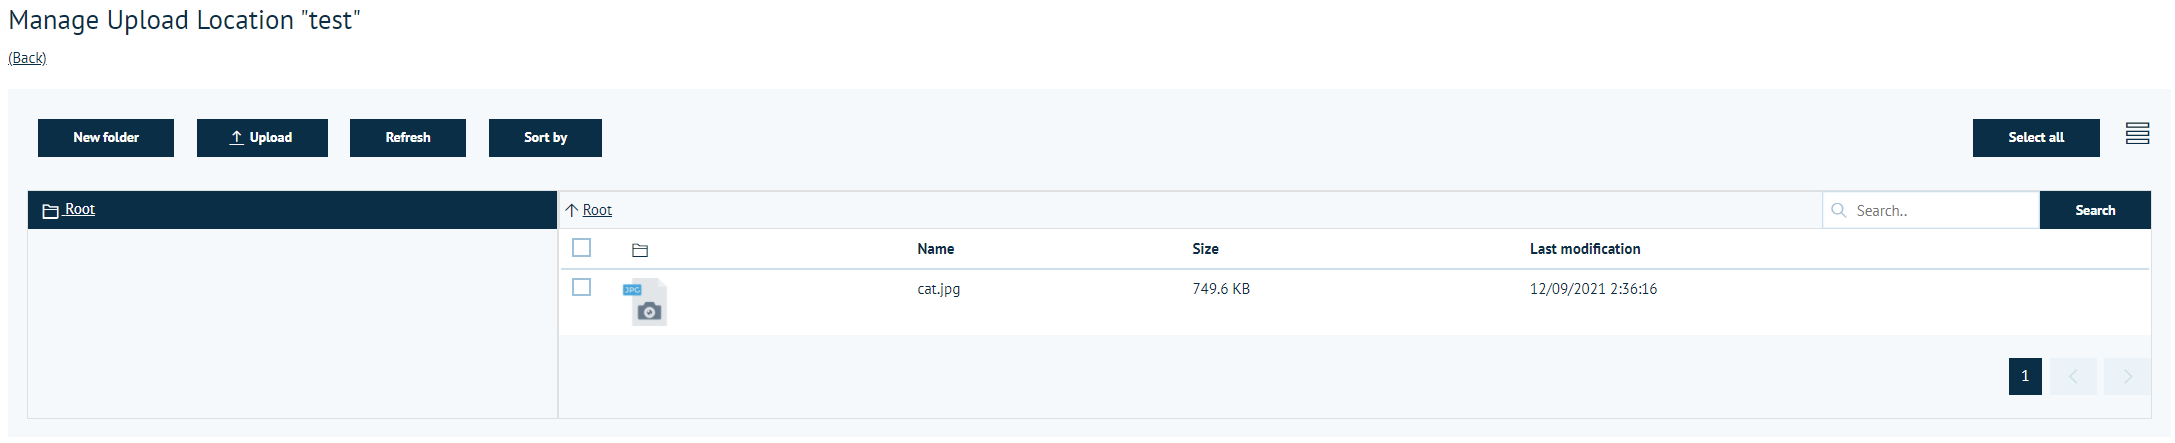
You can perform some operations when managing an upload content.
Upload files
You can upload files by clicking the "Upload" button.
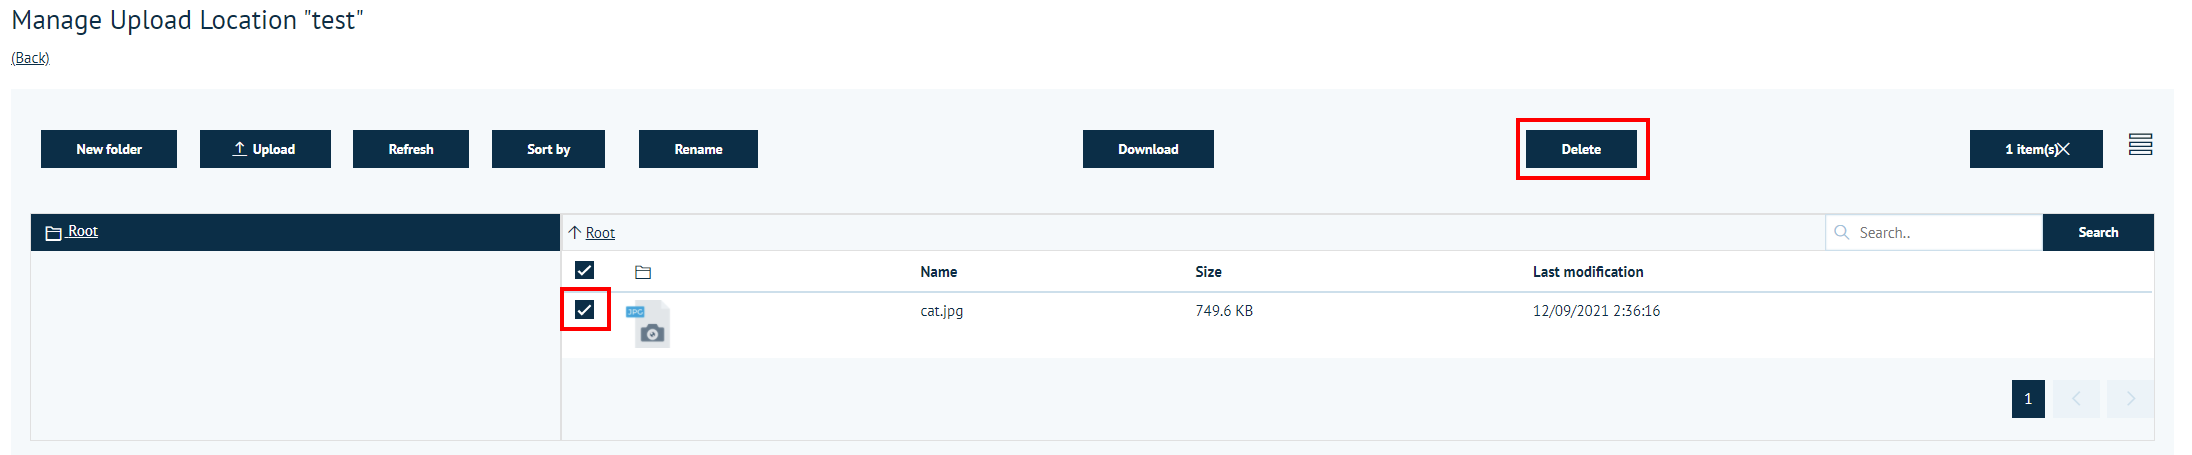
Deleting files
To delete a file you have to first select it, then click the "Delete" button.
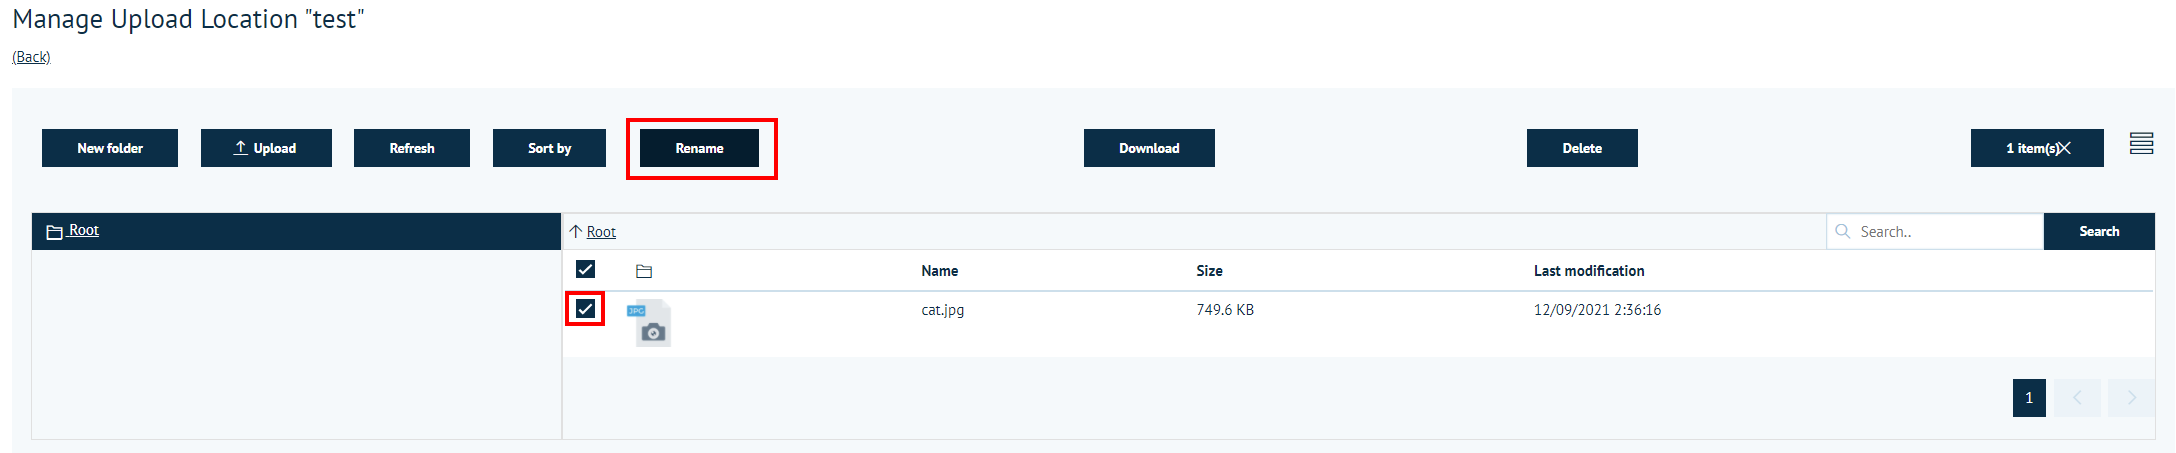
Renaming files
You can rename a file if you select it and click the "Rename" button. you are presented with a pop up to change the name. Take into consideration that the file name has to be unique to this folder and it can not be duplicated. A change of name will not trigger a Custom Data update.
Managing content via Catfish Sync
You can check our Setting up and installing CatfishSync guide where it is explained how to configure an upload folder sync.