🚀 Pricing Problem Solvers 🚀

Picture of 🚀 Pricing Problem Solvers 🚀
Read our handy storefront styling tips and tricks!

Understanding Infigo’s Pricing Methods


This guide introduces the three primary pricing methods available in Infigo:

  1. Basic (Simple) Pricing

  2. Tiered Pricing

  3. Pricing Scripts

You’ll learn how each method works, where to configure it, and which approach best suits your product catalogue or pricing strategy.


Key settings

Setting Description
Price / Old Price / Special Price The core fields used for basic pricing on a per-product basis.
Tier Pricing Records Defines quantity-based discounts, with quantity and price fields per tier.
Customer Role Optional setting for tier pricing — allows different pricing per user group.
Attach a Price Script Enables advanced dynamic pricing controlled by CSV files or custom logic.
Global Additional Data Storage area for CSVs used in pricing scripts.

Use cases

  • Basic Pricing:
    Best for simple, static products that always sell at a fixed price.
    Example: a one-size product with no options or quantity-based discounts.

  • Tiered Pricing:
    Perfect for volume discounts or trade pricing models.
    Example: "Buy 100 or more, save 20% per unit."

  • Pricing Scripts (Generic or Custom):
    Used for complex or data-driven pricing — when prices depend on combinations of attributes (size, material, quantity, etc.).
    Example: pricing that varies based on paper type and quantity.


Step-by-step implementation

Step 1 – Basic Pricing

  1. Navigate to Admin → Catalog → Products → Product Variants.

  2. On the Information tab, locate the pricing section.

  3. Enter:

    • Price – the default per-unit cost.

    • Old Price – optional (used to show “was/now” pricing).

    • Special Price – optional (temporary discounted rate).

  4. Optionally, set Start and End Dates for special prices.

  5. Save your product.

đź’ˇ Basic pricing does not change based on quantity or attributes — it’s a fixed per-unit model.


Step 2 – Tiered Pricing

  1. Go to Admin → Catalog → Products → Product Variants → Tier Prices.

  2. Click Add a Tier Price Record.

  3. For each tier, enter:

    • Quantity (the minimum quantity for the discount)

    • Price (the unit or total price, depending on your setup)

    • Optional: Customer Role to apply different prices to specific user groups.

  4. Choose how the price is displayed:

    • Per Unit or Total Order Price (toggle via checkbox).

  5. Save your configuration.

đź’ˇ Tiered pricing automatically adjusts prices as the customer increases the quantity in the storefront.


Step 3 – Tiered Pricing Methods

There are several ways tiered pricing can behave:

Method Description
Normal (Fixed Per Tier) Entire order uses one price per unit based on the tier reached.
Quantity-Based Pricing Restricts buyers to specific tier quantities (e.g. 100, 500, 1000).
Spread Pricing Distributes price savings across tiers (mixed pricing).
Interpolated Pricing Smooths pricing between tiers based on an equation — ideal for large ranges.

⚙️ “Interpolated” pricing creates a continuous curve between quantity tiers rather than fixed steps, providing smooth per-unit adjustments.


Step 4 – Pricing Scripts

Pricing Scripts provide maximum flexibility for dynamic or attribute-based pricing.
They let you define complex rules that consider multiple inputs such as size, material, and quantity.

Infigo offers:

  • Generic Pricing Script: Included by default, suitable for most use cases.

  • Custom Pricing Scripts: Tailored to unique business logic, available via Infigo’s Professional Services team.

To configure:

  1. In Product Variant → Information, locate Attach a Price Script.

  2. Select Generic Pricing Script.

  3. In the configuration box, specify which CSV file to use (via the filePath key).

  4. Upload your pricing CSV under Global Additional Data and reference it in the script.

Example configuration:

 
{ "filePath": "pricingdata.csv", "useTierPrice": true }

Step 5 – Advanced Pricing Options

In addition to these main methods, Infigo supports:

  • Sliding cost adjustments: Adjust prices based on material weight, size, or other product attributes.

  • Customer-specific pricing: Apply pricing per role, customer, or group.

  • Delivery cost add-ons: Add delivery surcharges per product.

  • Purchase restrictions: Disable purchase or hide pricing altogether for specific roles.


Tips & best practice

  • Start simple: Begin with basic pricing, then layer in tier or script-based logic as needed.

  • Be consistent: Use clear naming conventions for CSV files and attributes when configuring pricing scripts.

  • Validate tiers carefully: Ensure quantity thresholds don’t overlap or leave gaps.

  • Leverage Test Mode: Test each pricing configuration within Admin before publishing.

  • Centralize data: If using pricing scripts, store CSVs in one master folder for easy updates.

  • Document your logic: Keep a shared record of pricing rules for internal consistency.

Saving Time with the Generic Pricing Script


This guide introduces the Generic Pricing Script, one of the most flexible and time-saving tools for managing product pricing in Infigo.
You’ll learn what it is, how it works, and why it can drastically reduce manual effort when managing multiple products that share the same pricing logic or structure.


Key settings

Setting Description
Pricing Script Type Choose Generic Pricing Script from the dropdown in the Product Variant’s pricing script section.
CSV File Contains all pricing data (attributes, quantity tiers, and prices). Uploaded via Global Additional Data.
Attributes Product attributes (e.g., size, material, color) that drive pricing combinations.
filePath The configuration entry in the Generic Pricing Script that points to the uploaded CSV file.
Global Additional Data The file storage area where your CSVs are uploaded and managed for pricing scripts.

Use cases

  • Consistent pricing across multiple products: Use the same CSV and configuration on many products to save setup time.

  • Easy bulk updates: Edit a single CSV to update pricing for every product that references it.

  • Tiered or complex pricing models: Handle multi-attribute or quantity-based discounts without manual configuration.

  • Reduced maintenance: Centralised pricing logic eliminates repetitive changes in individual product settings.


Step-by-step implementation

Step 1 – Understand the concept

The Generic Pricing Script uses a CSV file as a pricing grid.
Each row in the CSV represents a unique combination of attributes (and optionally quantities) and assigns a specific price.

When a customer selects a matching configuration in the storefront, the system looks up that combination in the CSV and returns the correct price instantly.


Step 2 – Prepare your CSV

  1. In Excel or another spreadsheet tool, create your pricing grid.
    Example:

    Attribute A Attribute B Quantity Price
    1 1 1 2.50
    1 1 100 1.90
    1 2 100 1.60
  2. The CSV can include as many columns and rows as needed — even thousands for large product sets.

  3. Save the file as Comma Delimited CSV (.csv).

đź’ˇ The more products share the same pricing logic, the more valuable this approach becomes — a single CSV can serve them all.


Step 3 – Upload your CSV

  1. Go to Admin → Global Additional Data.

  2. Upload your CSV file into this area.

  3. If necessary, rename it using the gear ⚙️ icon.

  4. Take note of the exact filename — you’ll reference it in the pricing script configuration.


Step 4 – Configure the product

  1. Open the relevant product in Admin → Catalog → Products → Product Variants.

  2. Under Attach a Price Script, select Generic Pricing Script.

  3. In the configuration box, enter:

     
    { "filePath": "pricingdata.csv" }
  4. Save the configuration.

⚠️ Only include lines that override the defaults shown in the blue configuration box.
Avoid trailing commas — this is a common cause of script errors.


Step 5 – Test the setup

  1. Go to Test Mode in the Product Variant admin area.

  2. Ensure default attribute values exist so the test can return a valid price.

  3. Check the results displayed in the debug area to confirm correct CSV data retrieval.

  4. On the storefront, switch attribute selections or adjust quantity to verify dynamic pricing updates.


Step 6 – Reuse and update efficiently

  • The biggest advantage of the Generic Pricing Script is reusability.

  • To apply the same pricing logic to other products:

    1. Attach the Generic Pricing Script to each product.

    2. Point them all to the same CSV using the same filePath.

  • To update pricing, simply re-upload an updated version of the CSV — all linked products will update automatically.


Tips & best practice

  • Maintain one “master” CSV for shared pricing logic — this ensures consistency and reduces errors.

  • Always name your columns clearly and keep attribute names identical to those in the product setup.

  • Use tier pricing in your CSV to create price breaks by quantity.

  • Store a backup of older CSVs before overwriting — this makes rollback easy.

  • Keep the file size manageable (split into multiple CSVs if needed for large datasets).

  • Use debugMode temporarily to confirm that the script is reading from the correct CSV row.

Getting Started with the Generic Pricing Script


This guide covers the basics of using the Generic Pricing Script — one of the most versatile tools in Infigo for controlling product pricing.
You’ll learn how to attach the pricing script to a product, link it to a CSV pricing file, and configure attributes so that pricing updates dynamically based on user selections.


Key settings

Setting Description
Pricing Script Defines how pricing is calculated for a product. Choose “Generic Pricing Script” from the dropdown in Product Variant settings.
CSV File Stores the pricing data used by the script (uploaded to Global Additional Data).
Attributes (e.g., A and B) Product options that determine pricing combinations.
File Path The reference within the pricing script configuration that points to the uploaded CSV file.
Default Price The fallback price (e.g., £10,000) displayed if no matching attribute combination is found in the CSV.

Use cases

  • Flexible pricing: Control pricing dynamically based on multiple attribute combinations.

  • Simplified management: Use a single reusable script across many products.

  • Bulk or matrix pricing: Perfect for products with tiered or multi-attribute pricing logic.

  • Training or testing: Ideal for learning Infigo’s pricing structure before building complex scripts.


Step-by-step implementation

Step 1 – Create or select your product

  1. Go to Admin → Catalog → Products.

  2. Create a new product or edit an existing one.

  3. Navigate to the Product Variant section and click Edit.


Step 2 – Attach the Generic Pricing Script

  1. In the Information tab, scroll to Attach a Price Script.

  2. From the dropdown, select Generic Pricing Script.

  3. Save the product — this will reveal additional configuration options below the script selection.


Step 3 – Prepare and upload your CSV

  1. In Excel or another spreadsheet tool, create a CSV file with:

    • One column per product attribute (e.g., A, B)

    • A final column for the Price value.
      Example:
      | A | B | Price |
      |---|---|-------|
      | 1 | 1 | 15.00 |
      | 1 | 2 | 17.00 |
      | 2 | 1 | 20.00 |

    • Include a default fallback price for unmatched selections (e.g., £10,000).

  2. Save it as Comma Delimited CSV (.csv).

  3. Go to Admin → Global Additional Data and upload the file.

  4. Rename it (if needed) using the gear icon beside the filename.


Step 4 – Link the CSV in your script configuration

  1. Return to your product’s Product Variant configuration.

  2. In the script configuration box, add the filePath reference, for example:

     
    { "filePath": "mypricing.csv" }
  3. Ensure the filename matches exactly (including the .csv extension).

  4. Remove the trailing comma if this is the last line in the configuration — syntax errors here will prevent the script from running.

  5. Save the product.


Step 5 – Add your attributes

  1. Still in the Product Variant section, go to Attributes.

  2. Add the attributes used in your CSV (e.g., “A” and “B”).

  3. Ensure the attribute names match the CSV column headers exactly.

  4. Save your product again.


Step 6 – Test your setup

  1. View the product on your storefront.

  2. Initially, you may see the default price (e.g., £10,000) — this appears until valid attribute combinations are selected.

  3. As you choose different attribute values, the price should update dynamically according to your CSV data.

  4. If you see an error or the default price, check:

    • Attribute names match CSV headers.

    • CSV file is correctly uploaded and referenced.

    • No syntax issues (e.g., trailing commas) in the configuration.


Tips & best practice

  • Use simple column headers in your CSV that match your attribute names exactly (case-sensitive).

  • Keep your CSVs lightweight — remove blank rows or extra commas.

  • Always double-check your filePath matches your uploaded filename.

  • Remember: the last line of your configuration should not have a trailing comma.

  • Use the default price (e.g., £10,000) to flag configuration issues during setup.

  • For more advanced pricing (multiple CSVs or split files), see the Multi-Part CSV Pricing tutorial.

How to Optimise Page Loading Speed When Using Multiple Pricing Scripts


1. Overview

This article explains how to optimize pricing script performance for products displayed on homepage, category, and search result pages in your Infigo storefront. If your storefront is experiencing slow load times due to pricing calculations, this guide will help you implement a caching mechanism to improve performance.

For additional information and detailed tutorials, the Infigo Academy offers extensive resources on a wide variety of topics. Visit the Infigo Academy to search and browse our content.


2. Contents

  1. Overview
  2. Contents
  3. Key Points and Takeaways
  4. Key Settings
  5. Scenario-Based Guide
    • Scenario 1: Addressing Slow Page Load Times Due to Pricing Scripts
  6. FAQs
  7. Alternate Search Terms

3. Key Points and Takeaways

  • Introducing a caching mechanism improves load times by storing default product prices in the database.
  • A new catalogue setting, "Use precalculated price on Product Teaser," controls the caching functionality.
  • Cached prices are automatically updated when product-related data (e.g., pricing scripts, product groups) change.
  • When caching is disabled, prices revert to on-the-fly calculations, ensuring real-time accuracy.

4. Key Settings

Setting Name: Use precalculated price on Product Teaser

  • Path: Admin > Configuration > Settings > Catalogue Settings > Use Precalculated Price on Product Teaser
  • Explanation: Enables caching of product prices for teaser views on the homepage, category, and search result pages to improve performance.

5. Scenario-Based Guide

Scenario 1: Addressing Slow Page Load Times Due to Pricing Scripts

Problem:
Your storefront homepage takes 10-20 seconds to load due to pricing scripts executing repeatedly for products.

Solution:

  1. Navigate to the Catalogue Settings page in the admin panel.
  2. Enable the setting "Use precalculated price on Product Teaser."
  3. Monitor the load times after enabling the setting. Cached prices will now be used for product teasers, reducing script execution overhead.

6. FAQs

Q: What happens if I disable the "Use precalculated price on Product Teaser" setting?
A: Cached prices are reset to null, and prices are calculated on the fly in real-time.

Q: Will enabling cached pricing affect real-time updates?
A: No, background jobs automatically update cached prices when product-related data changes.


For additional information and detailed tutorials, the Infigo Academy offers extensive resources on a wide variety of topics. Visit the Infigo Academy to search and browse our content.

How to Configure Pricing Scripts for Checkout Attributes


Previously, pricing scripts could only be attached to products.
With this enhancement, scripts can now be assigned to checkout attributes, such as delivery options, service levels, or gift-wrapping choices - so that selecting an option during checkout can automatically update the basket total.

This gives greater flexibility in how pricing is handled across the entire checkout process, especially for storefronts that require surcharges, discounts, or conditional fees unrelated to individual products.


What’s included

  • Ability to assign pricing scripts to checkout attributes

  • Live recalculation of basket totals when attribute values change

  • Optional debug/output display via info-type attributes

  • Support for applying both fixed and percentage-based adjustments


Key settings

  • Target Scope: determines where the script will run. Select Checkout Attributes to trigger pricing logic when a checkout field changes.

  • Pricing Script: links your script to a specific attribute. Found under Admin → Checkout Attributes → Edit.

  • Debug Mode: optional setting that outputs live script results in-basket for testing and verification.


Use cases

  • Add a surcharge for “Express Delivery” or “Same-Day Dispatch.”

  • Offer a “Gift Wrap” service for an additional fee.

  • Apply a discount when a customer selects “Eco Packaging” or “Digital Delivery.”

  • Introduce donation or tip fields that modify the basket total automatically.


Step-by-step implementation

Step 1 – Create or edit a pricing script

  1. Go to Admin → Pricing Scripts.

  2. Click Add new or edit an existing script.

  3. Write your pricing logic as required.

  4. Set Target Scope to Checkout Attributes.

  5. Save the script.


Step 2 – Assign the script to a checkout attribute

  1. Navigate to Admin → Checkout Attributes.

  2. Select an existing attribute or create a new one.

  3. In the Pricing Script field, choose your newly created script.

  4. Save the attribute.


Step 3 – Test your configuration

  1. Add any product to your basket and proceed to checkout.

  2. Change the linked checkout attribute (e.g., tick Gift Wrap).

  3. Confirm that basket totals update immediately.

  4. (Optional) Enable debug mode to view live calculation results.

Using Multi-Part CSVs with the Generic Pricing Script


This guide covers how to configure multi-part CSV pricing within the Generic Pricing Script.
By splitting one large CSV into several smaller ones, you can significantly improve performance and maintain manageability for products with thousands of pricing combinations.

The example shown in the tutorial can be viewed on the training storefront:
👉 training.infigosoftware.com/pricingscripts
Look for the product Multipart CSV Pricing Scripts.


Key settings

In the product variant configuration (where you manage your Generic Pricing Script), the following parameters are essential:

Setting Description
subdirectory The name of the folder inside Global Additional Data where all partial CSV files are stored.
baseFileName The common prefix shared by all partial CSV files.
separator The delimiter that separates the prefix from the unique suffix in file names (e.g. “-” or “_”).
splitMapping Identifies which attribute defines how the CSVs are split (e.g. “B”).
filePath Must be blank when using multi-part CSVs, as pricing is determined by multiple files rather than one.

Use cases

  • High-volume pricing tables: Products with thousands of attribute combinations.

  • Complex configuration options: When loading one large CSV causes slowdowns in price updates.

  • Segmented logic: When each CSV corresponds to a specific attribute or option (e.g. “Size” or “Material”).

  • Scalable management: Easier to maintain, replace, or update parts of a large pricing matrix without affecting others.


Step-by-step implementation

Step 1 – Prepare your CSVs

  1. Split your main pricing CSV into multiple smaller ones.

  2. Each CSV should represent a consistent subset — for example, all combinations for one attribute value.

  3. Ensure that each file follows a consistent naming pattern:

    • Common prefix: Shared by all files (e.g. subdirectory)

    • Separator: A dash, underscore, or another symbol (e.g. -)

    • Unique suffix: Corresponds to the relevant attribute value (e.g. 1subdirectory-1.csv, 2subdirectory-2.csv)


Step 2 – Upload CSVs to Global Additional Data

  1. Go to Admin → Global Additional Data.

  2. Create a new subdirectory (e.g. “MultipartPricing”).

  3. Upload all partial CSVs into this folder.

    đź’ˇ Each subdirectory acts as a “container” for a complete set of related CSVs.


Step 3 – Configure the product variant

  1. Open the product in Admin → Catalog → Products → Product Variants.

  2. In the Generic Pricing Script configuration area, enter:

    • subdirectory = MultipartPricing

    • baseFileName = subdirectory (or your chosen prefix)

    • separator = -

    • splitMapping = B (or your chosen attribute)

    • filePath = (leave blank)

  3. Save your changes.


Step 4 – Test and validate

  1. Use Test Mode in the product’s admin view to confirm that prices return correctly for all attribute combinations.

    • Ensure you have a default configuration that returns a price (you may need to preselect attribute values).

  2. On the storefront, switch between attributes to confirm that pricing updates seamlessly.

  3. Observe the faster load times — even with large datasets, prices should update smoothly.


Tips & best practice

  • Keep all CSVs formatted identically to avoid parsing errors.

  • Limit each CSV to a manageable size (a few hundred lines) for best performance.

  • Use consistent file naming: prefix-separator-suffix.csv.

  • When testing, watch for pricing mismatches that might indicate missing or misnamed files.

  • If performance remains slow, review your attribute split mapping — ensuring that the split attribute properly segments your data.

  • Always keep a backup of your CSVs before restructuring or renaming files.

Configuring Tiered Pricing in the Generic Pricing Script


This guide demonstrates how to configure tiered pricing using the Generic Pricing Script.
Tiered pricing lets storefront administrators define different price-per-unit levels based on the quantity ordered — ideal for bulk discounts or wholesale models.

You’ll learn how to structure your CSV data, configure the script, and test the setup so your storefront automatically adjusts prices based on quantity brackets.


Key settings

Setting Description
filePath Specifies the name of the CSV file (uploaded to Global Additional Data) that contains the pricing data.
quantityColumnName Defines the header name of the column in your CSV that contains quantity thresholds.
useTierPrice Enables or disables tiered pricing logic (true or false).
debugMode Optional setting to output diagnostic information when testing.
Global Additional Data The storage area where your CSV files are uploaded and managed.

Use cases

  • Bulk purchasing: Offer lower unit costs as order quantities increase.

  • Trade pricing: Automatically apply volume-based discounts for B2B customers.

  • Promotional scaling: Manage “buy more, save more” promotions easily.

  • Automated scaling: Replace manual discount rules with CSV-based pricing logic.


Step-by-step implementation

Step 1 – Review the sample product

A ready-to-view example is available for reference:
👉 training.infigosoftware.com/pricingscripts
Look for Product #3 – Tier Pricing Script.
This example includes:

  • A written description of the setup

  • The pricing script configuration

  • The example CSV data structure

  • A working demo showing pricing updates based on quantity


Step 2 – Prepare your CSV file

  1. Create a CSV with the following structure:

    A B quantity price
    1 1 1 2.50
    1 1 10 2.00
    1 1 50 1.60
    1 1 100 1.20
  2. Each attribute combination (A + B) appears multiple times — once for each quantity tier.

  3. The quantity column defines the minimum quantity for that price bracket.

  4. Save the file as a Comma Delimited CSV (.csv).

đź’ˇ Example logic:

  • Quantity 8 → falls in tier ≤10 → £2 per unit

  • Quantity 25 → falls in tier ≤50 → £1.60 per unit

  • Quantity 70 → exceeds last tier → £1.20 per unit


Step 3 – Upload your CSV

  1. Go to Admin → Global Additional Data.

  2. Upload your new CSV file.

  3. If needed, rename it using the gear ⚙️ icon (e.g., tierpricing.csv).

  4. Note the exact filename — you’ll reference it in your script configuration.


Step 4 – Configure the product

  1. Open your product in Admin → Catalog → Products → Product Variants.

  2. Ensure Generic Pricing Script is attached.

  3. In the Pricing Script Configuration box, enter the following lines:

     
    { "filePath": "tierpricing.csv", "quantityColumnName": "quantity", "useTierPrice": true, "debugMode": true }
  4. Save the configuration.

⚠️ Only include lines you’re overriding from the default script.
The last line must not have a trailing comma — otherwise, the script won’t run.


Step 5 – Test in Admin

  1. In the product’s admin view, click Test Mode.

  2. Ensure you have a default configuration that returns a price (for example, preselected attributes).

  3. Review the debug output at the top of the screen — it shows which CSV row is being used and confirms that tier pricing is active.


Step 6 – Validate on the storefront

  1. View the product page on the storefront.

  2. Select your attribute combinations.

  3. Adjust the quantity field — you’ll see the price-per-unit change dynamically as the quantity moves through defined tiers.

  4. If no tier applies, the system uses the nearest valid tier or the maximum bracket.


Tips & best practice

  • Ensure the quantity column name in your CSV matches exactly what’s defined in the script configuration (case-sensitive).

  • Keep quantity tiers sorted in ascending order to avoid misalignment.

  • Include a top-end tier (maximum quantity) so that high-order quantities always fall within a valid bracket.

  • Always validate in Test Mode before deploying to live storefronts.

  • Use debugMode = true during setup and disable it once testing is complete.

  • For better performance on large datasets, consider splitting CSVs into smaller subdirectories (see the Multi-Part CSV Pricing guide).

How Do I Hide All Pricings on my Storefront?


You can hide all storefront pricing by enabling the setting "Hide all pricing on the storefront" in Configuration > Settings > General Settings > Hide all pricing on the storefront:

When this setting is enabled then all pricings for a storefront will be hidden.

This includes pricings on product pages as well as in the basket/cart and during checkout like in the examples below:

Stock product

Mega Edit Product

Basket/Cart


Alternatively, if you'd like to hide the price for individual products please see: Hide Pricing with CSS – Infigo Help Desk (zendesk.com)

How Do I Configure Tier Visibility for Attribute Price Adjustments?


When tiered pricing is active, attribute value lists now display tier information directly, improving transparency for storefront admins.

Highlights

  • Attribute editor now shows tier levels and prices

  • Simplifies configuration of quantity-based discounts

  • Reduces need to cross-reference pricing tables

How to implement

  1. Go to Admin > Catalog > Attributes > Product Attributes.

  2. Edit or create an attribute with tier pricing enabled.

  3. Use the Value Editor to define price tiers (absolute or percentage).

  4. Assign the attribute to a product or group and verify tier display in both Admin and storefront views.

Applying discounts to specific customers


In Infigo, customer-specific discounts are configured through the discounts system rather than from a dedicated discount field on the customer account itself.

See our tutorial series related to discounts here.

Infigo does support automatic discounts without a coupon code, and those discounts can be limited to selected customers by using discount requirements. The clearest method is to apply the discount to customers who meet a condition such as belonging to a specific department.

This means that if you want to give one customer a permanent discount, such as 10% off, the practical setup is:

  • create a discount in Promotions > Discounts
  • make it apply automatically by turning off coupon-code use
  • restrict it to a customer condition, most commonly a specific department
  • place the intended customer in that department

This approach gives you account-specific pricing behavior without requiring the customer to enter a code at checkout.


Key Settings

Access the Discounts section in Infigo admin.

Discount Type

This controls where the discount applies.

Choose this carefully based on whether the customer should receive the discount on selected items or more generally.

Use Percentage

Use this when the discount should be a percentage of the product price or order value.

For a permanent 10% discount, set the value to 10.

Requires Coupon Code

This setting should be unticked if the discount must apply automatically.

If this remains enabled, the discount behaves like a coupon and the customer would need to enter a code manually.

Requirements

This is the key area for restricting the discount to the right audience.

The most applicable option here is:

  • Customer belongs to a specific department

This is the recommended method when you want only certain customers to receive the discount.

Department Membership

If the discount is department-based, the correct users must be assigned to that department.

If the customer is not in the targeted department, the discount will not apply.

Learn more about departments here.


Use Cases

Permanent discount for one named customer

You want one customer to always receive 10% off without entering a coupon code.
Create a department for that customer, assign them to it, then create an automatic discount that only applies to that department.

Special pricing for a group of buyers

You want a selected set of customers to receive better pricing than standard users.
Create a department for that customer group and apply a discount only to that department.

Free or reduced-price products for internal teams

A head office or internal team should be able to order certain items without charge, while other departments still pay standard pricing.
Create a discount for the relevant products and limit it to the internal department.

Product-specific customer pricing

A customer should receive a discount only on certain products, not across the whole storefront.
Use a product-variant discount and combine it with a department-based requirement.


Step-by-Step Implementation Guide

Example: Set up a permanent 10% discount for a specific customer

  1. Decide whether the discount should apply to all products or only selected ones
    Before creating the rule, confirm whether the customer should receive:
    • a broad discount across their purchases, or
    • a discount only on specific products or variants
  2. Create or identify the customer group you will target
    Based on the available documentation, the most reliable way to target a specific customer is through a department.
    If this discount is for just one customer, create a dedicated department for that customer and assign only that account to it.
  3. Assign the customer to the correct department
    Go to your department management area, open the relevant department, and add the customer to it.
    Save your changes before moving on. See department guidance here.
  4. Go to the discount setup area
    In the Admin area, navigate to:
    Promotions > Discounts
  5. Create a new discount
    Select Add New and enter a clear internal name, such as:
    10% discount for selected customer
  6. Choose the correct discount type
    Select the discount type that matches your goal:
    • use a broader discount type if the discount should apply more generally and does not need to be attached product by product
  7. Set the discount amount
    Enable the percentage option and enter 10.
    This creates a 10% discount.
  8. Make the discount automatic
    Find Requires Coupon Code and make sure it is unchecked.
    This ensures the customer does not need to enter a code during basket or checkout.
  9. Add the customer restriction
    Open the Requirements tab on the discount.
    Add the requirement:
    Customer belongs to a specific department
    Then select the department that contains the customer who should receive the discount.
  10. Save the discount
    Review the settings and save all changes.
  11. Test the setup using the customer account
    Sign in as the affected customer and add an eligible product to the basket.
    Confirm that:
    • the discount applies automatically
    • no coupon code is required
    • the discount only appears for the intended customer
  12. Check other accounts to confirm the rule is restricted correctly
    Log in as a customer outside that department and verify that the discount does not apply.

Rounding adjustment on pricing


You can choose to round prices when they are being calculated, to do this

Go to Configuration > Settings > Order Settings

Scroll down until you see the setting 'Round Price during calculation'


When the setting 'Round Price during calculation' is enabled we have two rounding options, which will round 3 or more decimal places to 2, but in different ways. 


Banking

Banking rounding will be the default option when the setting is first enabled, and it will round 0.5 the nearest even number.


Commercial 

Commercial rounding is the other option, it will round 0.5 and higher up and 0.4 and lower down.

Don't forget to 'Save' any changes made.


However when using 'Quantity Based Pricing' the system interrogates the pricing bands, and the quantities and divides them down. In some cases, this can lead to rounding taking place which causes incorrect formatting within the shopping basket.


Then you will need to disable 'Round Price during calculation'.

Your shopping cart values should now work as expected.


How to setup discount bands that reduce the cost of products


Infigo allows you to setup discount bands that reduce the cost of products added to the basket based on the number of separate jobs that are the same product with the same quantity chosen when in the basket.

Setting up the discount

1. Go to Promotions > Discounts in admin 

2. Click Add New 

3. Give the Discount a name that is relevant 

4. Select Assigned To Product Variants Directly in the Discount Type drop down menu 

5. Choose whether you want to discount an amount in or a percentage

6. You can assign a discount code, but if you want it to automatically apply to the basket / cart, then you'll want to leave this unticked. 

7. Also, you can set the limitation as per the below. 

8. Click Save and Continue

9. Under the Requirements tab choose Customer has multiple line items of the same quantity discount in discount requirement type

10. Set your line item limits (min / max number of items that must be in the basket to qualify)

10. Click save 

Please note: if you wish to have multiple tiers of discount you will need to carry out the above steps several times to create the various different percentage discounts.


Lastly, to apply the discount to a product go to product management in admin > open the product you'd like to apply the discount to > go to the Product Variant (edit) and click on the Discounts tab. Tick the discount(s) in question and Save. 

Managing Tax, Tax Settings, Tax Rate


Tax levels are managed through Infigo globally at a Platform level. This allows you to update a rate for all Storefronts at once.

To make a change to the Tax name, or rate, login to the Platform as a Platform Administrator.

At the Storefront chooser, select your Platform.

Select Configuration > Tax > Tax Categories


Your Tax Categories are the different bands of Tax that can be applied to products. Adjust the predefined bands, or setup your own new ones within this screen.

mceclip2.png

Once you have created your Tax Categories, choose Configuration > Tax > Tax Providers

Tax Providers are ways in which you can cost Tax for each of your Tax Categories.

Generally the Fixed Tax Rate provider suits most needs. Click Configure and apply a percentage of tax for each of your Tax Categories.

Once you have finished configuring your tax categories and providers, switch back to Storefront Admin to set further tax configurations on a per-storefront basis.


Applying VAT to Products and Product Groups

Since both Products and Product Groups are treated as a single entity, the process for applying tax is the same, just on different site pages:

For Groups go to Catalog > Products > Product Groups > [Your group] Edit and you will see the following:

mceclip3.png

Once you have made your changes make sure to SAVE your configuration.

The options available are the rates configured from Configuration > Tax > Tax Categories

For Products go to Catalog > Products > Product Management > Edit > Product Variant Tab > Edit and you can scroll down to the following section:

mceclip4.png

Once you have made your changes make sure to SAVE your configuration


Applying VAT to Delivery

To enable the TAX on delivery follow these steps:

Configuration > Settings > Tax Settings. Locate "Delivery Is Taxable" or "Shipping is Taxable" and tick it. From the screenshot below you can see the tax categories are the same as the ones used for Products and Groups.

You can also set the site to include tax in the configured delivery price.

mceclip0.png


Calculation & Settings

Once all tax calculations have been setup Configuration > Tax > Tax Providers/Tax Categories

and applied to products, go to Configuration > Settings > Tax Settings.

Infigo allows you to setup the Tax calculations individually for each Storefront:mceclip1.png

All settings here will adjust the way prices appear on the site, and in the order breakdown through the checkout process. See below for a description of each setting:


Prices include tax: A value indicating whether entered prices include tax.
Allow customers to select tax display type: A value indicating whether customers are allowed to select tax display type.
Display tax suffix: A value indicating whether to display tax suffix (incl tax/excl tax).
Display all applied tax rates: A value indicating whether each tax rate should be displayed on a separate line (shopping basket page). 
Hide zero tax: A value indicating whether to hide zero tax in order summary. 
Hide tax in order summary: A value indicating whether to hide tax in order summary when prices are shown tax inclusive.
Tax based on: Includes a drop-down for selection between default, shipping and billing addresses.

Default tax address: Your address used to calculate tax.

Hide Address From Customer: A value that includes or excludes the customer from viewing your Default tax address.
Delivery is taxable: A value indicating whether delivery is taxable.
Delivery price includes tax: A value indicating whether delivery price includes tax.

Payment method additional fee is taxable:  A value indicating whether payment method additional fee is taxable.
EU VAT enabled: Check to enable EU VAT (the European Union Value Added Tax)

Show pricing per item or order


Infigo now allows you to display the pricing per item or order.

We have introduced a feature switch that will allow you to decide whether you want the price throughout the site (e.g. the product landing page) to display the order price or the item price.

Previously, the only way for you to display the order price was to use Quantity based pricing as this took the item price and multiplied it by the quantity and displayed that. We have now included this feature that will let you do that independent of quantity based pricing.

This should eliminate any issues some were seeing when using Custom Scripts and it then multiplying the price again by the quantity in the basket. Can be applied to individual product variants, or product groups.


To enable the feature, navigate to the Product variant or Product Group and check the feature called ‘Show Price as Orderline Total’

mceclip0.png


Quantity Based Pricing


Infigo Academy: Pricing your first product


Overview

Infigo supports the setup of quantity based tiered pricing which not only allows you to control your pricing based on the number of items customers are ordering but also to limit the quantities in which you want to sell that product in. For each quantity tier you want to offer you can configure an order line price for that amount which will then be presented to the user when ordering that product.


Product OR Product Group

As with many of the product configuration options this can either be done in the product's individually or if they are part of a product group then as part of the configuration of the group. The steps are exactly the same. Here is the navigation for both. 

Product Navigation: Catalogue > Products > Product Management - Press 'Edit' on the product. Go to the 'Product Variant' tab. Press Edit. 

Product Group Navigation: Catalogue > Products > Product Groups - Press 'Edit' on the product group.


How-To

1. It is good practice to set your minimum basket quantity to match your lowest quantity tier. In this example we are setting up quantity tiers of 25, 50, 100, 150, 200, 250 and so we would set the minimum basket quantity to 25.

mceclip2.png


2. Now, navigate to the Tier Prices tab. Here you have a number of options available to you but for standard Quantity Tier pricing as this article discusses you will want to check the 'Use Quantity Based Pricing' setting. 

3. To create quantity tiers you simple need to click on the 'Add New Record' button. Here you will be presented with a Customer Role drop down (find out more below), a Quantity input and a Price For Order input. Enter in your Quantity tier amount followed by your Price for that quantity and then click 'Insert'. Repeat this process for as many quantity tiers as you want to offer to the customer.


Once finished, ensure you Save the product.


mceclip1.png


All pricing in Infigo is based on the unit price, so although in this article we show us setting up the price for the quantity tier as a whole, in the background the pricing engine is dividing that order price by the quantity to arrive at a unit price.

In order to ensure this remains accurate you need to make sure that rounding is not happening on your pricing calculations -click here to view more information on Price Rounding.


Turn off all pricing on a Storefront


It's easy to globally disable all pricing on an Infigo Storefront. This is useful in scenarios where pricing is not a factor for the client of a particular B2B Storefront.

To activate this, navigate to your General Settings area of Infigo admin.

A setting will be available named "Hide all pricing on the storefront".

Activating this will reveal an additional option named "Hide add to basket button whilst prices are hidden". This is useful as an emergency measure, if you need to quickly disable the ability for new items to be placed in the basket and subsequently ordered.

Click Save to confirm the settings change.

This will not delete any of the pricing configuration you have performed on your Storefront, such as product pricing, shipping, taxes, etc. It simply hides it from front-end users whilst the setting is enabled.

Discounts General Overview


This article serves to cover the use of discounts to both products and product groups, within Infigo. Discounts can be applied to products, product groups and to categories.

The same discount (25% will be used throughout this example) however, an almost unlimited amount of discounts can be applied to suit your needs. In the following examples, a discount code has been applied, in the instance of a discount code being inapplicable, the discounts will be applied automatically.

Step One

1) Navigate to Promotions > Discounts

mceclip1.png


2) On the Discounts menu, you will be able to add and delete discounts on your storefront. The below steps explain how to setup each of our discounts, as well as explain the different settings and requirements you may enable. 

Step Two

mceclip2.png
  • Entering a designation for the discount – this will reflect the discount value.

*The option of configuring the discount value to either be a percentage or amount deducted can be selected/configured from this information.

mceclip3.png
  • Configuring the discount details will enable the utilization of the discount on products and other relating processes/properties.


Discount Types

mceclip4.png
  • Selecting the appropriate discount type will determine how and where the particular discount will come into effect, regarding the actual products or payment/checkout process stages.

Assigned to order total

This type of discount is applied at the checkout summary and ultimately affects the end price. An example order is a quantity of 10 business cards costs £100.00. When the coupon code is applied, the 25% is taken off. 

mceclip1.png
  • Designating the 'Assigned to order total' discount type.
mceclip0.png
  •  Configuring the settings of the discount and assigning the aforementioned discount type, the result is of the discount affecting the end total of the product. This can be confirmed by the inclusion of the discount within the summary of all stages of the order and the overall total showing the change in value from that of the initial sub-total.  

*Also shown is that the discount was applied via the established discount code (opting to initiate a discount without the code) eliminates this stage and the coupon/discount code field can be hidden via Configuration > Settings > Basket Settings (Cart Settings) and disabling the option to 'Show discount box'.


Assigned to product variants (SKUs)

This form of discount is applied to products that have registered variants. The SKU (stock-keeping unit) can act as a further form of reference regarding the product itself. You must also assign this discount directly to the product variant in Catalog > Products > Product Management > + button > Edit > Discount tab.

mceclip2.png

mceclip3.png

mceclip4.png


mceclip0.png
  •  Applying the discount to the Product Variant (SKU) shows the change in price within the front-end of the system, prior to adding the product to the basket. The above screen capture depicts the old and new price (following a discount of 25%) as well as the SKU of the product (Mag-000).


 Assigned to categories

When you directly assign the discount into the category from Catalog > Categories > Manage Categories > Edit > Discounts tab, all products in the category will have the discount applied. In this example, the Business Card is placed in a Stationery category, therefore, all products in this category will have the 25% discount assigned to them.

mceclip1.png


mceclip2.png


Assigned to Delivery (Shipping for US)

The format of this discount will be in that it is visually recorded in the checkout process and thus will affect the final cost in which the customer will pay by potentially reducing the cost of delivery.

mceclip4.png

 The above screen capture shows the discount of 25% applied to the various delivery methods that have been configured on the storefront.

mceclip3.png

The screen-capture above shows the original prices/rate assigned to each form of delivery.


Assigned to order sub-total

This type of discount is associated with the order subtotal and will appear as such during the checkout process. In the example below assigning a discount will customarily calculate 25% of the subtotal (in this scenario, from the original sub-total of £45.00).

mceclip5.png
  •  Depicted above, is the corresponding 25% discount of the original sub-total which was £100.00 deducted £25.00
  • Something to bear in mind, is that the tax will be calculated from the ORIGINALsub total, and then added to the final total amount.


Assigned to product variants directly

This discount type concerns the variants of particular products. For example, business cards and journals may have multiple variants (colour, size) which are able to be grouped together and legible to be charged in one instance.

mceclip6.png

mceclip7.png

  • Entering the product variant of the Business Card (85x85mm). Selecting 'Edit' will allow for the discount of 25% to be applied under the 'Discount' tab.
mceclip8.png
  • The above screen capture depicts the product variant of the business card and the change in price, as seen on the front-end of the system.


Assigned to product groups directly

Products can be consequently assigned to groups that relate to their purpose or nature. In this following example, the Business Card will be placed within a Business Cards group. 

The discount can be assigned to the group in Catalog > Products > Product Groups > Edit > Discounts tab. 

mceclip9.png

mceclip10.png

 
mceclip11.png
  • This business card is assigned to the Business Cards group, which has a 25% discount. The new price is reflected on the product landing page.


Assigned to order sub-total including shipping

Assigning this discount type results in affecting both the order sub-total and the cost of delivery. Shown below, the shipping/delivery method First Class originally cost £10.00, in addition to the product cost of £100.00 (totalling £110.00 altogether).

You can see below, the sub-total and the shipping both get a 25% discount. 

Something to bear in mind, is that the tax will be calculated from the ORIGINAL sub total, and then added to the final total amount.

mceclip12.png


Requirements

In addition to the discount types, the instances of when a discount can be further applied is controlled through specific requirements. You can set multiple requirements per discount. 

The requirements may be affected by the discount type that is also in use at that time (for instance, the discount type of: 'Assigned to Delivery', Requirement: 'Customer had spent x.xx amount' will produce subtly different results - should the requirement remain the same, though the discount type be of: 'Assigned to Order Total').


mceclip0.pngBilling country is

This discount option will only apply when the user checking out selects one of the valid configured countries. You may set multiple countries to this requirement. 


Customer had previously purchased all of the product variants

If a user had already purchased all of the product variants you assign, then the discount will apply to the next order.

Inserting the IDs of specific product variants will therefore apply the discount to only these products.

Simply insert the product variant ID's, which can be located on the Product details page or the product URL. Multiple ID's will be separated by a comma.

mceclip5.png

mceclip3.png

mceclip4.png

mceclip6.png


Customer has previously purchased one of these product variants

Similar to the above requirement, this discount will only be applicable should a client have purchased a specific product variant (again IDs will be entered into the 'restricted product variants' field).


mceclip7.png


Customer had spent x.xx amount

As implied in the name of this requirement, this discount will only be applied should a user's basket total a specific amount (for example in the screen capture above, the user's had spent £110.00 - significantly more than the requirement of £25 requirement and therefore the discount was applied). It is worth to note that the discount type in this instance was 'Assigned to Order Total'.


mceclip8.png


 Customer has all of these product variants in the cart

As applied in the name of this requirement, this discount will be applied should the client have specific product requirements in their cart. This can be applied through entering the specific Product Variant IDs into the appropriate field and separated by a comma. If multiple ID's are present in the requirement, they must all be in the cart to obtain the discount. 


mceclip9.png

mceclip10.png


Customer has multiple line items of the same quantity discount. Only valid for direct product variant discounts! 

An example here would be the user wants to order 20 business cards. 10 Business Cards for a Supervisor, and 10 Business Cards for an Accountant. This would constitute multiple line items of the same product. The result would be both business cards are given a 25% discount. 


This discount can only be used with Assigned to Product Variants Directly. Please see the steps above on how to Assign to Product Variants Directly. 

Though it has been included in previous examples, in order for a customer to receive the discount automatically, no coupon code would be applied in this instance


Go to the Requirements tab to begin the setup. 


Minimum Number - this is the minimum qty needed to activate the discount

Maximum Number - this is the maximum qty that the discount will be applied

Requires the same quantity values - if enabled, the discount is only activated when all orderlines of the specific product variant are equal. 

Numbers are quantities - if enabled, the total number of order lines items is used, otherwise the total quantity is used. 


mceclip14.png

mceclip15.png


Customer has one of these product variants in the cart

Similar to the previous requirement stated above, this discount will only be applied should a specific ID be inserted into the Restricted Product Variants field.

mceclip16.png


Customer's basket value is x.xx

The discount, in regards to this requirement, will only be applied should the customer's basket value meet/equal a pre-set value.

Cart Value is maximum - when enabled, the discount will only apply if the Cart Value is lower than the set amount. For example, the amount is set to £200.00, but the cart is £100.00. 

mceclip17.png

mceclip18.png


When disabled, the discount will apply if the cart value is greater than, or equal, the configured amount. Example: The Cart Reference Value is £25.00, and the cart total is £100.00, the discount will apply. 


Discount is for Charity Donation or Not

This relatively new requirement will allow for the discounted percentage/amount to be donated to a charity of the storeowner's choice or alternatively be set so that the storeowner will receive the total funds possible from the order.

mceclip20.png


Must be assigned Customer Role

As this requirement suggests, the discount will be applied, should the user possess a specific customer role. In the below example, the customer role of 'registered' has been selected and will thus apply to all registered users. 

mceclip21.png


Shipping Country is

From this requirement, the discount (in this instance) will only be applied should the shipping country be consequently defined and set thus meeting the variable assigned in the drop-down menu - as shown in the screen capture below. Multiple shipping countries can be assigned

mceclip22.png


 Following the guidance and steps shown within this article, you will now be able to successfully create discounts on your storefront.


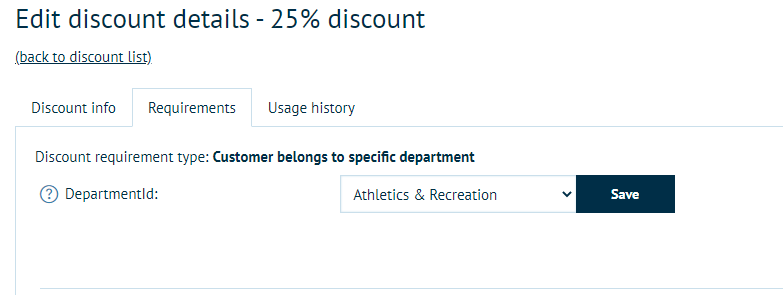
Customer Belongs to specific department

This discount will only apply to the user if they are within the department that you select.

mceclip23.png


Discount Code Generator


After receiving more and more requests of late to apply bulk discount codes to storefronts for customer we took it upon ourselves to create a discount code generator that will enable you to create large quantities of discount codes yourselves.


To start, you need to setup an initial discount code (Promotions > Discounts) with the relevant settings and requirements – this will be used as the blueprint for the bulk discount codes you are about to generate.

mceclip1.png


Once setup, click on the ‘Clone’ button in the top right-hand corner when editing your newly created discount blueprint. You should now see two options – Batch discount generator & Custom code uploader.


Batch Discount Generator


The first tab, Batch discount generator allows you to input the number of discount codes you need the system to create for you, apply a prefix and set the total length of each code. Once all these settings have been configured click ‘Generate Discount Codes’ and the system will randomly create the number of codes you have specified, using the criteria you have entered and the requirements and settings from the blueprint discount code.

mceclip2.png


Custom Code Uploader


The second tab is, as the name suggests, a place for you to input your already generated voucher codes. This is useful if you use a third party to create your codes for you. Simply paste them into the text box and click ‘Create Uploaded Discount Codes’ and the system will do the rest.

mceclip3.png


If you have anymore questions about this, please feel free to open a support ticket.

Discount Requirement on Basket Total


This is a completely new discount type. It is one that allows you to apply a discount to a basket total when the user has over a specified amount.


For example,
If shopping basket total is over £200 apply discount 1
This only works on the subtotal (not including delivery or tax)


Setup

Contact us about installing the plugin on your platform. Once installed you are free to setup the discount. Navigate to Promotions > Discounts and create a new discount. Give it a relevant name, set the type to ‘Assigned to order subtotal’, configure the discount amount, start end date etc. as you wish then click ‘Save and Continue Edit’.


Setting up the discount

In the admin page, navigate to Promotions > Discounts.

Click 'Add new' (top right)

Give the Discount a name that is relevant (maybe include the product you are applying it to for your own reference)

From the drop down choose your discount type.

Choose whether you want to discount a static cost or a percentage of the price.

mceclip0.png

Click 'Save and Continue Edit', then navigate to the Requirements tab and set the requirement type to ‘Customer’s basket value is x.xx’ and then lastly set the basket total threshold (this is the amount that will trigger the discount should their basket total go over that figure)


Save the requirementsmceclip1.png

Can I delete discount codes?


 You can, but you can also simply add a end date in the "valid to" field and it will no longer work for end users. 


If I delete a discount code, will it still shows in my Insights Sales Order report?


As it stands, if you delete a discount code then it will no longer be shown in your order report. 


Incomplete

Can’t find what you need?

Ask our Infigo Support Team for help..

🔎
Loading…
    Select a Problem Solver